Classes and attributes
Assign class or attribute
Bounding Box, Polygon, Polyline, and Point
You can assign a class/attribute to an object in 3 ways:
Method 1
- Right-click on a Bounding Box, Polygon, Polyline, or Point.
- Choose a class/attribute from the drop-down list.
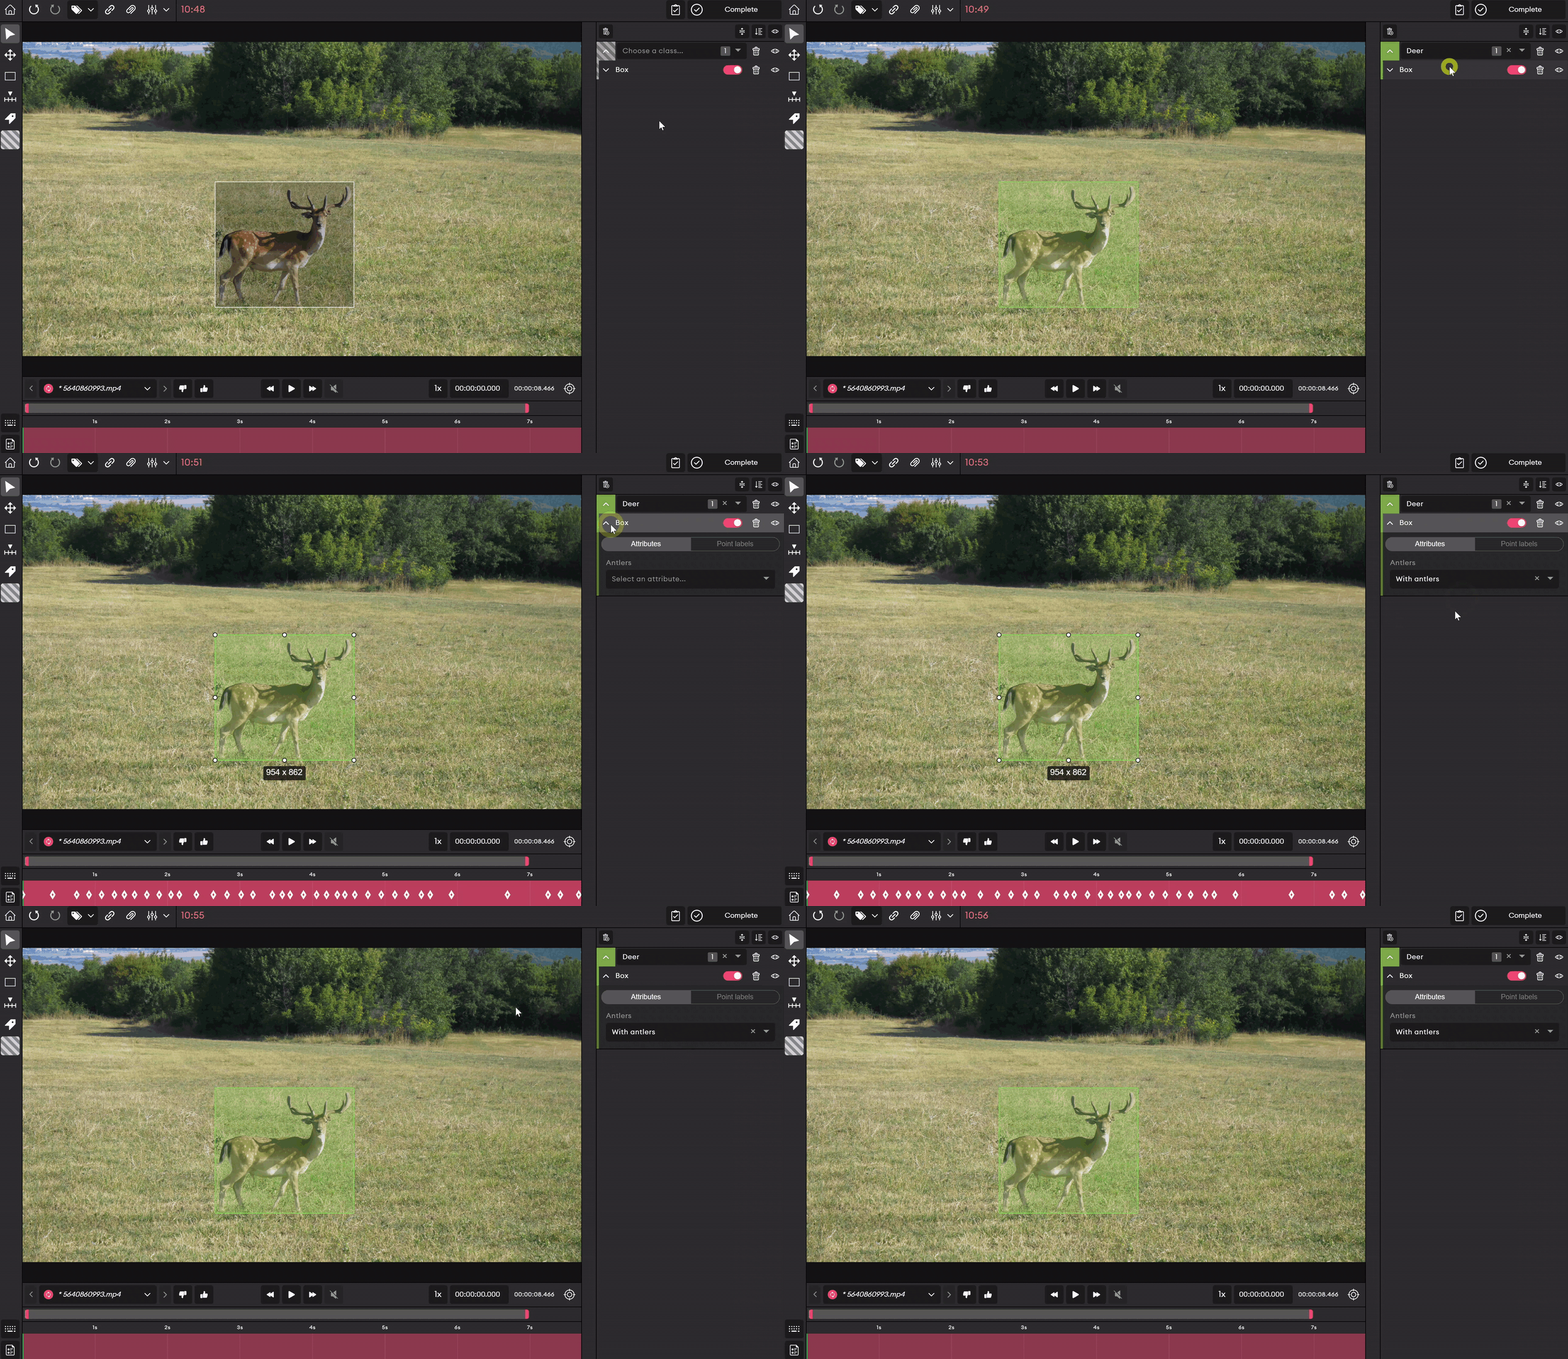
Method 2
- Select a Bounding Box, Polygon, Polyline, or Point.
- Choose a class/attribute from the drop-down list in the right panel.
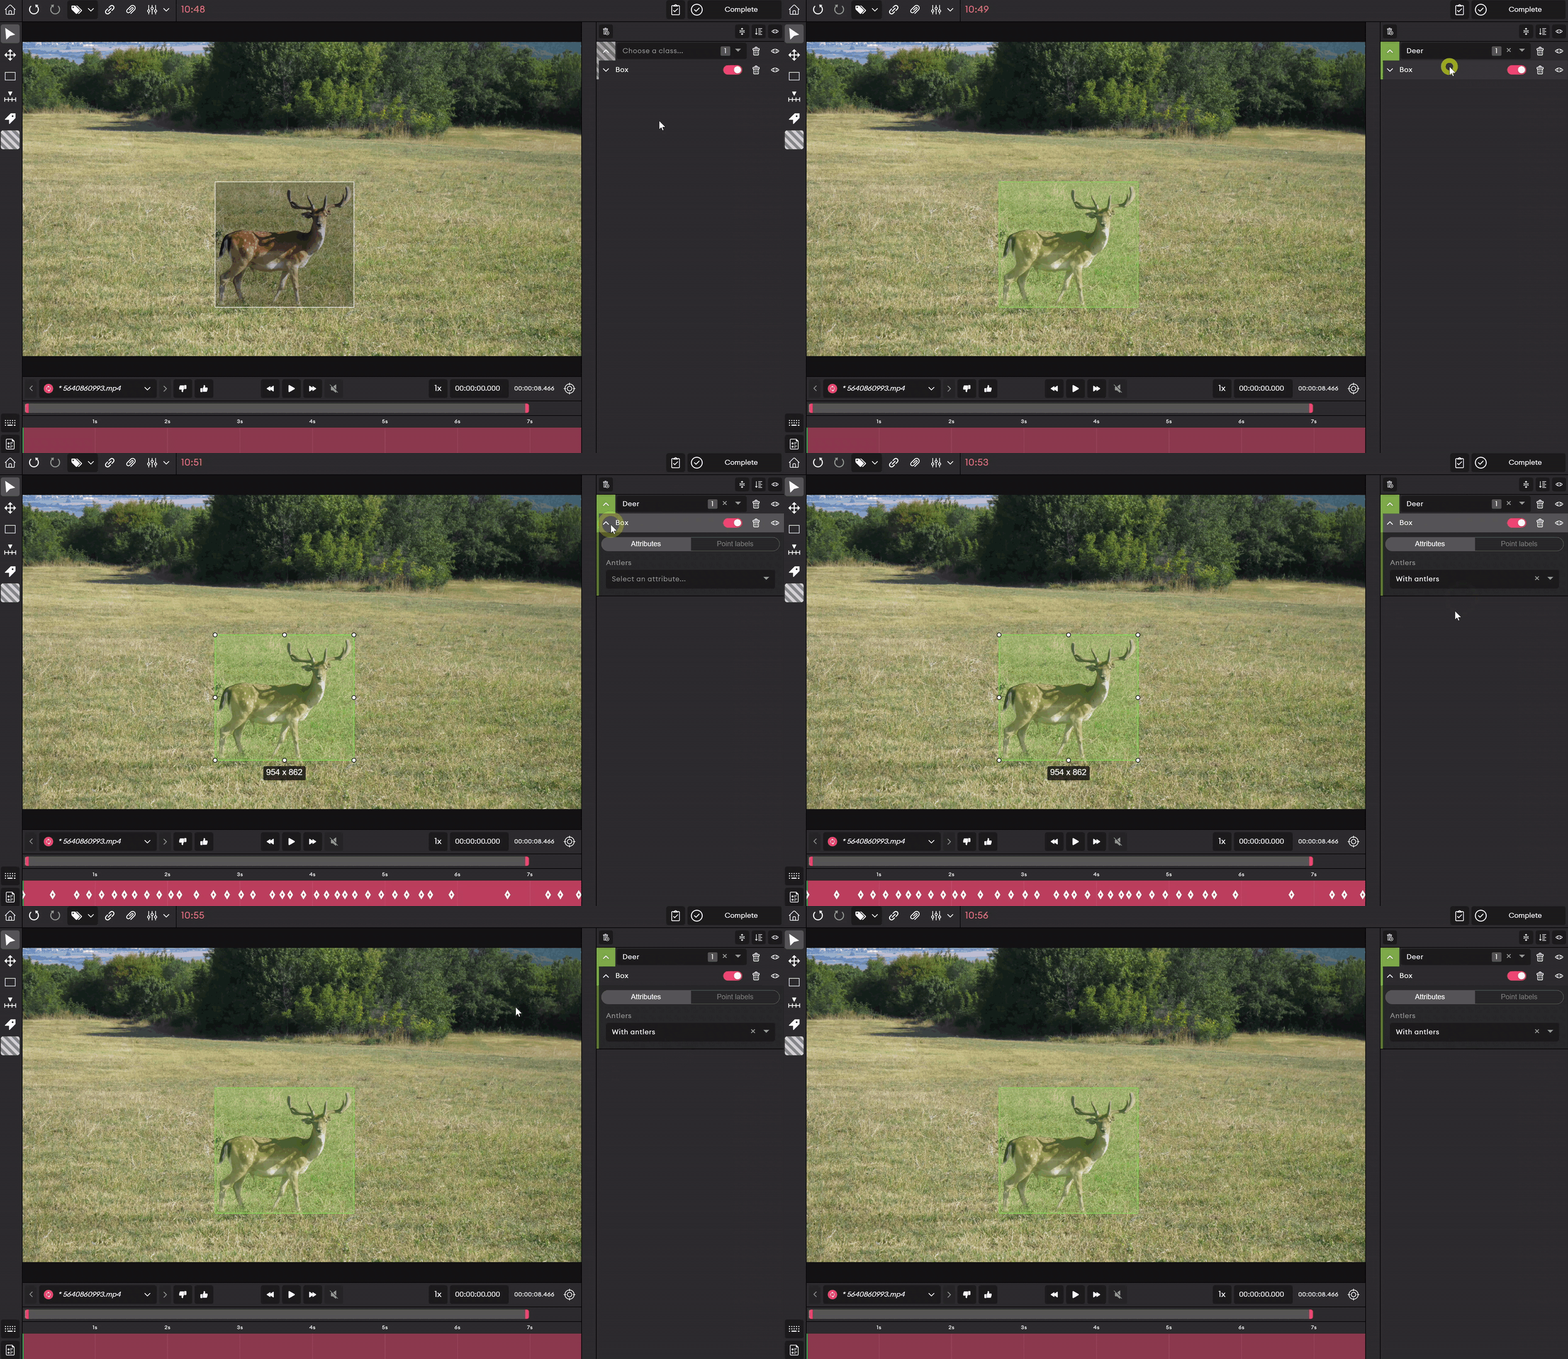
When you add an attribute to a Bounding Box, Polygon, Polyline, or Point, it’s applied to it from the timeframe you added it till the end of the video/audio.
To limit an attribute to a certain timeframe:
- On the timeline, right-click where you want the attribute to end.
- Delete the attribute.
Method 3
You can assign a class to a Bounding Box, Polygon, Polyline, or Point before annotating it.
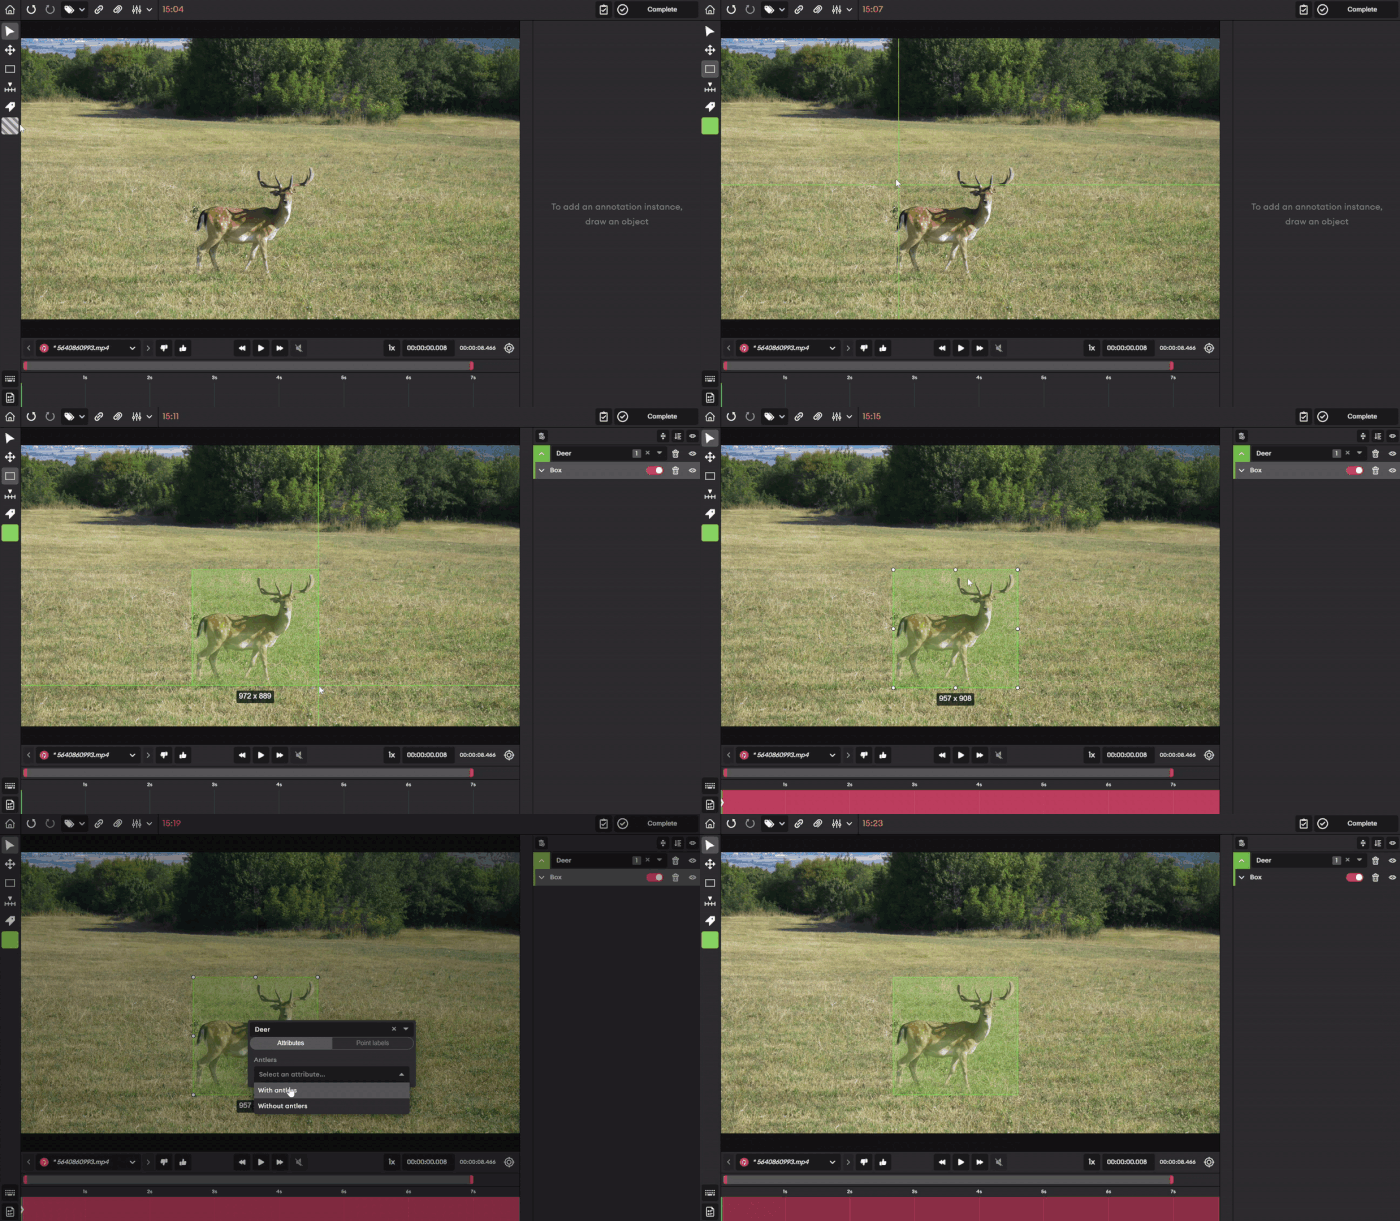
- In the left panel, select the class selection tool.
- Choose a class.
- Select the Bounding Box, Polygon, Polyline, or Point tool in the left panel.
- Annotate the object.
The same Bounding Box, Polygon, Polyline, or Point can have multiple attributes.
To assign multiple attributes to the same Bounding Box, Polygon, Polyline, or Point:
- Assign an attribute to a Bounding Box, Polygon, Polyline, or Point.
- Pause the video/audio where you want to add a new attribute.
- Add a new attribute. The new attribute will be interpolated till the end of the video/audio.
- Pause the video/audio where you want the new attribute to end. You can choose to add a new attribute or turn off the interpolation toggle.
A white icon appears on the timeline whenever you add a new attribute to a Bounding Box, Polygon, Polyline, or Point. The icon is located at the point in time where you added the attribute.
Select default class
To select a default class, press the number that corresponds to the class you want to set as default on your keyboard.
Event
You can assign a class/attribute to an Event in 2 ways:
Method 1
In the timeline, right-click on an event and choose a class/attribute.
When you add an attribute to an Event, it’s applied to the entire Event.
To limit an attribute to a certain timeframe in an Event:
- On the timeline, right-click where you want the Event's attribute to end.
- Remove the attribute.
A white icon appears on the timeline whenever you add a new attribute to an Event or remove an attribute. The icon is located at the point in time where you added or removed the attribute.
Method 2
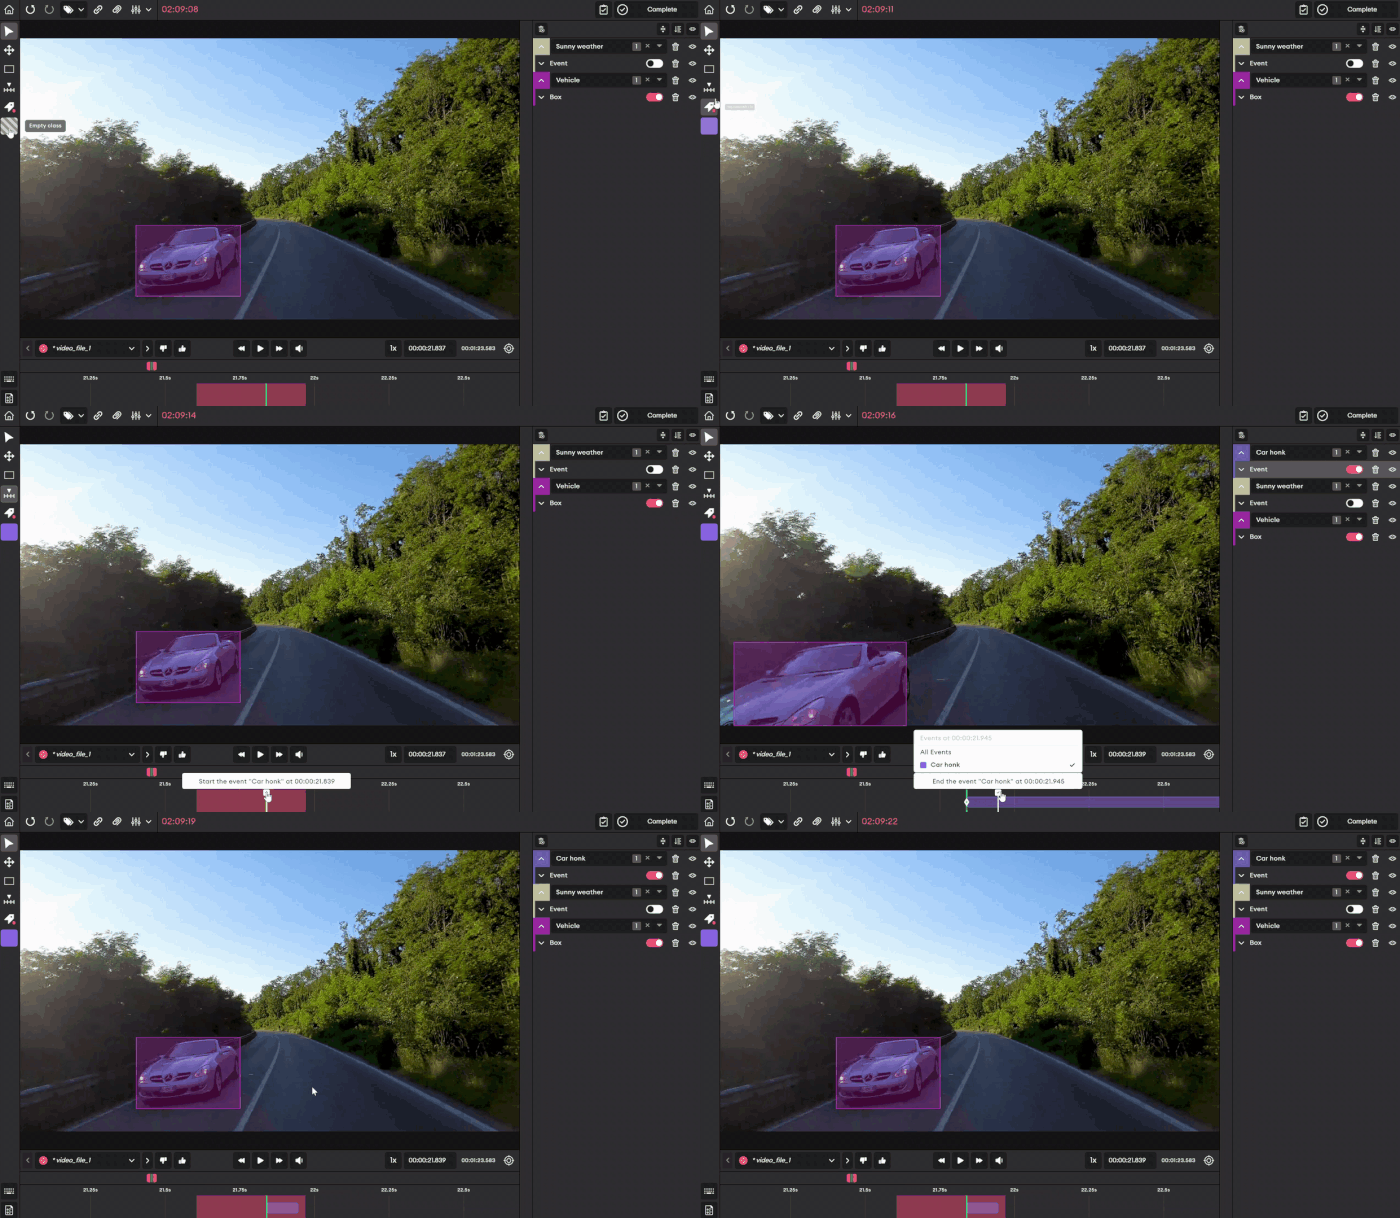
You can assign a class to an Event before annotating it. Follow these steps:
- In the left panel, click the class selection tool.
- Choose a class from the drop-down list.
- In the left panel, click Event or press E on the keyboard.
- Hover over the timeline and place the cursor where you want the Event to start.
- Click on the + button. The Event will be interpolated till the end of the video/audio.
- Hover over the timeline and place the cursor where you want the Event to end.
- Click the checkmark button.
OR
On the timeline, click where you want the Event to end. Next, turn off the interpolation toggle that corresponds to the Event in the right panel.
OR
Pause the video/audio where you want the Event to end and press the Backspace or Delete key on the keyboard.
Assign multiple attributes to the same Event
An Event can have different attributes.
To assign multiple attributes to the same Event:
- On the Event in the timeline, right-click where you want to change the attribute.
- Choose a different attribute from the drop-down list.
A white icon appears on the timeline whenever you add a new attribute to an Event. The icon is located at the point in time where you added the attribute.
Change class or attribute
Bounding Box
To change the class/attribute of a Bounding Box:
- Right-click on a Bounding Box.
- Choose a class/attribute from the drop-down list.
Event
To change the class/attribute of an Event:
- In the timeline, right-click on an Event.
- Choose a class/attribute from the drop-down list.
Attributes logic
Single selection attributes
Case 1
When you add an attribute and then add another one, the first attribute will stretch till the beginning of the second one. The second attribute will stretch till the next attribute change or till the end of the instance.
In this example, the instance’s attribute is Blue from second 6 till second 15, which is the beginning of the attribute Red.

Note that these are two segments of the same instance.
Case 2
When two attributes follow each other and you delete the second one, the first one will stretch till the end of the second attribute.
In this example, the attribute Red stretches till second 30. When removed, Blue stretches till second 30.
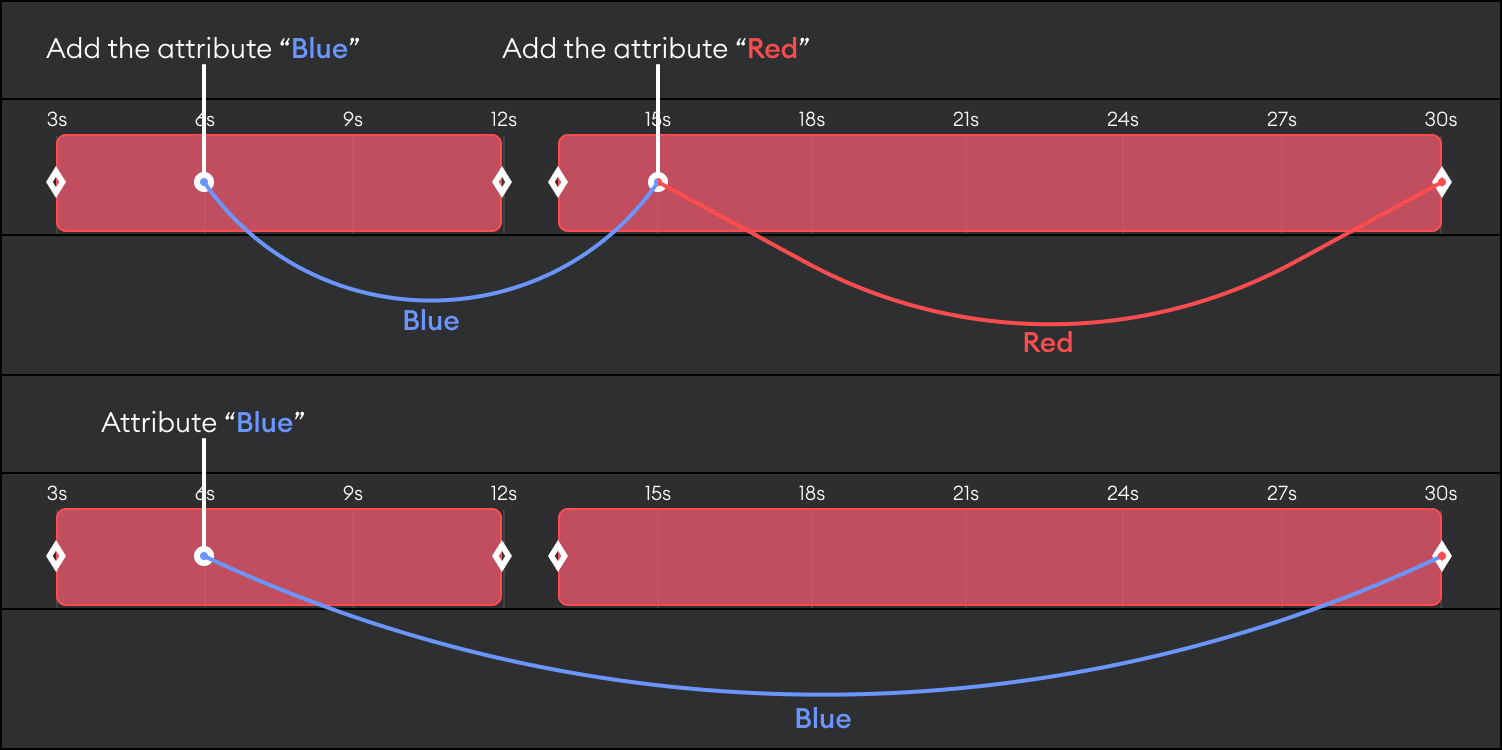
Note that these are segments of the same instance.
Multiple selection attributes
When you add an attribute then add another one, both stretch till the end of the instance. Since selecting multiple attributes is possible in this case, both attributes will overlap.
In this example, the attributes Blue and Red overlap from second 18 till second 30.

Note that these are two segments of the same instance.
Change class in bulk
To change the class of a group of instances that have the same class:
- In the left panel, select the drop-down list.
- Choose a class.
Updated about 2 months ago