
Databricks integration
You can use your Databricks integration to upload items into your Multimodal projects by using SQL queries. Please make sure that the Databricks SQL Connector is set up according to the following documentation.
Step 1: Begin integration setup
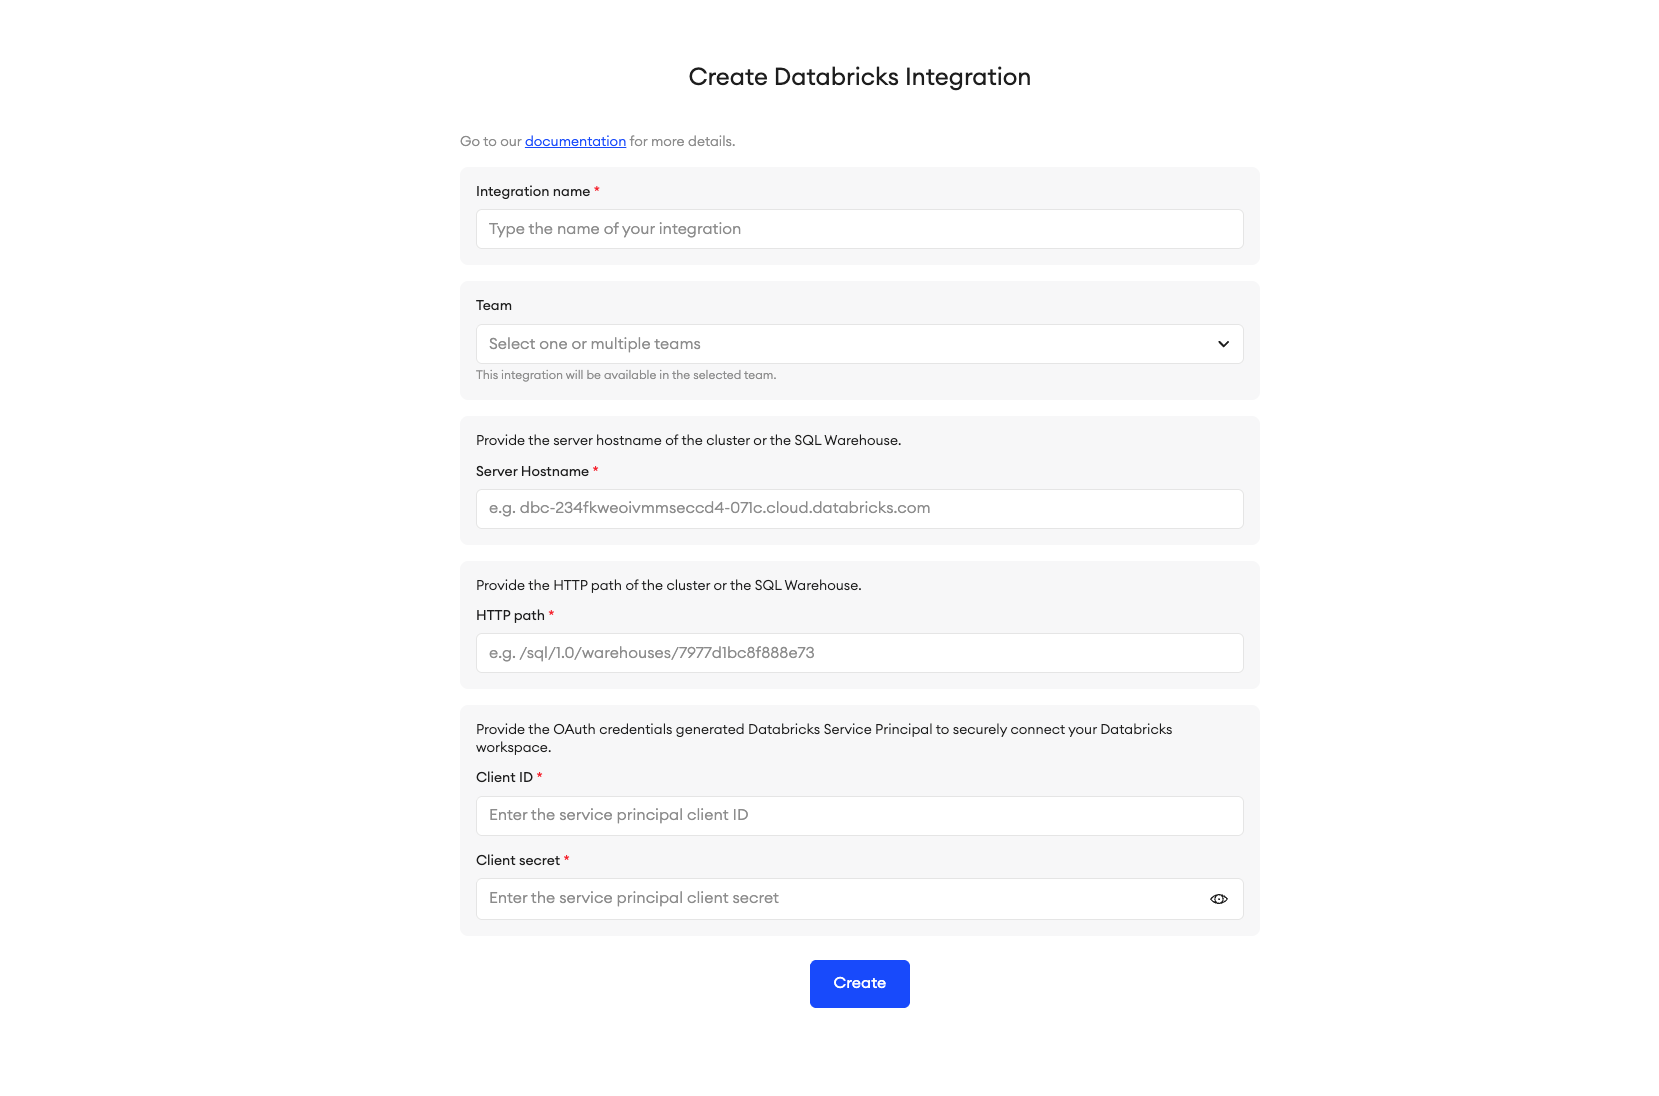
To set up the integration:
- Go to Integrations from your Organization tab or through Team Setup.
- Click + New Integration.
- Select Databricks.
- In the Integration name field, type in a unique name for your integration.
- Under Team, you can add the integration to one or multiple teams (optional). The integration will be available in the selected team(s) only.
It is also possible for Team Owners and Team Admins to set up an integration through the Team Setup tab.
Step 2: Server Hostname
-
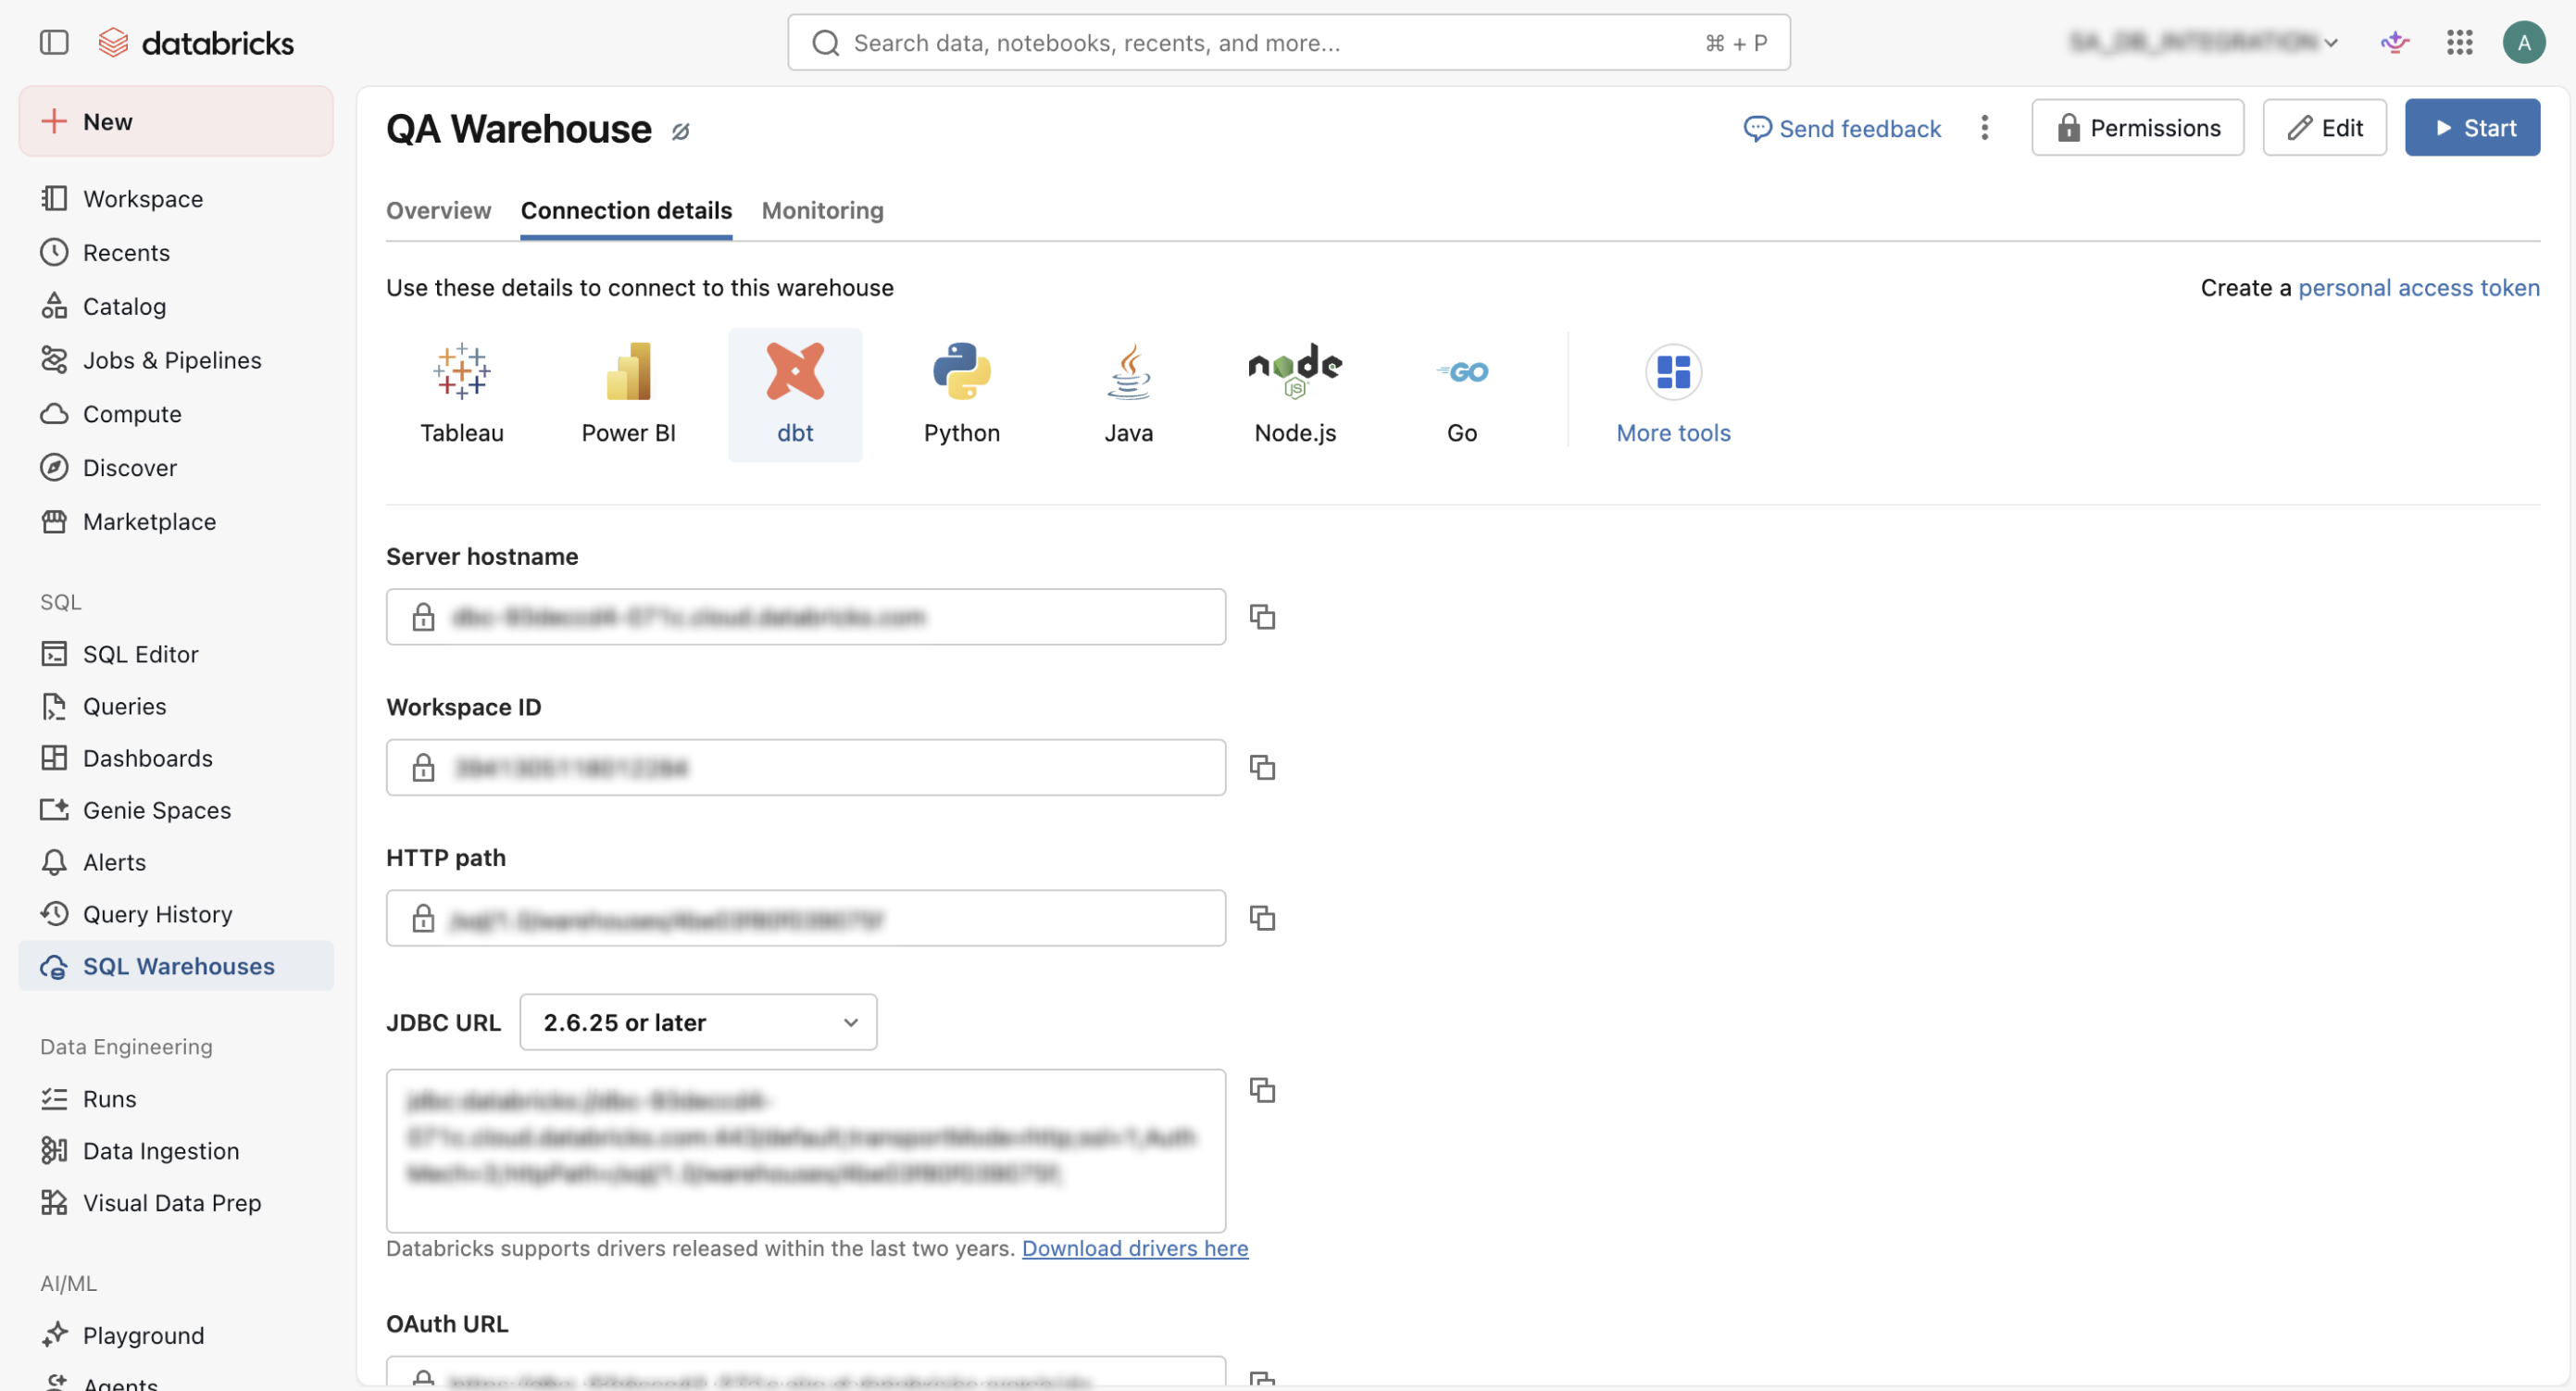
There are two values that you can choose from to enter into the Server Hostname field. Copy one of the values indicated in the locations below:
- From Databricks → SQL Warehouses →
<TARGET_WAREHOUSE>→ Connection details, copy the SQL Warehouse server hostname.
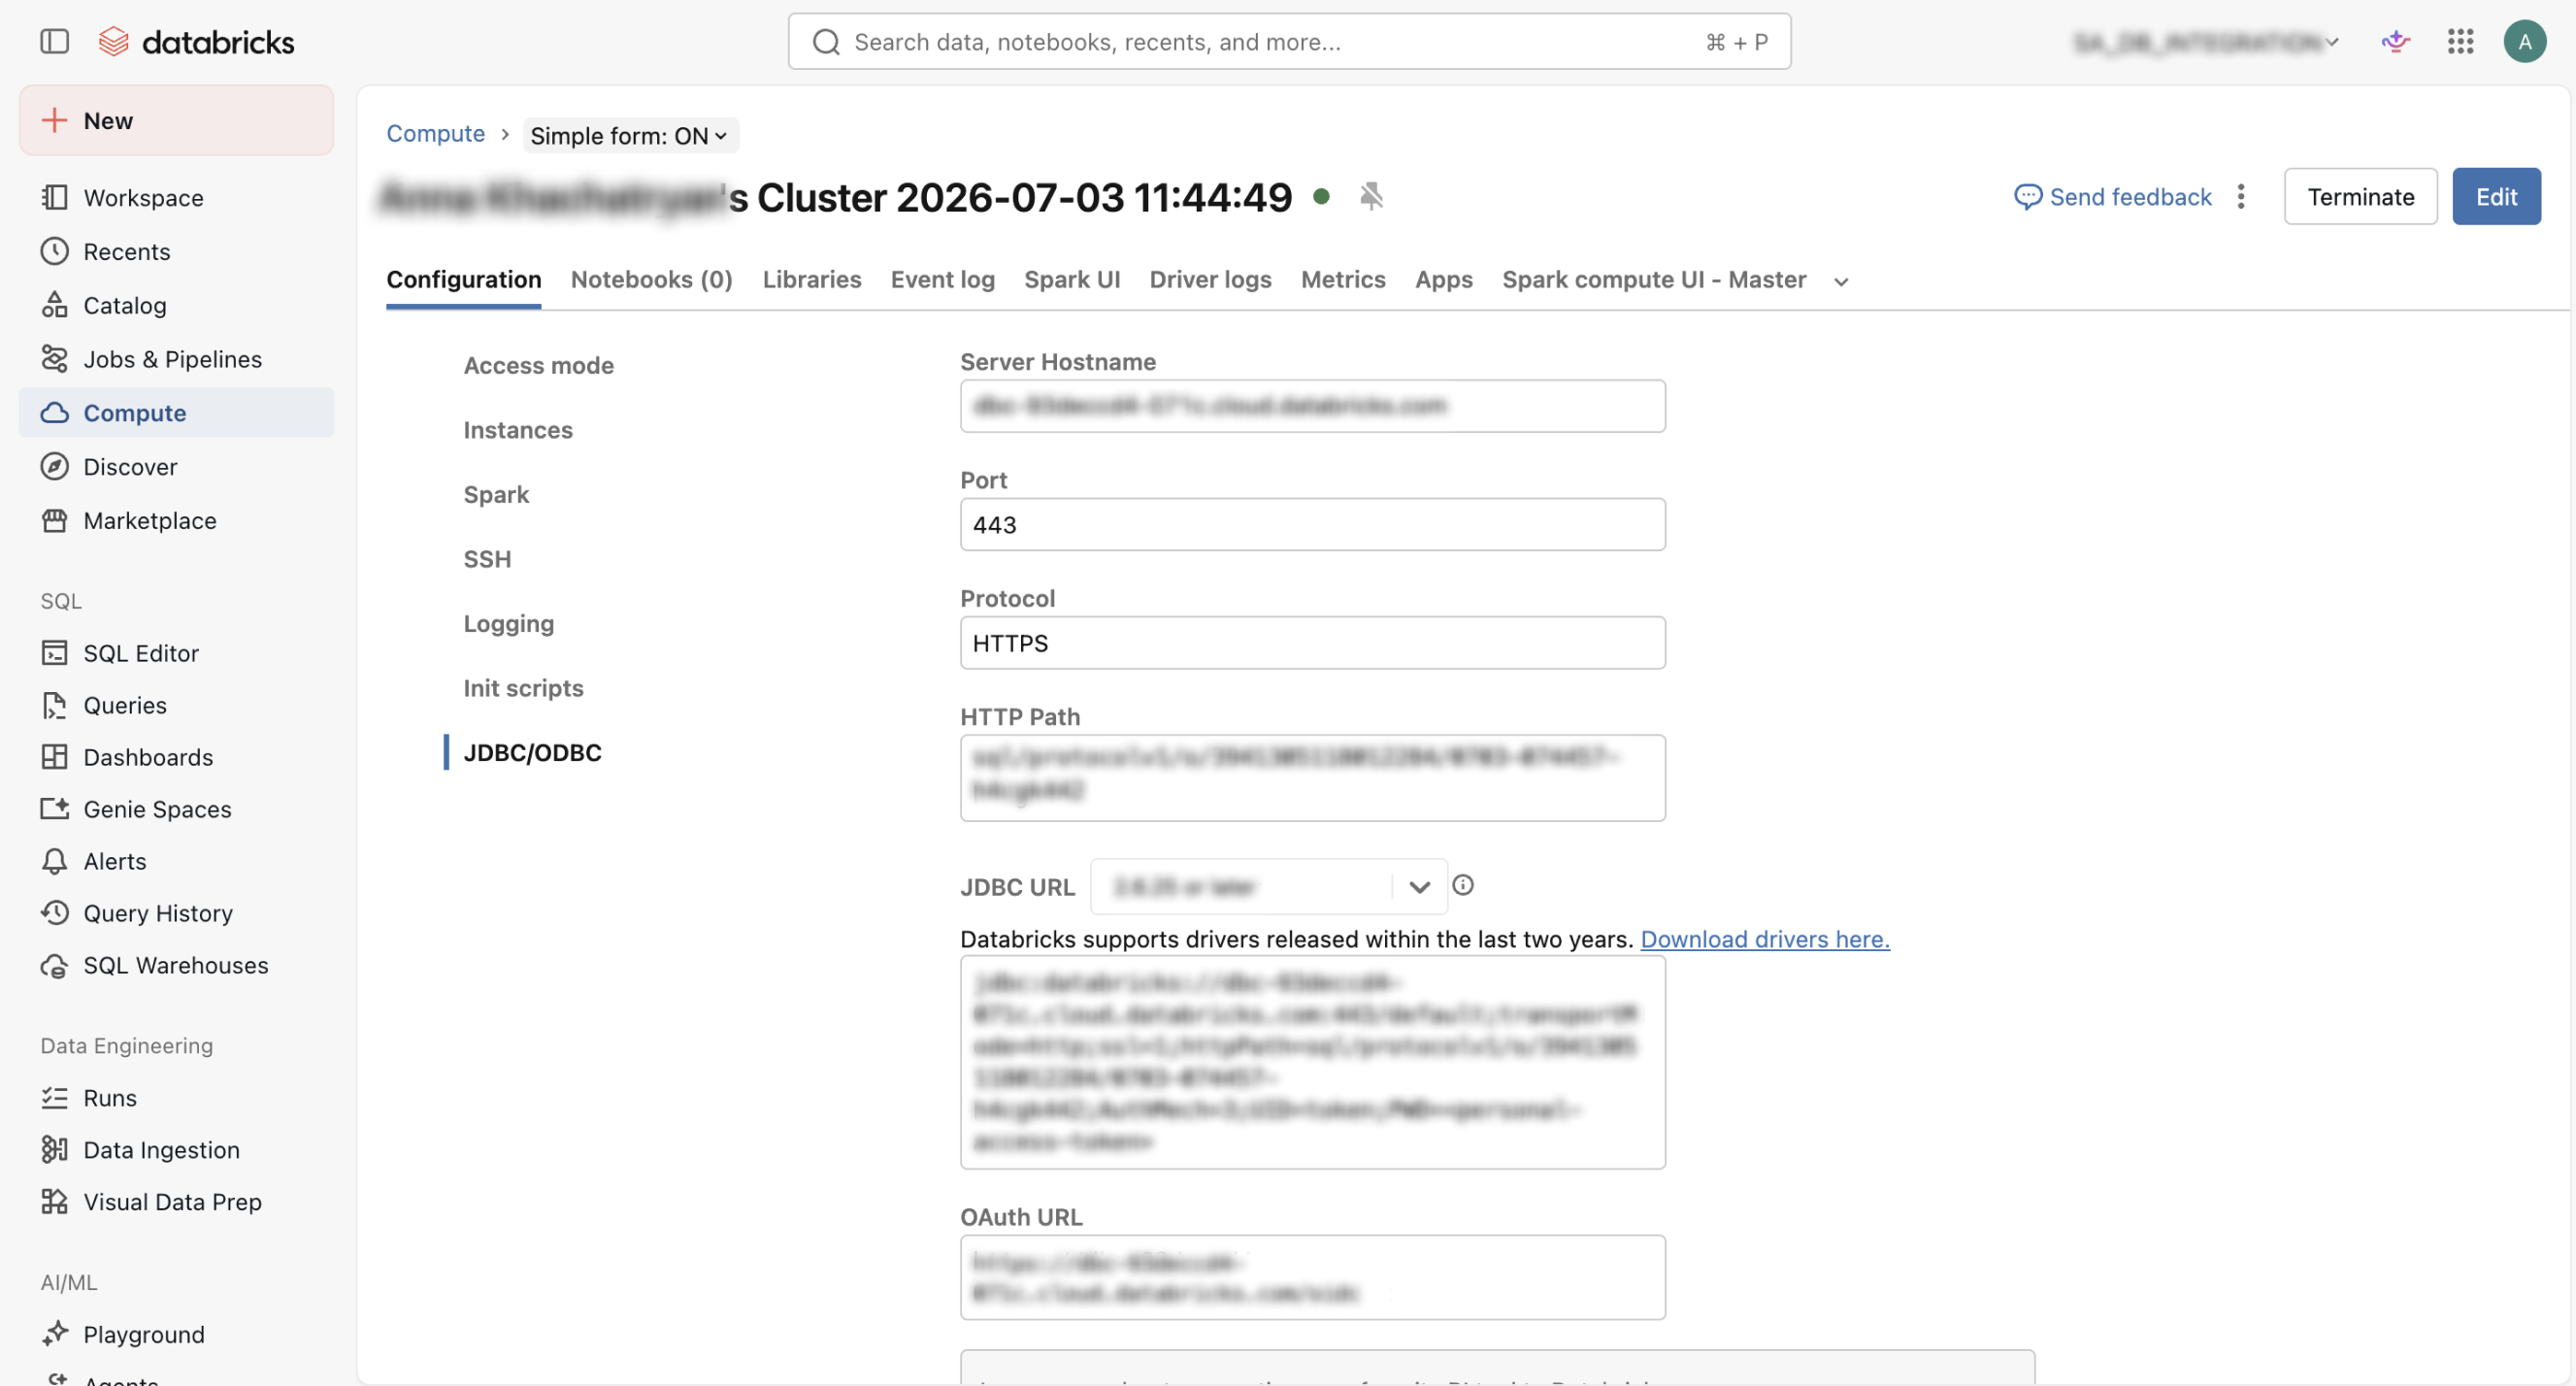
- From Databricks → Compute →
<TARGET_CLUSTER>→ Configuration → Advanced options → JDBC/ODBC, copy the cluster server hostname.
- From Databricks → SQL Warehouses →
-
After copying the required value, paste it into the Server Hostname field.
Step 3: HTTP path
- There are two values that you can choose from to enter into the HTTP path field: from your SQL warehouse, or your cluster server. The values can be found in the same locations as shown in Step 2: Server Hostname.
- After copying the required value, paste it into the HTTP path field.
Step 4: Generate OAuth credentials and finalize setup
In this step, you’ll need the OAuth access token from your Databricks workspace.
- In your Databricks workspace, click on your username in the top right corner.
- Select Settings.
- Go to the Identity and access tab.
- Next to Service principals, click Manage.
- Select the service principal.
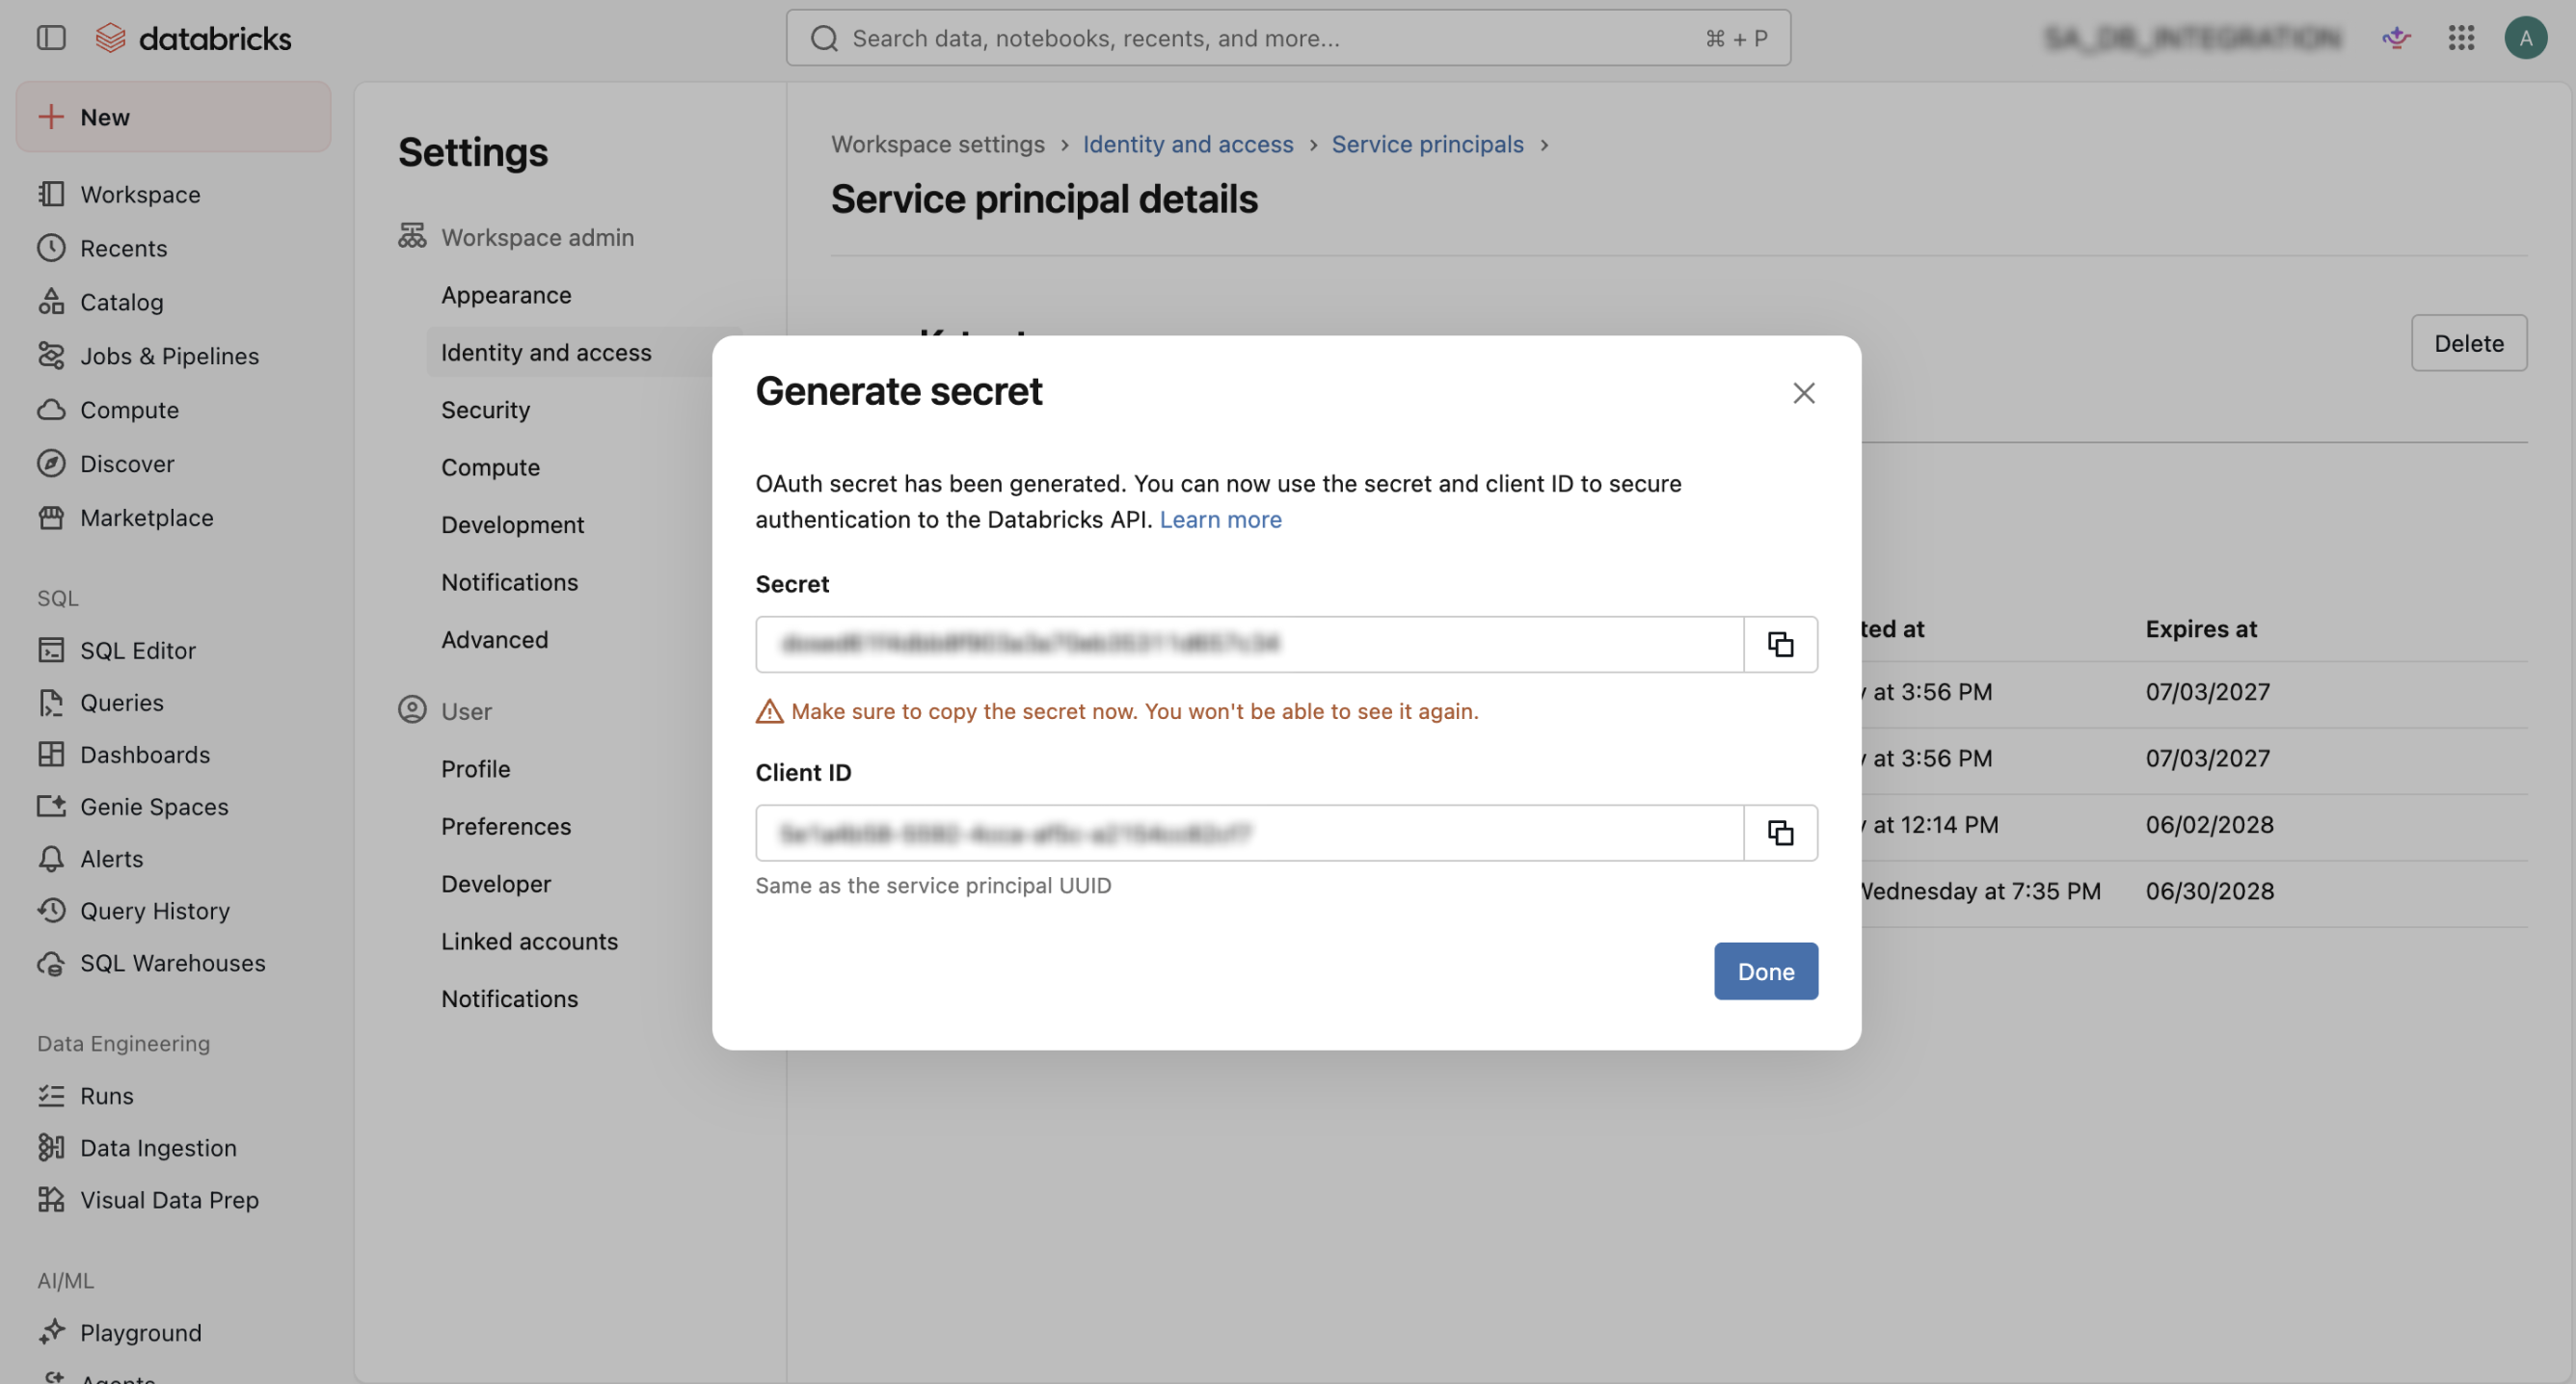
- Go to the Secrets tab.
- Click Generate secret, and set the secret’s lifetime.
- Click Generate.
- Copy the secret and save it somewhere safe, as you won’t be able to see it later. The client ID is the same as the service principal’s application ID.
- Next, go back to SuperAnnotate’s integration setup page.
- Paste the Client ID and Secret in their corresponding fields.
Step 5: Grant the service principal access to clusters or SQL warehouse
To enable the service principal to use clusters or SQL warehouses, you must give the service principal access to them.
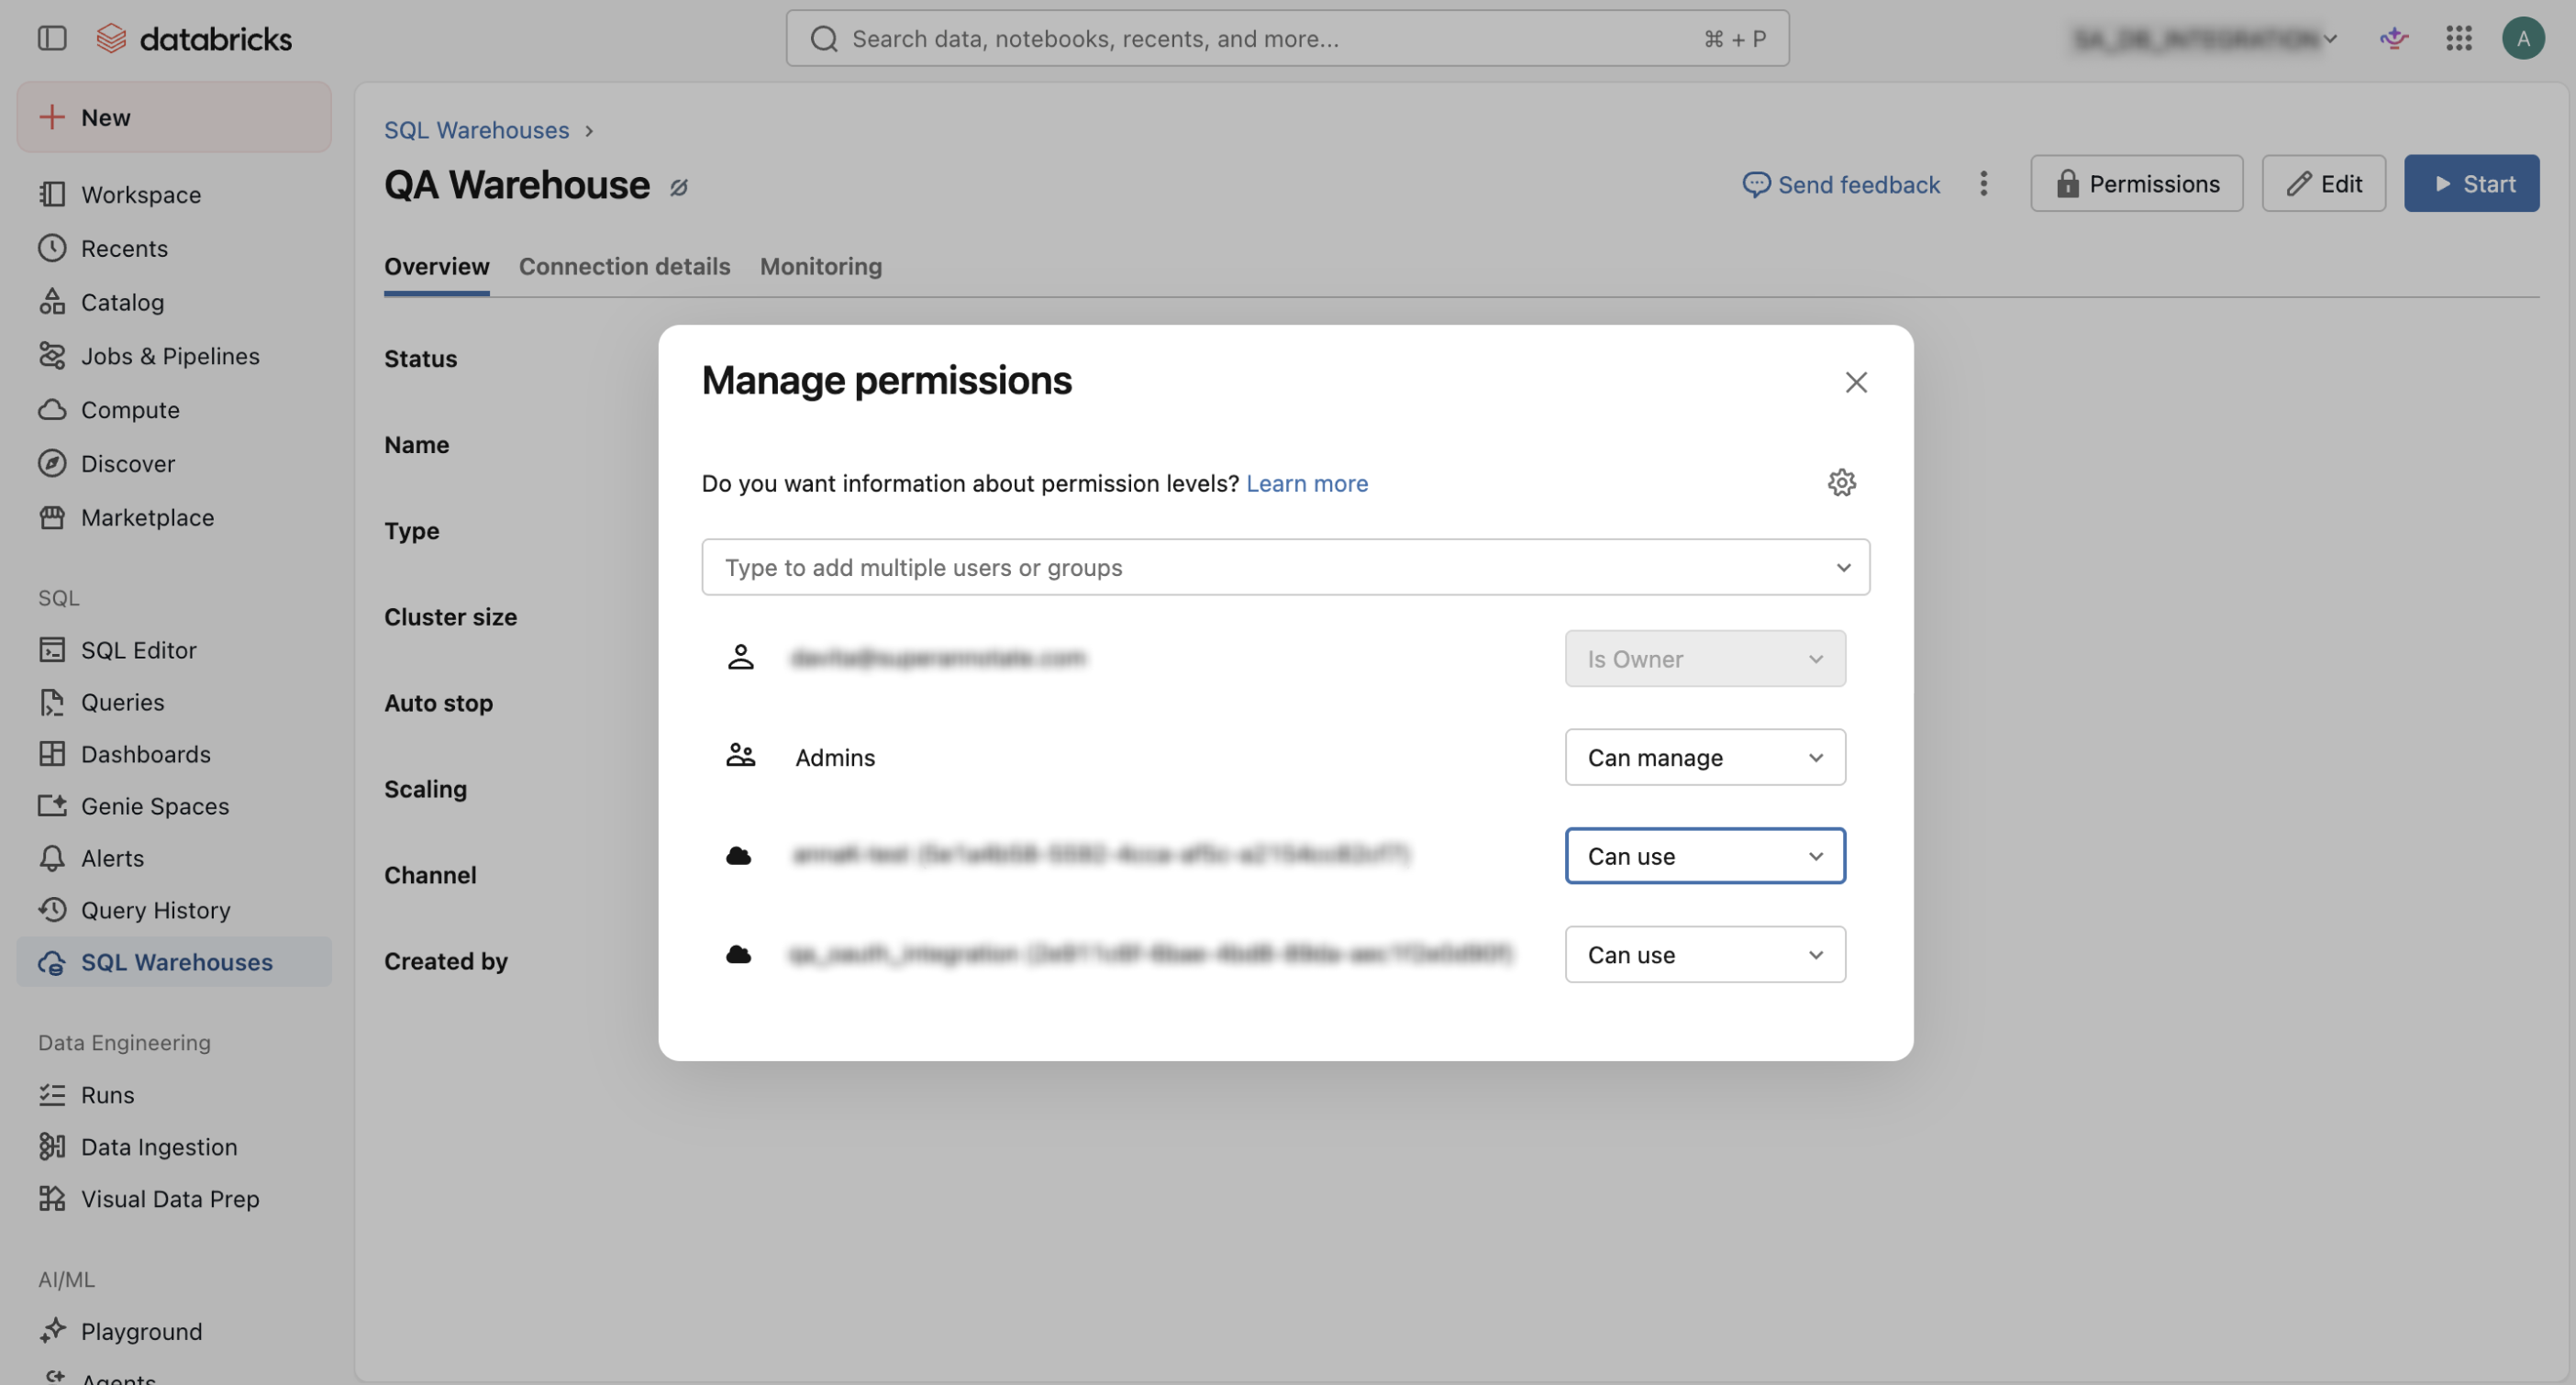
For SQL warehouse, follow this steps:
- In the Databricks workspace, go to SQL Warehouses.
- Open the warehouse used by SuperAnnotate or create one if needed.
- Open the warehouse’s Permissions.
- Find or add your service principal.
- Assign the service principal the
Can usepermission at minimum.
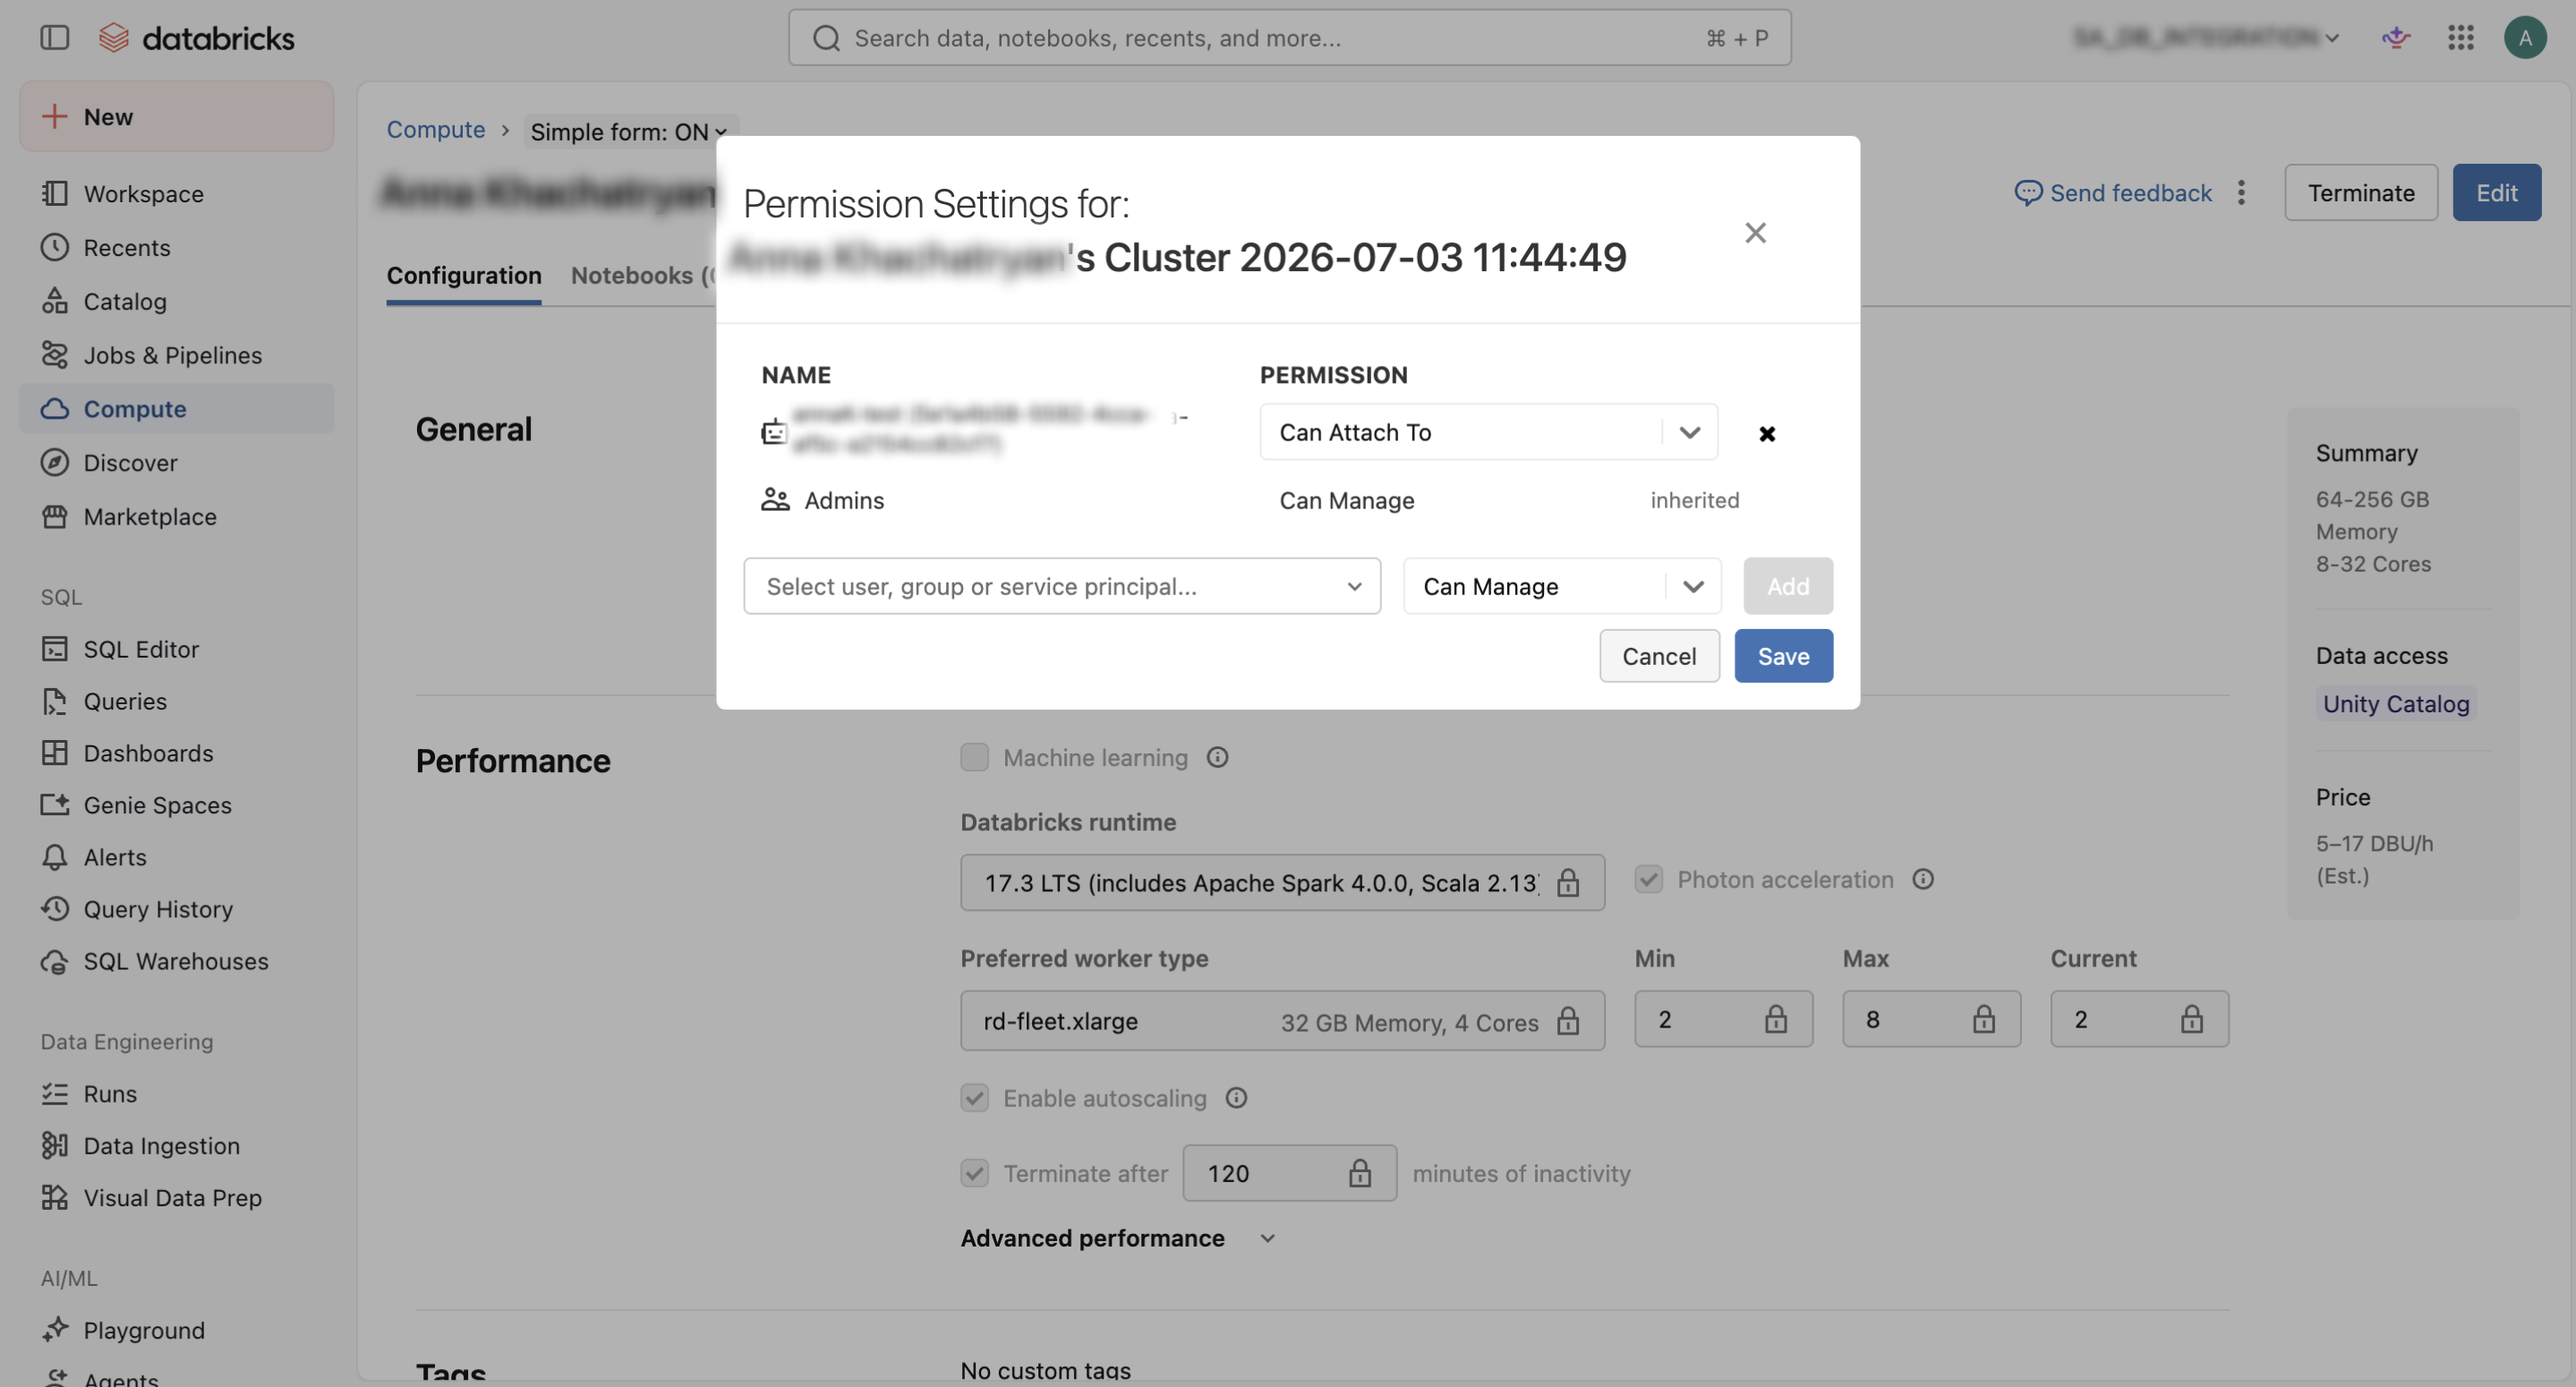
For Compute, follow this steps:
- In the Databricks workspace, go to Compute.
- Open the Compute used by SuperAnnotate or create one if needed.
- Open the Permissions.
- Find or add your service principal.
- Assign the service principal the corresponding permission that is the Compute equivalent of
Can useon SQL Warehouse.
Step 6: Grant the service principal access to data in Catalog
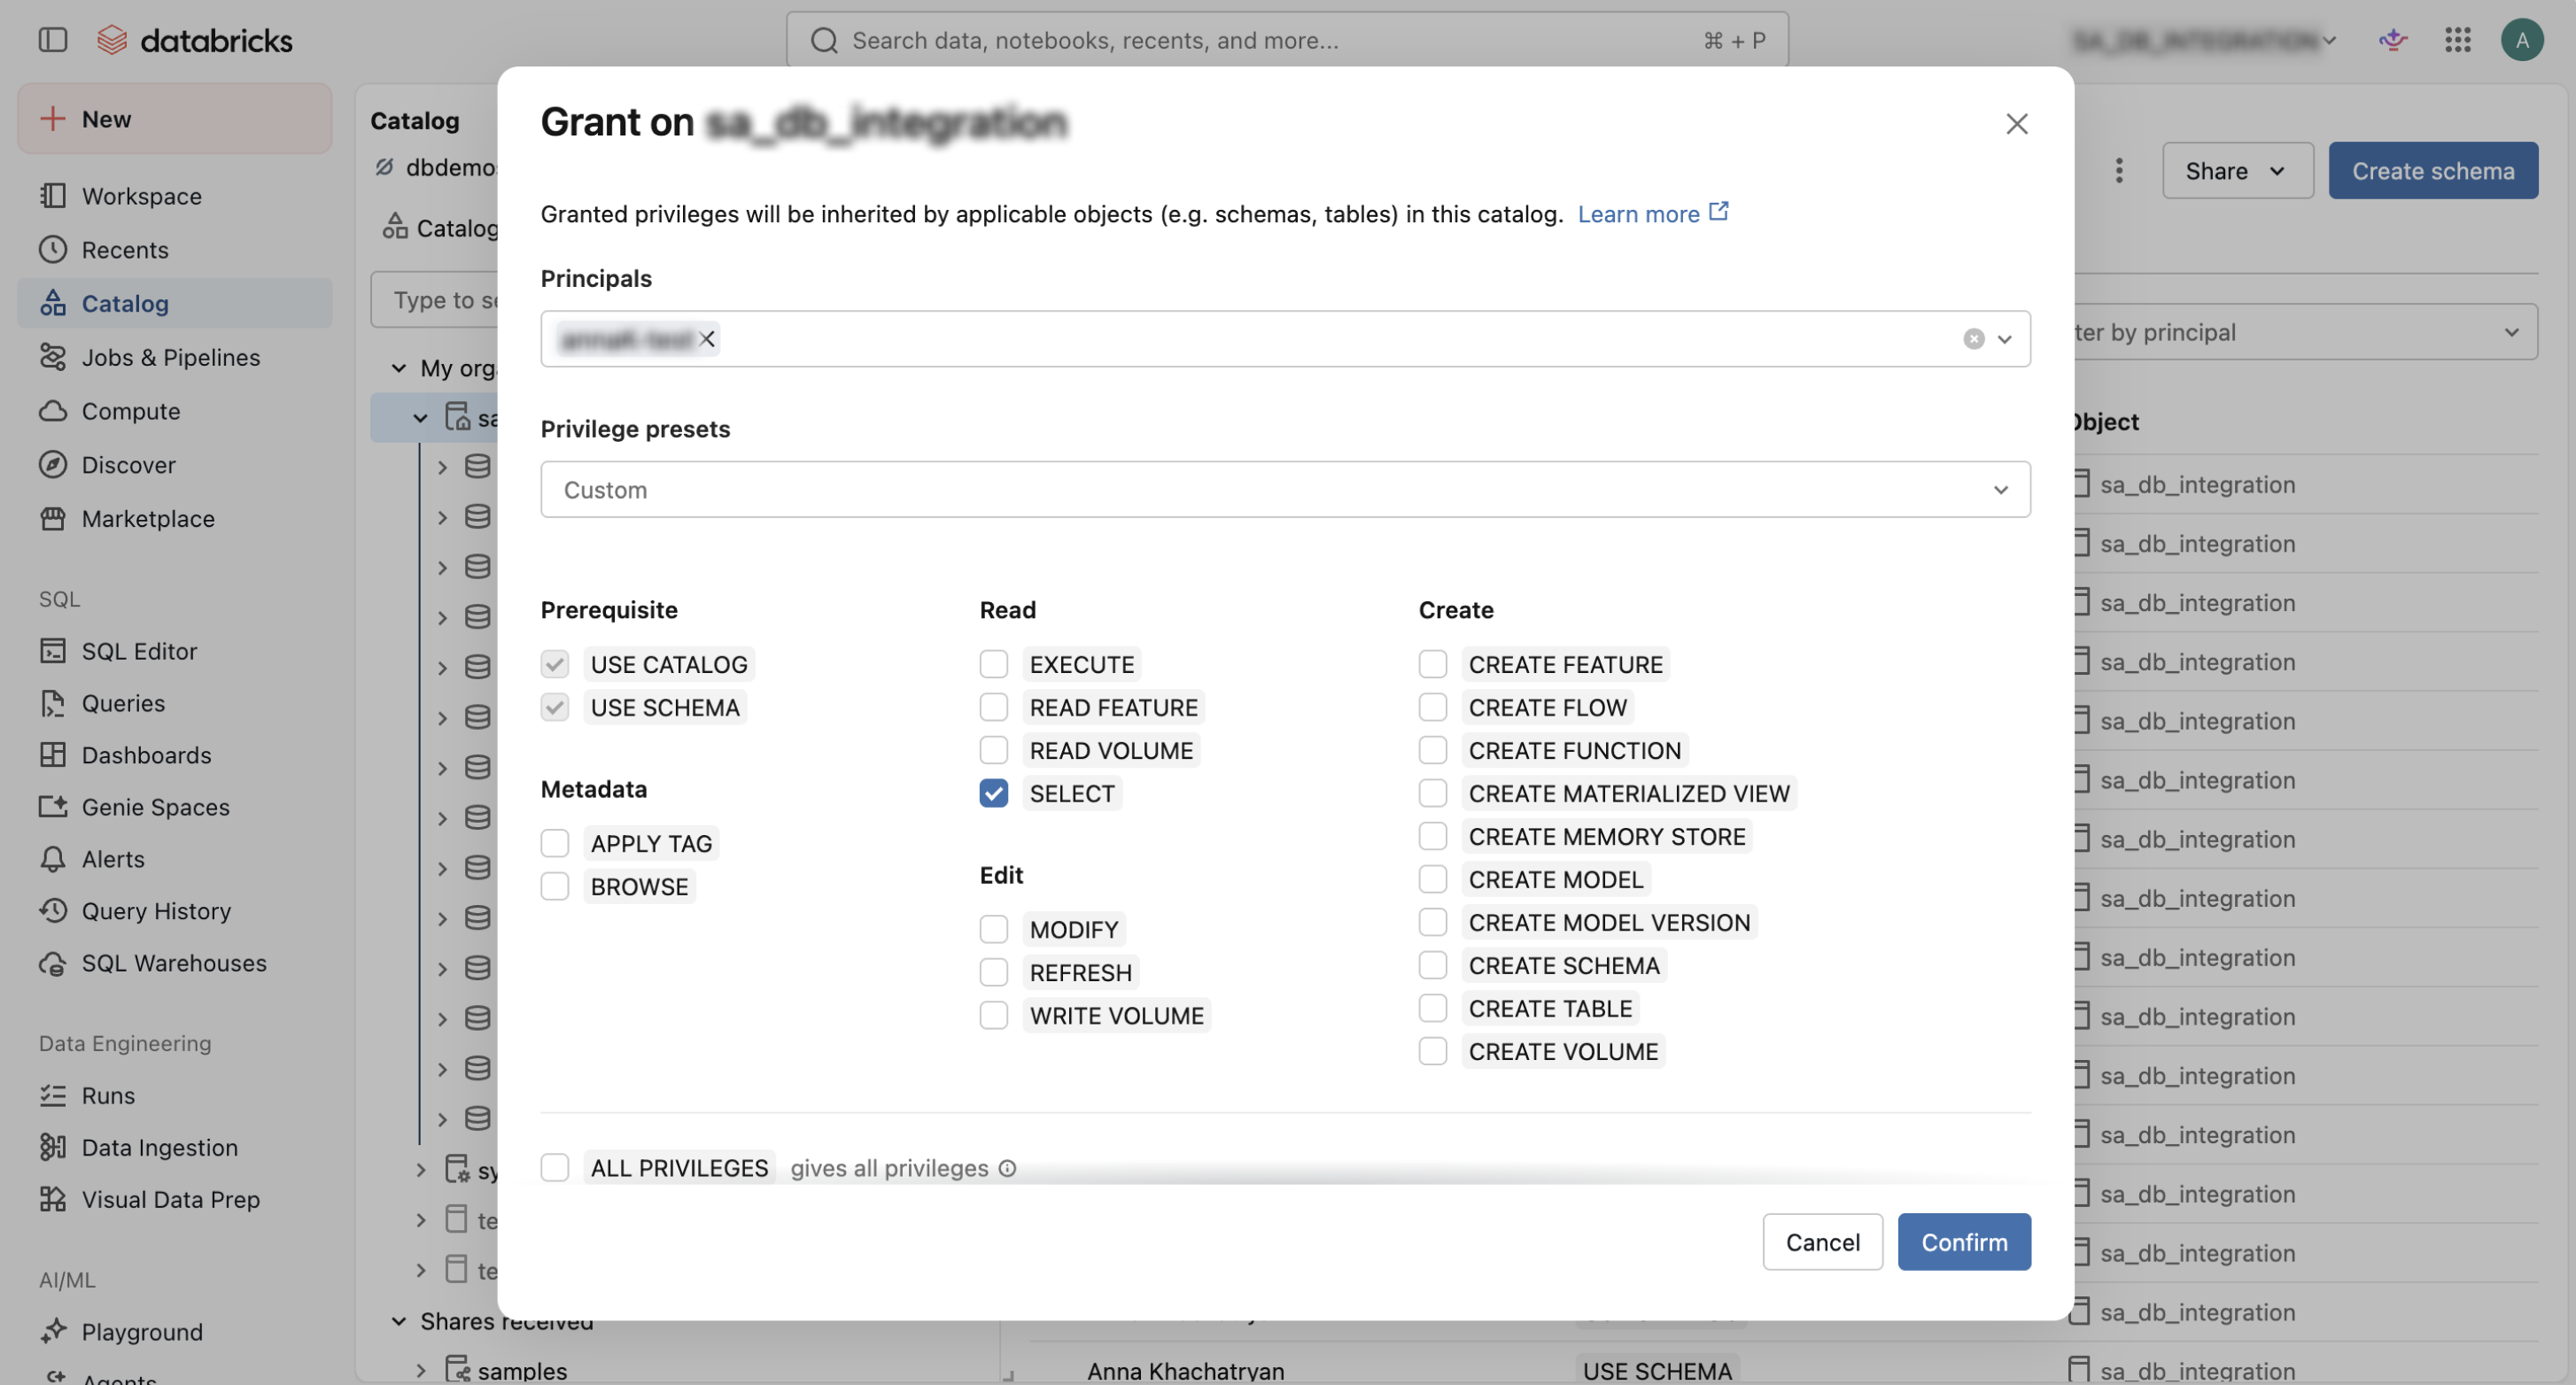
To enable SuperAnnotate a permission to read the data, you must give the service principal corresponding access in Catalog > Permissions.
- Open Catalog from the left sidebar.
- Select the catalog that contains the data SuperAnnotate should access.
- Open the Permissions tab.
- Search for and select the SuperAnnotate service principal.
- Grant at least the following permissions to allow the service principal to access the catalog:
USE CATALOG,USE SCHEMA,SELECT. - Click Confirm.
- When you’ve completed all the steps, go back to SuperAnnotate’s integration setup page and click Create.
Please note that your integration won’t work if the service principal secret expires. The data you've uploaded from the integration will still be accessible in the project.
Validate Integration
To validate your Databricks integration:
- In Integrations, find your integration.
- Click the three dots
⋮. - Select Check connection.
Edit team
If you need to make your integration available for more teams, or you want to revoke a team's access to it, you may edit the permissions accordingly.
To add or remove an integration to one or multiple teams:
- In Integrations, find your integration.
- Click the three dots
⋮. - Select Edit team.
- Add one or multiple teams from the dropdown, or remove a team by clicking the X on their name. To add all teams, choose Select all. To remove all teams, click the X on the right side of the field.
- Click Save.
If you remove a Databricks integration from the team, any data you’ve uploaded from it will remain accessible in your projects.
Delete integration
To delete an integration:
- In Integrations, find your integration.
- Click the three dots
⋮. - Select Delete Integration.
- In the popup, click Delete.
If you delete a Databricks integration, any data you’ve uploaded from it will remain accessible in your projects.
Add items with Databricks integration
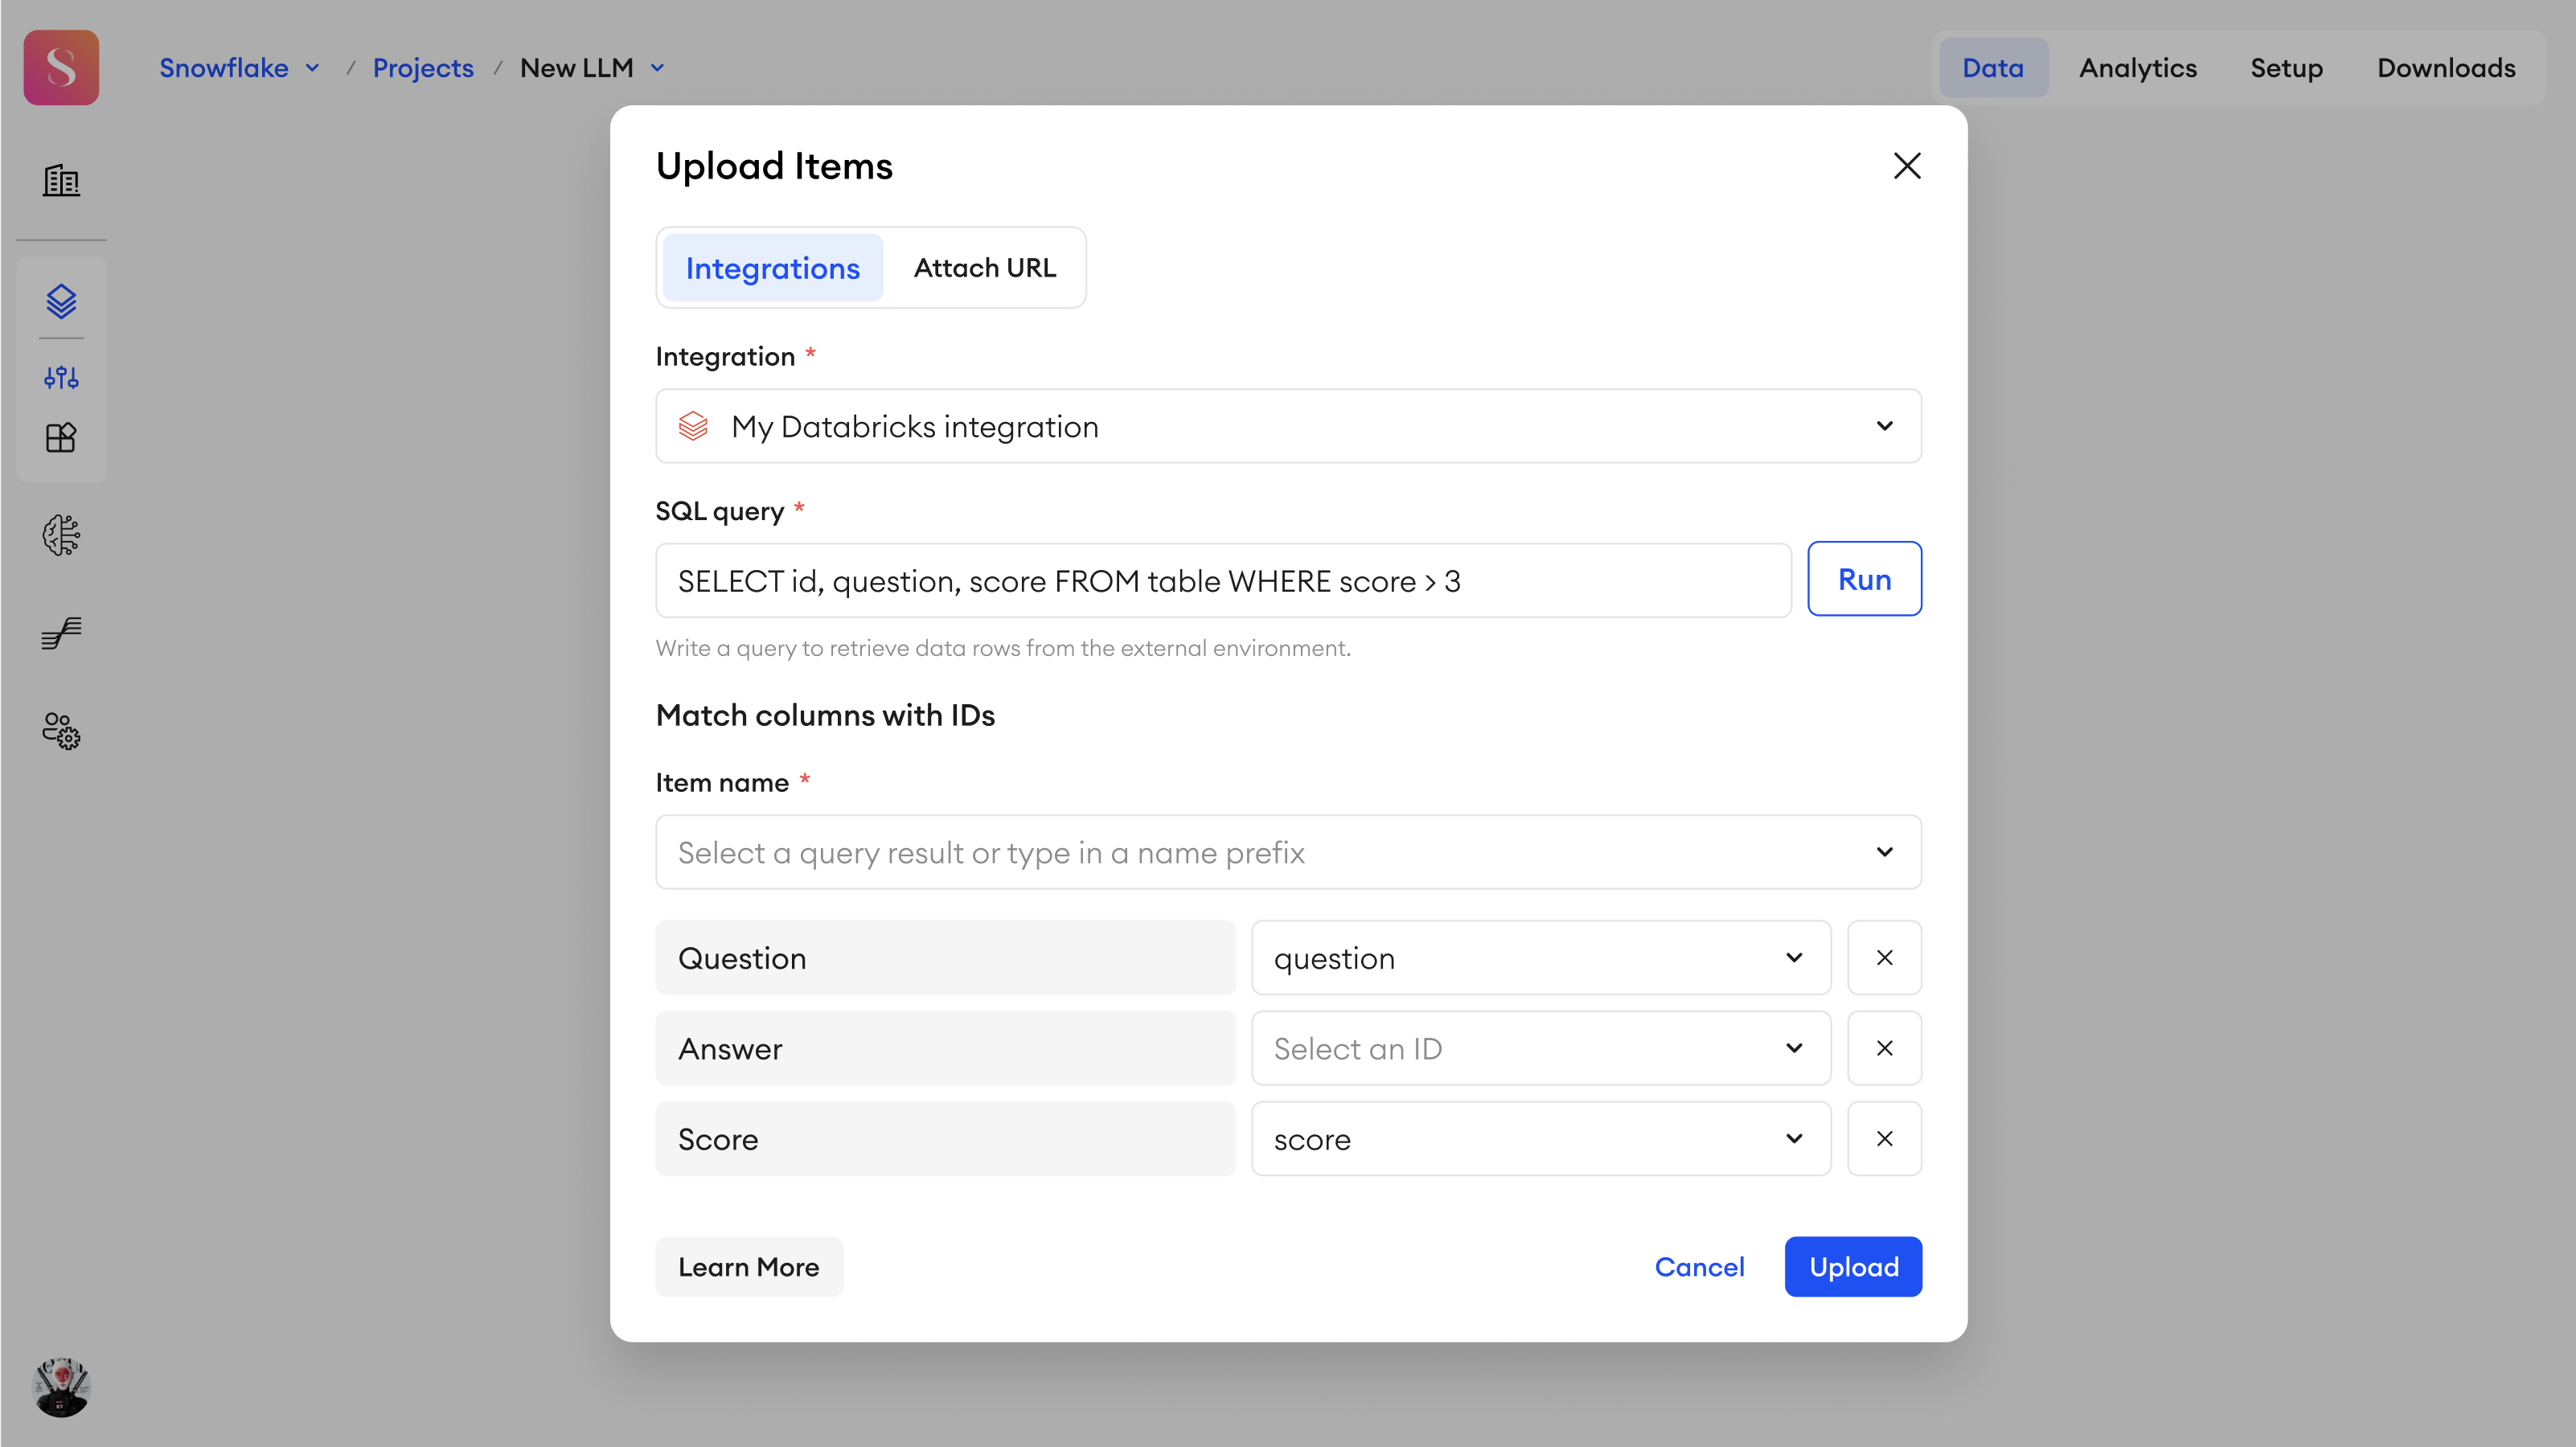
You can add items into your Multimodal project by selecting the integration upon upload:
- In Data, click Add.
- Select Upload Items.
- Select your Databricks integration you want to upload from.
- Type in the SQL query to retrieve data rows from your Databricks environment.
- Click Run to get the queried table column names.
- Under Item name, you must either select a query result from the list, or type in a name prefix:
- Query result - from your query results, you can select the column names, whose values will become the names for your uploaded items. In case of any duplicate item names, only the first of that name will be uploaded.
- Name prefix - you can manually type in a name prefix. A randomly generated, 10-character suffix will be added to it automatically.
- Select component IDs that exist in your project from the dropdown list, and map them to the corresponding column names from your queried table.
- In this dropdown, you’ll only see component IDs of the Input, Select, or Media component types that haven't been excluded from export.
- If the column name matches the component ID exactly (case-insensitive), then those IDs will be automatically selected.
- To map the category of a column, select the
_item_categoryID from the dropdown.
- Once you’re done, click Upload.
After uploading, each row from the mapped columns will become an item with a defined name. All of the values of the mapped columns will be uploaded to their corresponding component IDs.
Any Single- or Multi-select values that don’t exist in the project will be skipped during the upload.
In the case of Select components, the options in your table should be provided as a list of strings, as shown below:
["Partially complete, needs review", "Incomplete"]- For Range sliders -
[2,5]
You can only map each component ID to one column at a time. If you try to map a component ID that has already been mapped to another column, then the previous mapping will be removed.
Updated 11 days ago