Annotation
Once a form has been built and published, you can use the editor for your annotation process. You can further manage your Multimodal project through Settings.
When is my data saved?When working on an item in the Multimodal editor, your changes will be saved:
- on item change
- on status change
- when the home button is clicked
- after 100 actions have been taken
- using the save button or shortcut
- via python code.
Comments

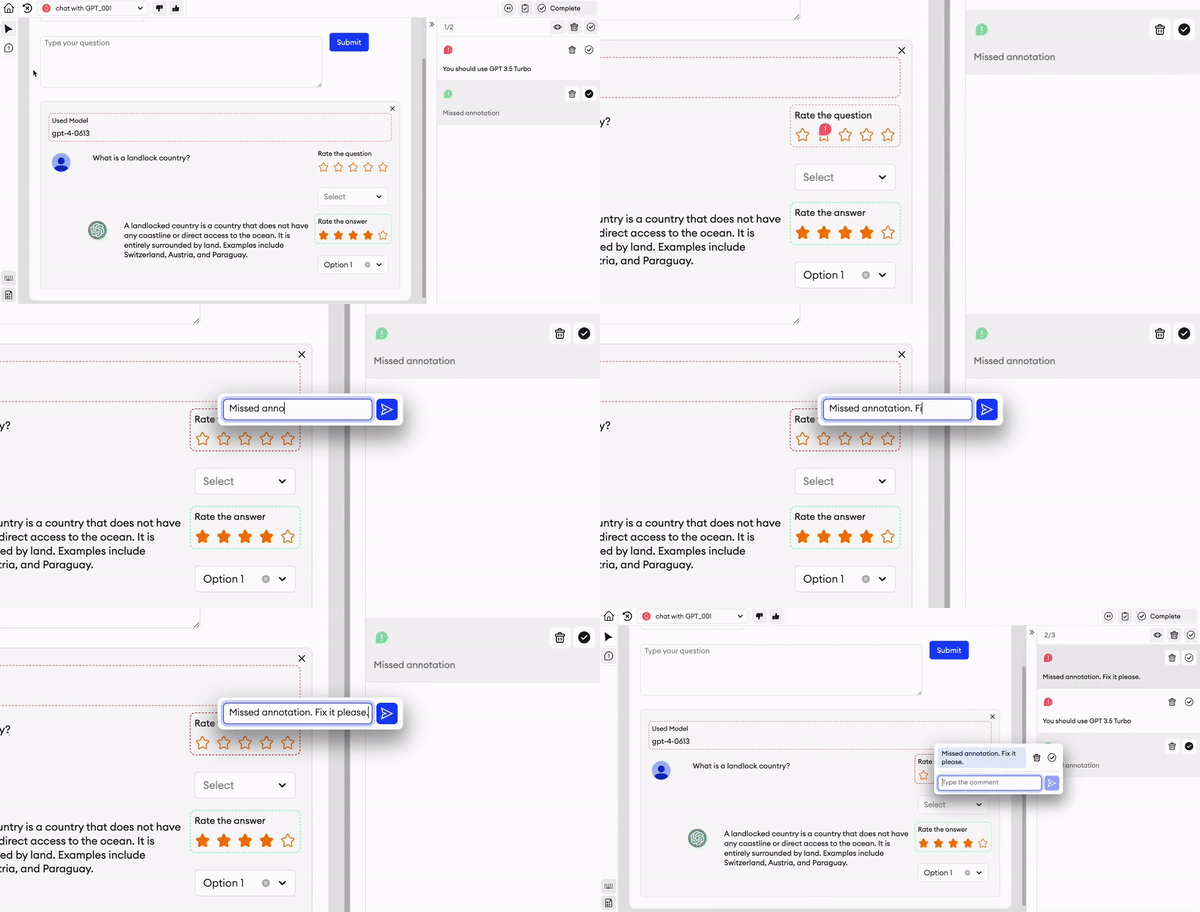
To leave a comment on the item:
- In the editor, click Comment in the left panel or press
Con the keyboard. - Select a component on the form.
- Type in your text.
- Click the send button or press
Enteron the keyboard.
- You can only place a comment on the Input, Select, and Media component types, and only on components that haven’t been excluded from the form.
- Each component can only have one comment at a time.
To reply to a comment:
- Click on the comment you want to reply to.
- Type in your reply.
- Click the send button or press
Enteron the keyboard.
To resolve a comment:
- Click on the comment on the form or find it in the right panel.
- Click the Resolve arrow.
Approve/Disapprove item
You can approve or disapprove each item when in the Multimodal editor.
To approve an item, you can click the corresponding thumbs up button in the top panel or press Ctrl + Shift + ↑ on the keyboard.
To disapprove an item, you can click the corresponding thumbs down button in the top panel or press Ctrl + Shift + ↓ on the keyboard.
Switch to another item
To switch to a specific item:
- In the editor, find your item's name in the top panel.
- Click the item name to open a dropdown menu.
- Select the item you want to switch to.
To switch to the previous item, press the ← key on the keyboard.
To switch to the next item, press the → key on the keyboard.
Item status
When in the editor, you can change the item's status. In the top panel, find the status buttons on the right side:
- Skip: To skip an item because it's not useful to your model.
- Quality Check: To send an item to the QA.
- Return: To return a text to the Annotator.
- Complete: To complete an item.
If you try to click Quality Check or Complete to change the item's status and there’s a required field left blank, the status won't change. All required fields must be filled.
Item information
When you click on the item dropdown menu in the top left, you can see all the items in the project. When you hover over the information icon, you can see the following:
- Item name (which you can copy).
- Project name: Name of the project to which the item belongs.
- QA: The assigned QA. If there's no QA assigned to the item, then the name would be Unassigned.
- Annotator: The assigned Annotator. If there's no Annotator assigned to the item, then the name would be Unassigned.
Upload annotations with SDK
You can use the following SDK function to upload your Multimodal annotations in JSONL format: sa.upload_annotations()
Example
import json
from pathlib import Path
from superannotate import SAClient

annotations_path = Path("annotations.jsonl")
annotations = []

# Reading the JSONL file and converting it into a list of dictionaries
with annotations_path.open("r", encoding="utf-8") as f:
    for line in f:
        annotations.append(json.loads(line))

# Initialize the SuperAnnotate client
sa = SAClient()

# Call the upload_annotations function
response = sa.upload_annotations(
    project="project1/folder1",
    annotations=annotations,
    data_spec='multimodal'
)
Updated about 1 month ago