
Building a UI
You can build a custom annotation/evaluation interface in two ways:
- Drag-and-Drop UI Form Builder – An interactive canvas for placing components.
- UI Form JSON File – A scriptable approach where you upload a JSON file of the form layout and properties.
Either method yields the same result: a structured layout of components that can be dynamically updated and extended with custom code.
Properties
This is the builder that you'll use to create your Multimodal form. The builder is separated into two sections that will help you build and edit your form based on your project's requirements. After creating the project, you may build a custom form from scratch or select from a number of available templates. Building the form involves the use of various UI components and their customized functionality, which can be defined through the Code Editor.
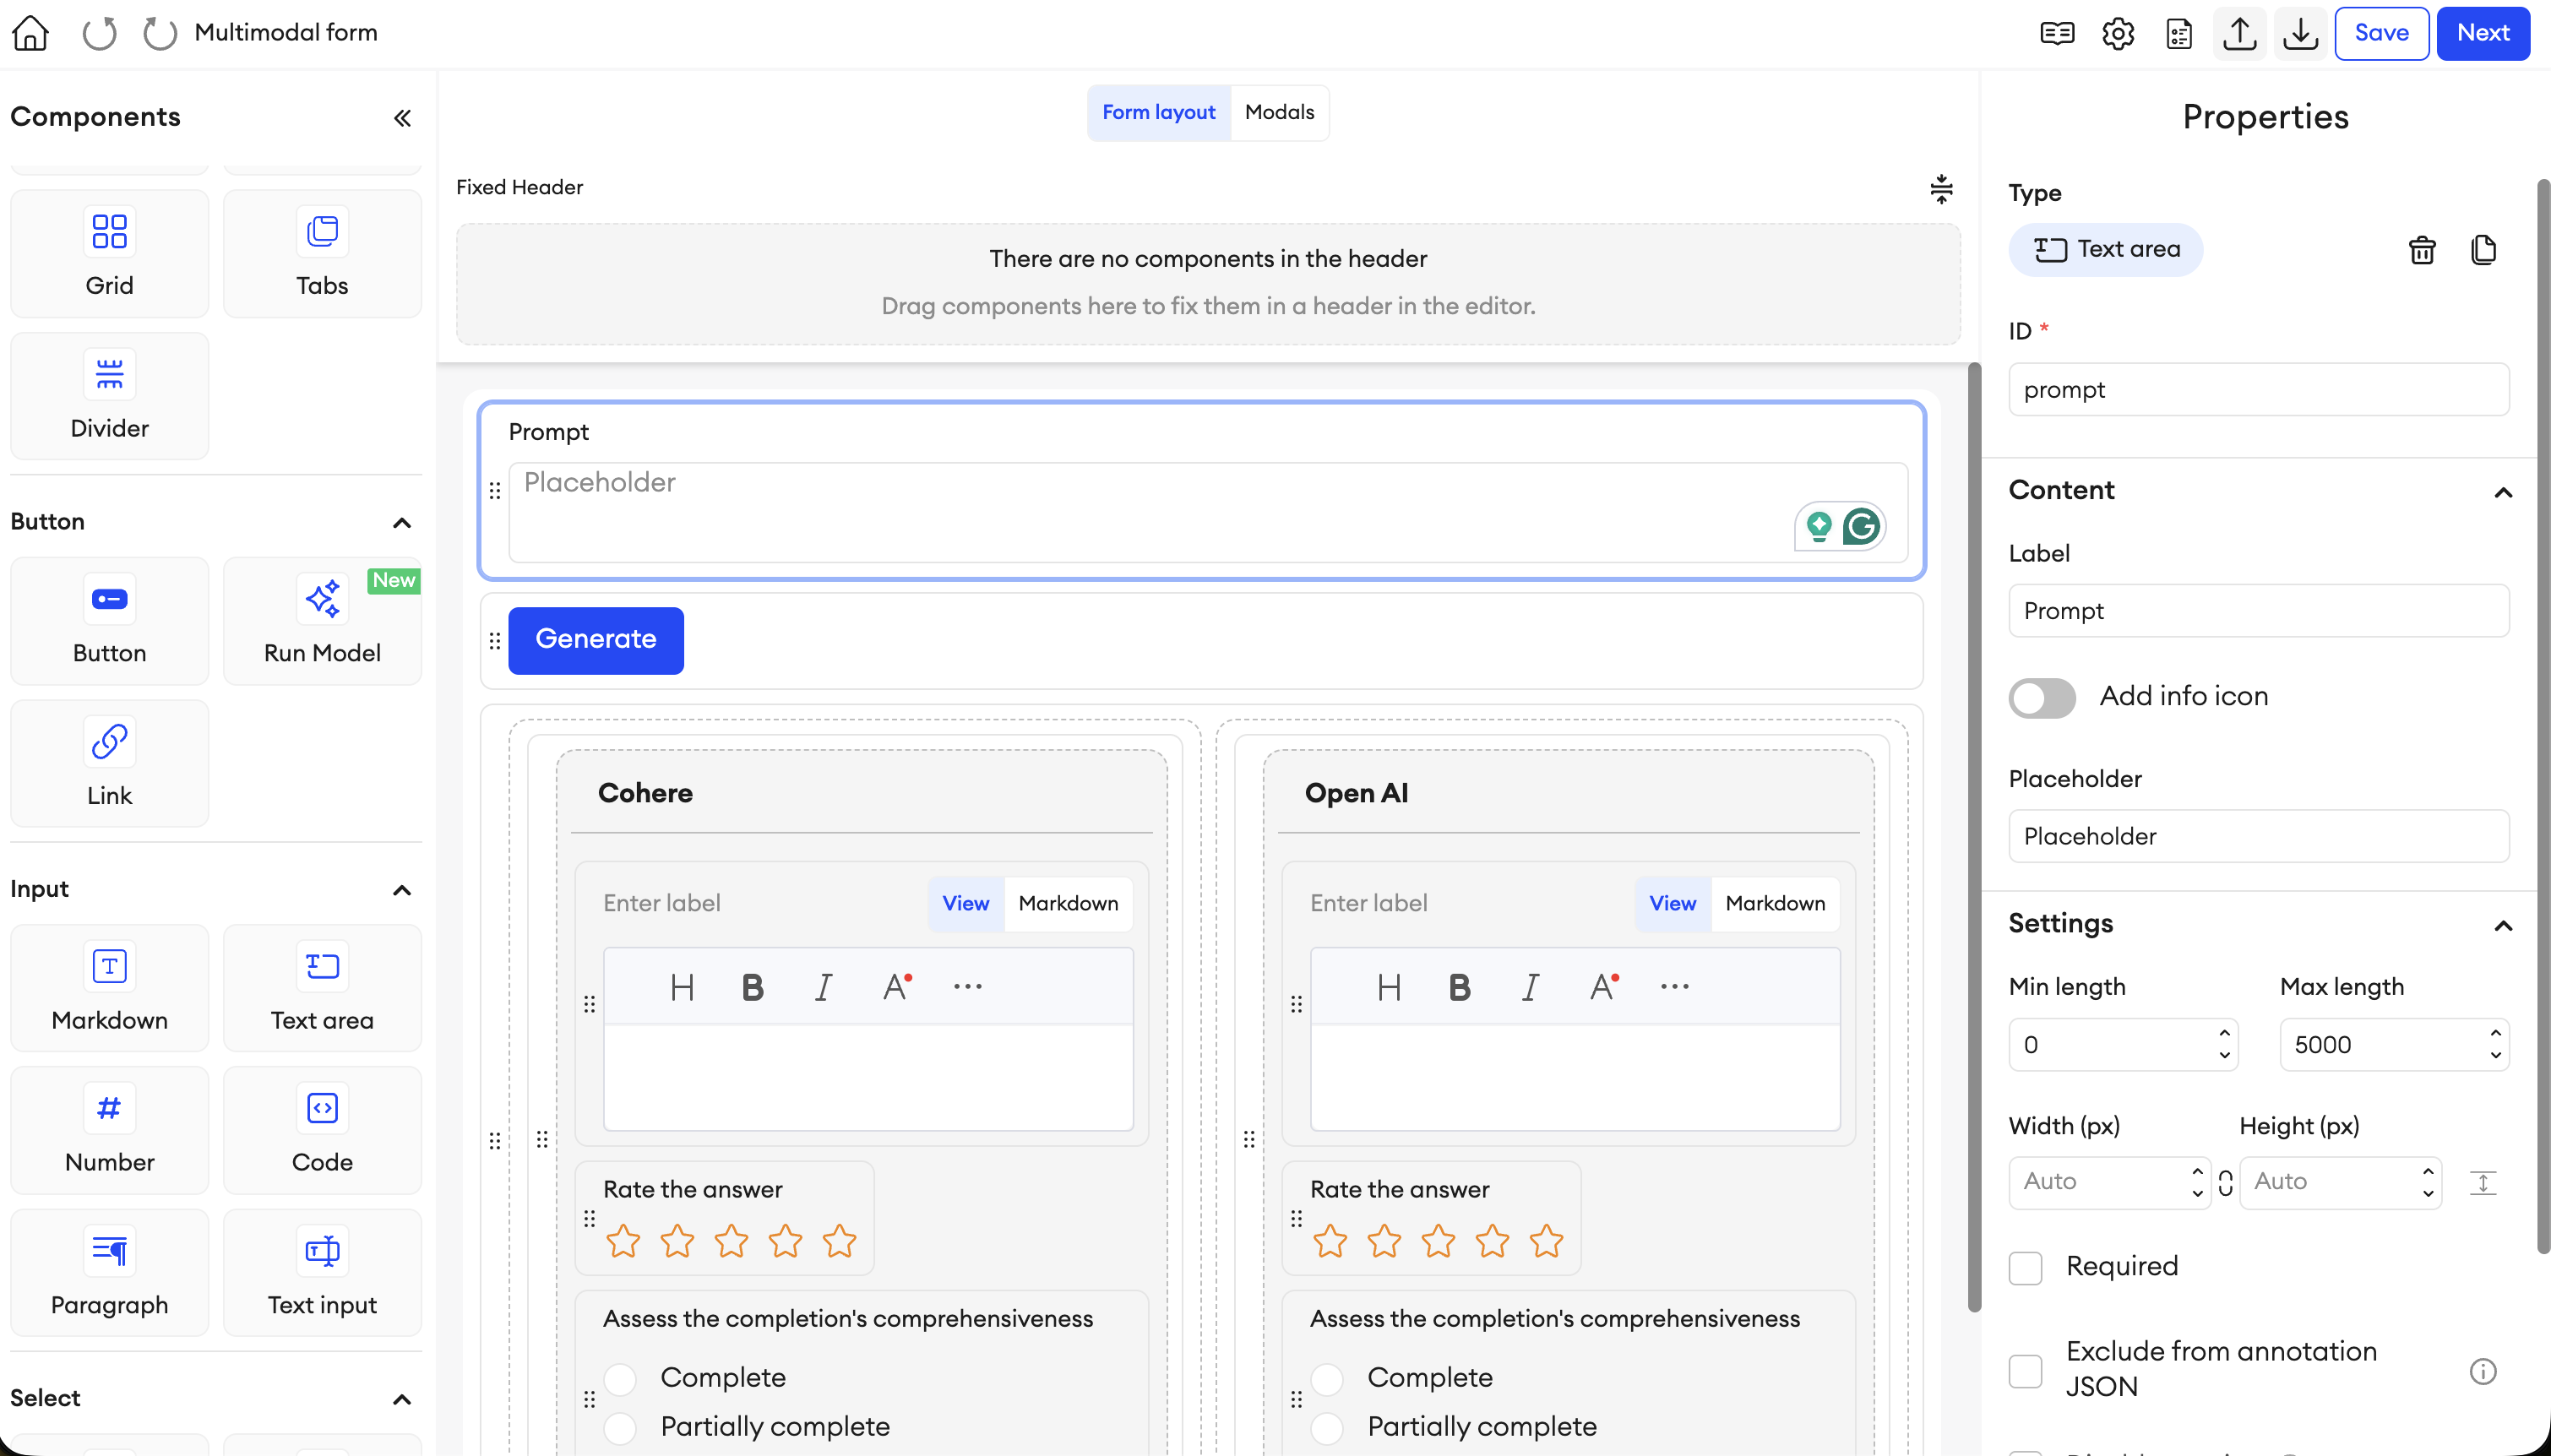
Outline of the UI builder
The UI Builder is divided into three main areas:
- Components Panel
- A library of available UI elements grouped by category (Layout, Button, Input, Select, Media and Custom).
- You drag these components onto the canvas to add them to your interface.
- Canvas
- The visual workspace where you assemble the user interface.
- Divided into two main sections:
- Header: Often used for project titles, instructions, or important project-wide elements.
- Body: The main area where annotators or reviewers will interact with form components.
- Properties Panel
- Displays the configurable properties for the currently selected component.
- Here, you set attributes such as component ID, default value, permissions, styling, etc.
General properties
There are multiple components available in the UI Builder. Each component on the UI should have its own unique ID that is auto-generated, but can be changed to a more defining value. You should keep in mind that there are a few reserved IDs that can’t be used for any component, and these are: _item_name, _item_category, and _folder.
The rest of the component’s properties are divided into sections: Content, Settings, Permissions, and Format.
Content
You can manage and control the component’s main properties here. This includes its values and composition.
Settings
You can manage and fine-tune a component’s settings to make sure it looks and behaves the way you want. These settings include things like component positioning, sizing, value ranges or limitations, whether or not to exclude it from the export JSON, and whether or not the component is required to be fulfilled before an item is completed.
Permissions
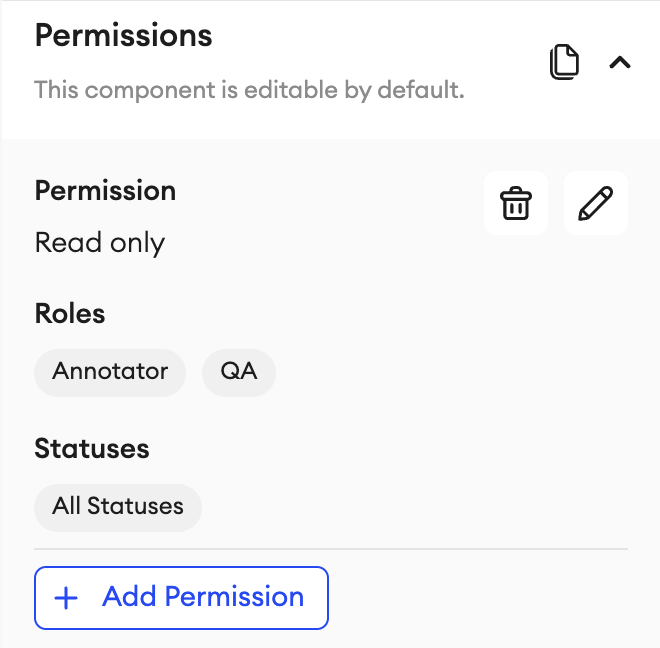
You can modify the permissions on each individual component (except Grid) so that they can either be Hidden or Read only. You can select one or multiple roles and statuses that this setting is applicable to, including any custom ones available in your project. This can be done when defining the properties of the component.
If there are multiple components that you want to have the same Permissions for, you can copy the settings of one component and paste it onto another. You can do this by clicking the respective buttons to Copy (or Alt + Ctrl + C) the permissions, and Paste (or Alt + Ctrl + V) them.
Component-specific permission settings
- When setting the permission conditions for the Tab component, you can apply different conditions per tab.
- You can also define additional permissions for Web components as described here.
Format
Some components will give you the option to format their appearance. This includes background styles, title styles, text direction and button styles.
You can also copy and paste format settings from one component to another:
-
Hover over the format settings.
-
Click Copy/Paste formatting and click Copy formatting, or use
Ctrl + Shift + C -
Click on the component you want to copy these settings to.
-
Click Copy/Paste formatting and click Paste formatting, or use
Ctrl + Shift + V
Import and Export
You can Import or Export in a few ways at any time by clicking their respective buttons in the top-right corner of the form builder.
- Import: You can import a form JSON file that you've created or exported from a project. You may also import a form Template to start with.
- Export: You can export a form in JSON format, or as a CSV file for annotations. Saving a form's JSON allows you to reuse the layout and all its components and functionality across other Multimodal projects.
Reusable componentsBy exporting a form JSON, you may also save frequently used components and their respective python logic to append them to any form without having to recreate them from scratch.
In this case, be sure to select the Add to existing form option when importing.
Status controls
This setting controls whether or not contributors may manually transition an item’s status while working on it in the editor. When disabled, contributors must handle transitions programmatically based on:
- The transition type and configuration of each status, including validation requirements
- The configuration of the form’s code.
This feature is Enabled by default, but you can Disable it at any time from the editor’s Settings, accessible via the button in the top-right corner.
Comments panel
This setting controls whether users can leave comments on items or read any that were placed. This is enabled by default. Disabling it will hide all comment panels and prevent users from commenting on items in the editor.
If you disable this feature and there are some items that contain comments, those comments will no longer be visible in the editor or in Explore. Disabling the feature will not delete any of the existing comments, it’ll only hide them. Reenabling the feature later will bring them back.
README
You can create a README file for your project’s form while in the UI builder. This README file will be visible any time this project’s form is opened in the builder and can be accessed from the top-right corner. You can use it to include any important or key bits of information about your project and form.
To create a README file:
- Enter the project’s form builder either during project creation or from the project’s settings.
- In the top right, click the README button.
- Type in all the information you want to include.
- When you’re done, click Apply.
- Click Next in the top-right corner.
- Click Publish (if done during project creation) or Update (if this is an existing project).
To edit a README file:
- Enter the project’s form builder from the settings.
- In the top right, click the README button.
- Click the Edit button.
- Make your changes accordingly.
- When you’re done, click Apply.
- Click Next in the top-right corner.
- Click Update.
Updated 20 days ago