
Workflow
Within your team and any corresponding projects, you can manage the set of statuses and member roles that you can use to assign the work being done. With custom workflows, you'll be able to effectively reflect the working processes of your team and projects onto the platform for a smoother annotation cycle.
Customizable features
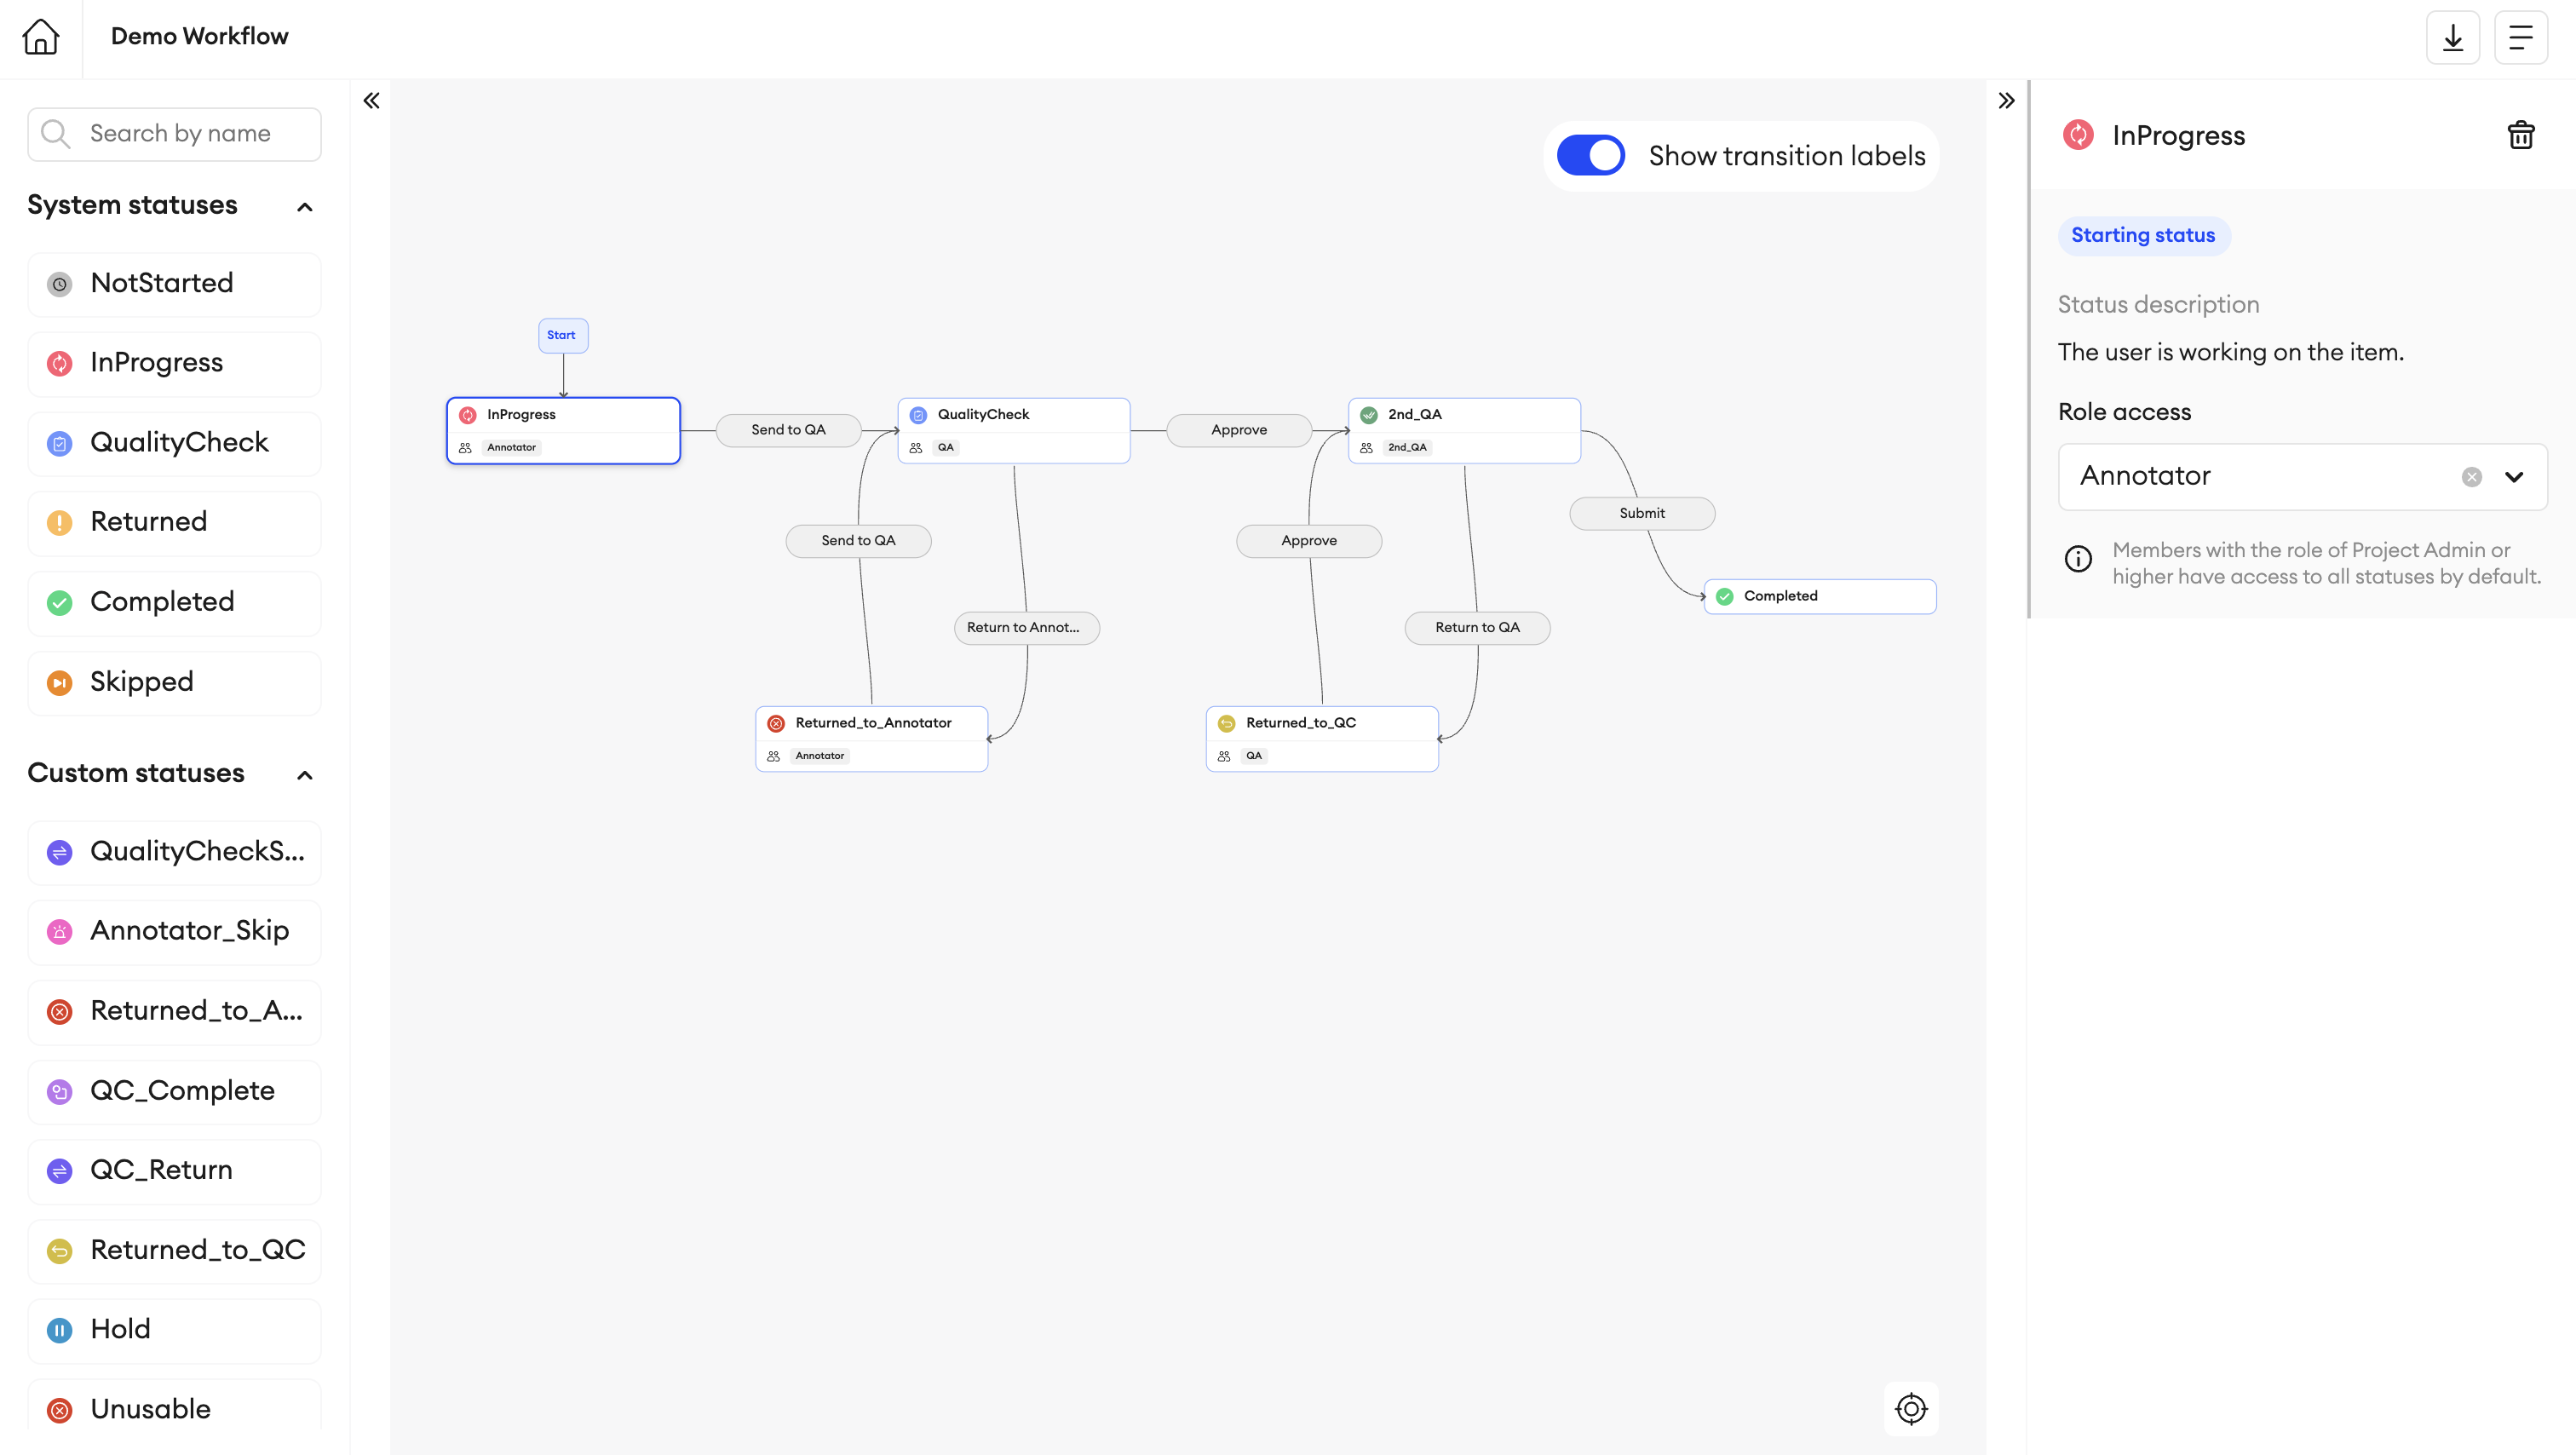
- Workflows - A sequence of statuses and transitions that an item goes through in its annotation lifecycle. It consists of statuses and their transitions, and user roles. You can create a workflow and link it with one or multiple projects to align the platform's workflow with their team’s processes.
- Custom roles - You can create custom roles which inherit the platform's default permissions for the Annotator and QA roles. Also, you can additionally set any editor-specific permissions when creating these roles.
- Custom statuses - These custom statuses can be used to create a new annotation cycle that better fits your project.
- Transitions - These are links between two statuses and it is the action that a user should take to move an item from one status to another.
If you want to create a custom workflow with a custom set of statuses and roles, instead of using the existing ones, be sure to create those statuses and roles ahead of time.
Updated about 2 months ago
Did this page help you?