Steps
Creating a set of annotation steps for your project automates a good portion of the annotation process. This tool can be found in the Setup section of the FineTune tab in the left panel. It is useful for cases such as pose estimation tasks.
With SuperAnnotate, you can create a steps for your project in two ways: General steps, and Keypoint annotation steps. Read on to find out more about them.
General steps

This method allows you to create an automated set of steps with which to apply instances using pre-selected tools. You can create object classes and, by adding them to the steps, assign them different annotation tools.
This can be useful when annotating images that contain various shapes that require classification.
Create general steps
Step 1: Create the required classes
- In Setup, go to Classes.
- Create any number of classes (object) and name them accordingly.
These classes will be assigned tools during the process, so be sure to name them something to help you when applying the set.
Step 2: Set up the steps

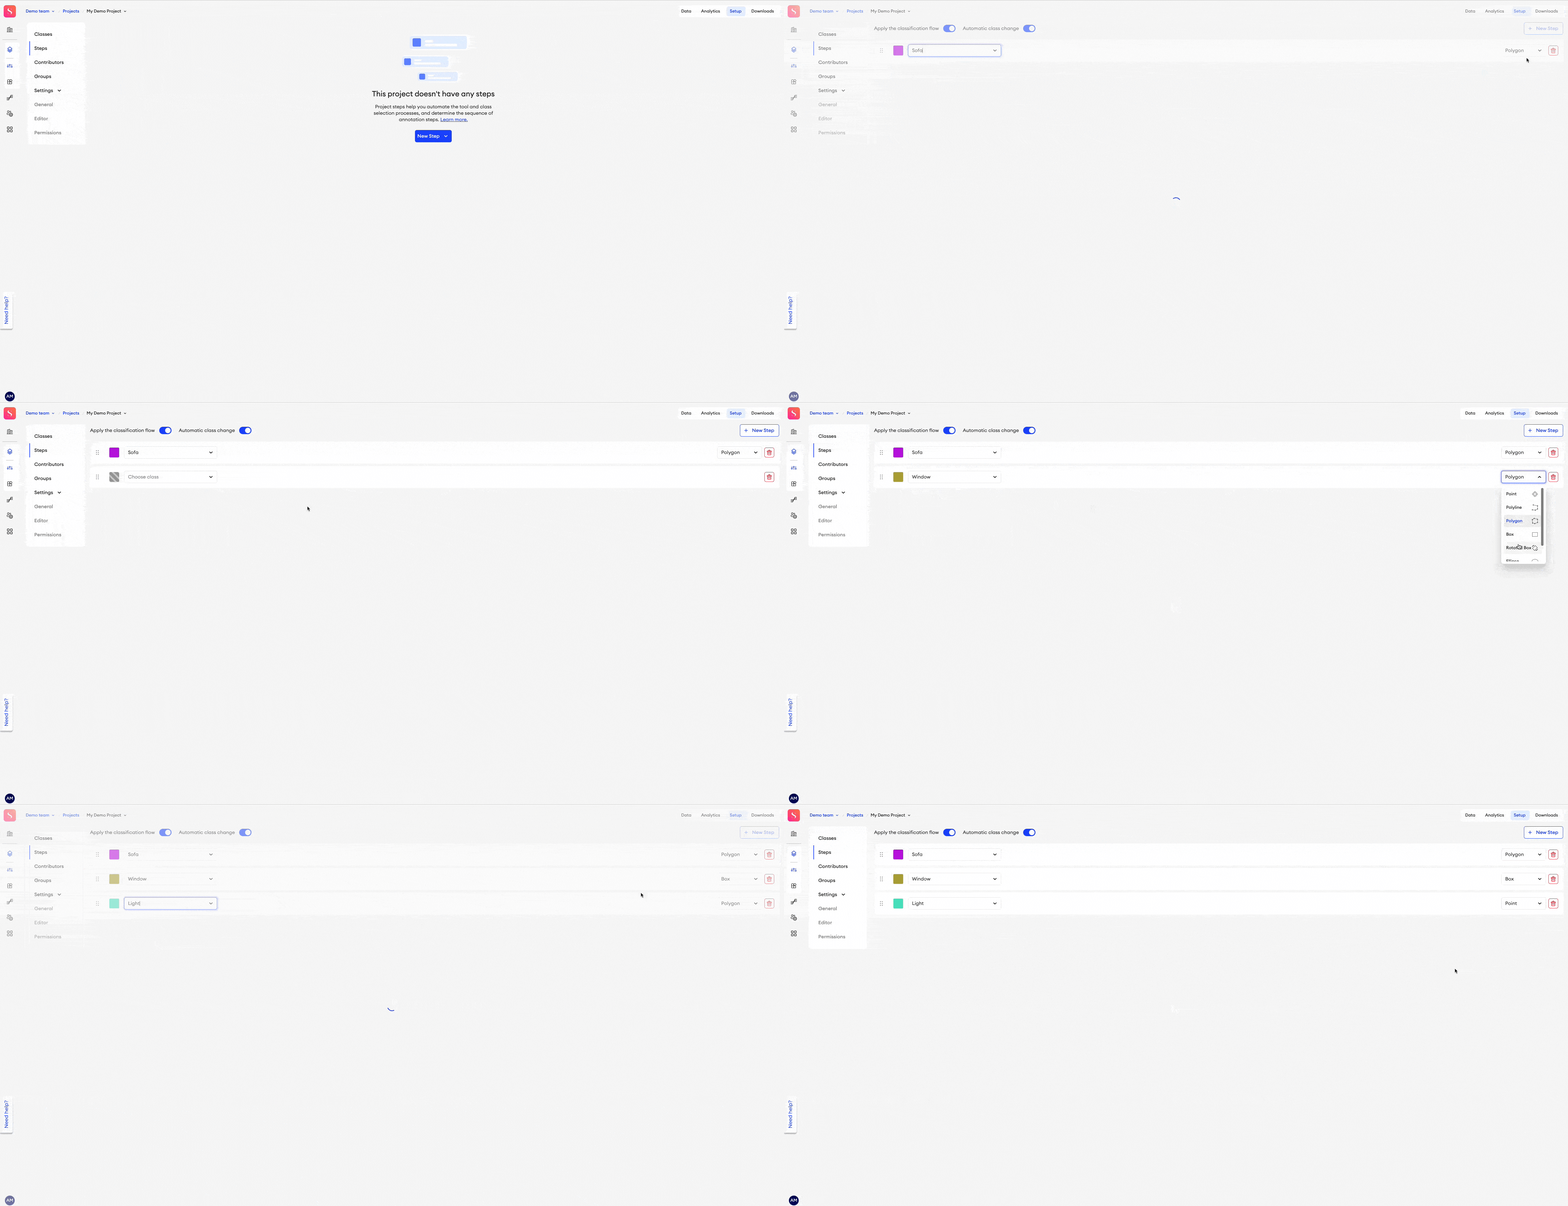
- In Setup, go to Steps and click New Step.
- Select General steps.
- Click + New Step to begin adding steps. This'll create a new empty step.
- From the dropdown, select a class.
- If you’ve given the class any attributes, select an attribute (optional).
- Assign an annotation tool to the step.
- Repeat steps 3-6 as many times as necessary. You can select the same class and/or attribute more than once.
Click and drag the reorder button
⋮⋮to change the order of the steps.
Magic Polygon, Magic Select, and Magic Box can’t be assigned to a step here.
Step 3: Use the steps
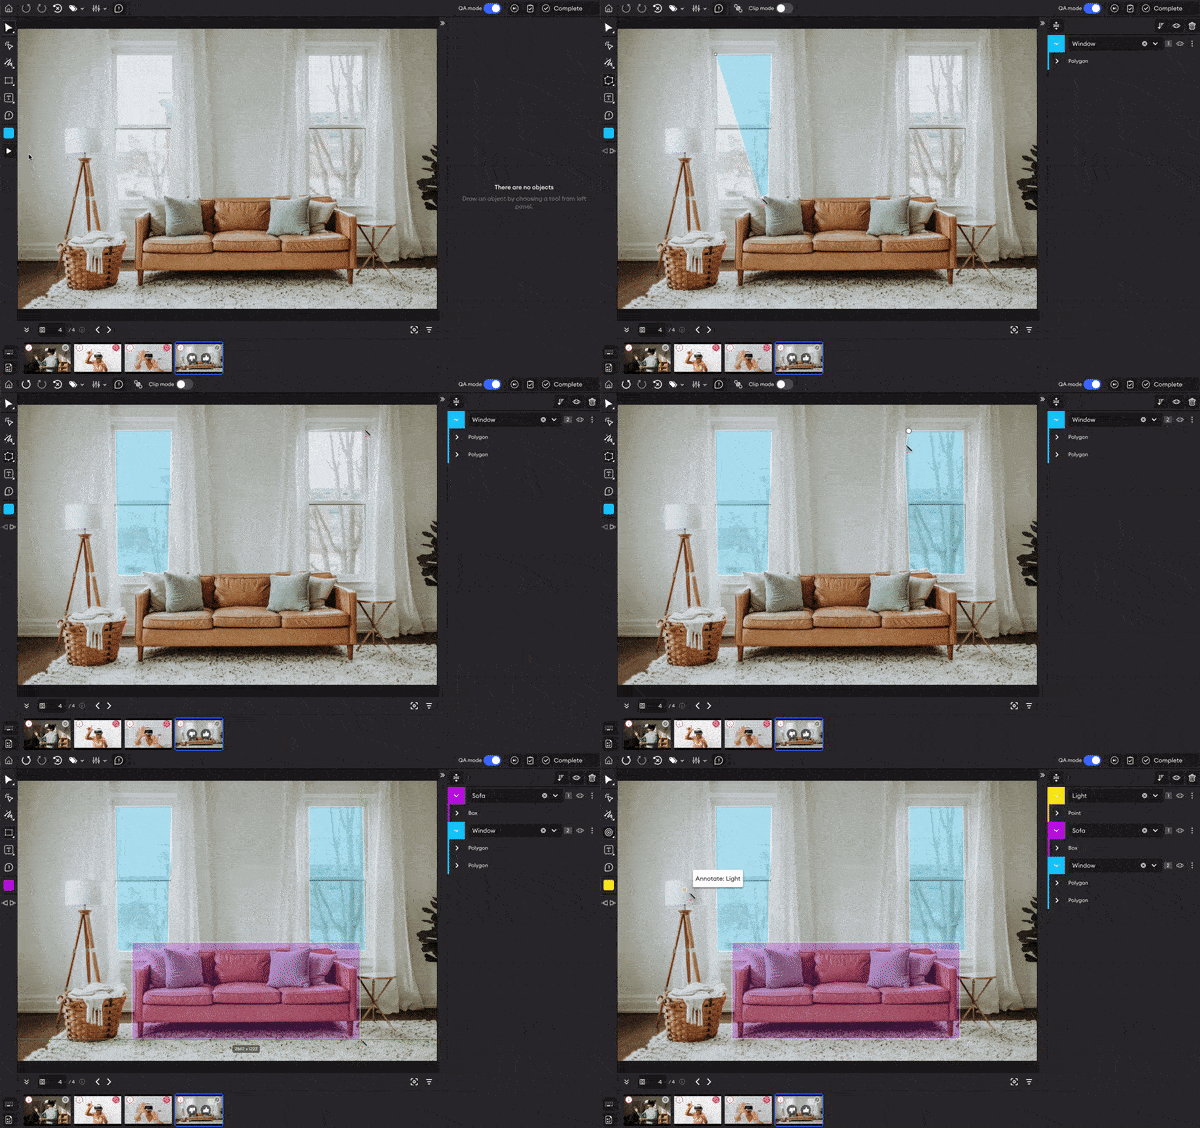
You can start using your newly created steps in the Image Editor now. Learn more.
Delete steps
To delete a General steps set:
- In Setup, go to Steps.
- Next to a step, click the Delete button.
- Repeat this with all steps. Once the last step has been removed, the whole set will be deleted.
Keypoint annotation steps
This method will allow you to make direct connections between each point you assign. Keypoint steps are used for cases such as Skeleton annotation and Pose estimation tasks.

Create keypoint steps
Step 1: Create the required classes
- In Setup, go to Classes.
- Create any number of classes (object) and name them accordingly.
These classes will be assigned tools during the process, so be sure to name them something to help you when applying the set.
Step 2: Set up the steps

To manually set up keypoint annotation steps:
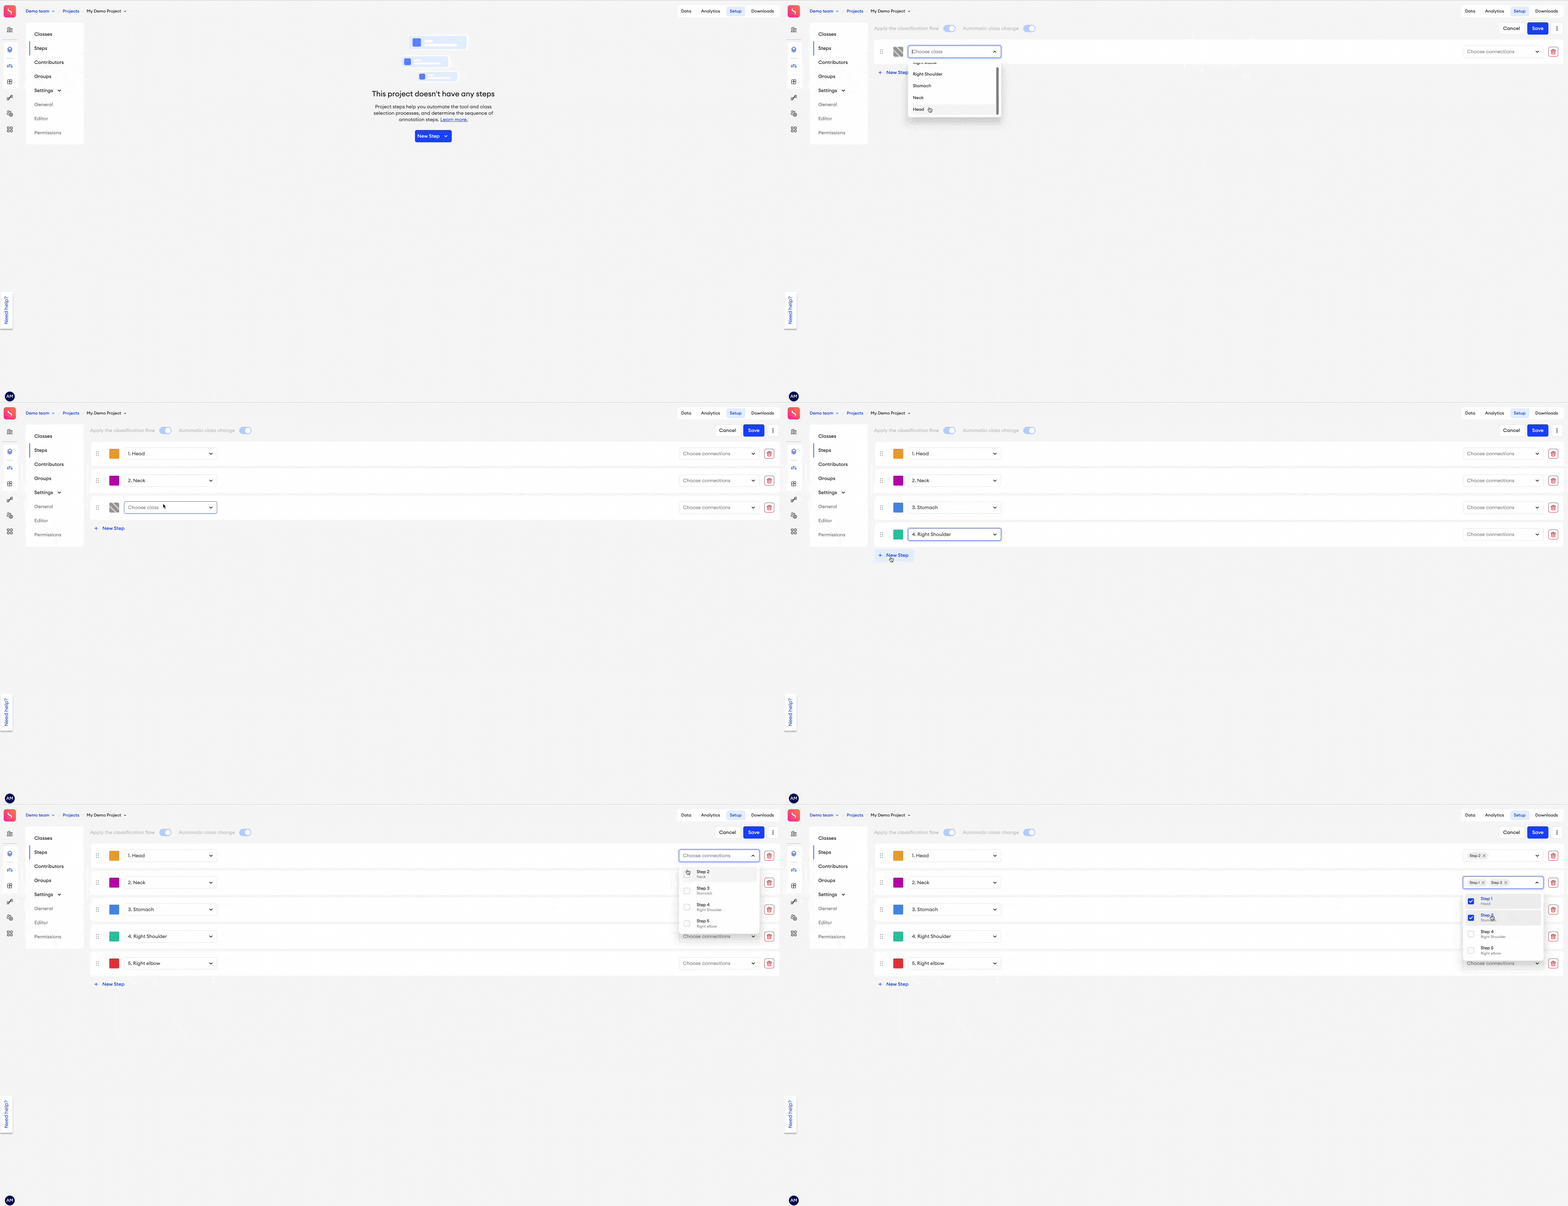
- In Steps, click New Step and select Keypoint annotation steps. You'll see the first step is already added for you.
- Assign a class.
- Choose an attribute, if available (optional).
- Click + New Step to make a new step.
- Choose connections for your steps to link them. You need at least two steps to do this.
- Repeat the process as many times as necessary.
- Click Save.
You’ll notice that you have two switches above your steps: Apply the classification flow, and Automatic class change.
Switching Apply the classification flow on will enable the use of this set in the editor.
Switching Automatic class change on will make sure that the classes will change automatically during the annotation process.
You can click and drag the reorder button
⋮⋮to change the order of the steps.
Step 3: Use the steps
You can start using your newly created set in the Image Editor now. Learn more.
Download keypoint steps
To download your keypoint steps:
- Go to Steps.
- Click the three dots
⋮in the top right. - Click Download.
Upload keypoint steps
To upload existing keypoint annotation steps:
- In Steps, click New Step and select Upload keypoint annotation steps.
- Choose a JSON file from your computer that contains the steps. Learn more.
- You may have to assign classes to the steps manually.
When uploading a set of steps, the new JSON file will override the previous one.
JSON of keypoint steps
{
    "steps": [
      {
        "id": 1,
        "class_id": 1639565,
        "attribute": []
      },
      {
        "id": 2,
        "class_id": 1639564,
        "attribute": []
      },
      {
        "id": 3,
        "class_id": 1639563,
        "attribute": []
      }
    ],
    "connections": [
      [1,2],
      [2,3]
    ]
  }
Description:
- “steps”: array of objects - List of information for each step.
- “id”: integer - Step ID.
- “class_id”: integer - Class ID. It must match the existing class ID in the project.
- “attribute”: array of objects - List of attributes for this step.
- “id”: integer - Attribute ID. It must match the existing attribute ID in the project (optional).
- “group_id”: integer - Attribute group ID. It must match the existing attribute group ID in the project (optional).
- “connections”: array of objects - List of the connected steps by step IDs.
Delete keypoint steps
To delete your keypoint steps:
- Go to Steps.
- Click the three dots
⋮in the top right. - Click Delete.
- In the pop-up, click Delete.
Updated 11 months ago