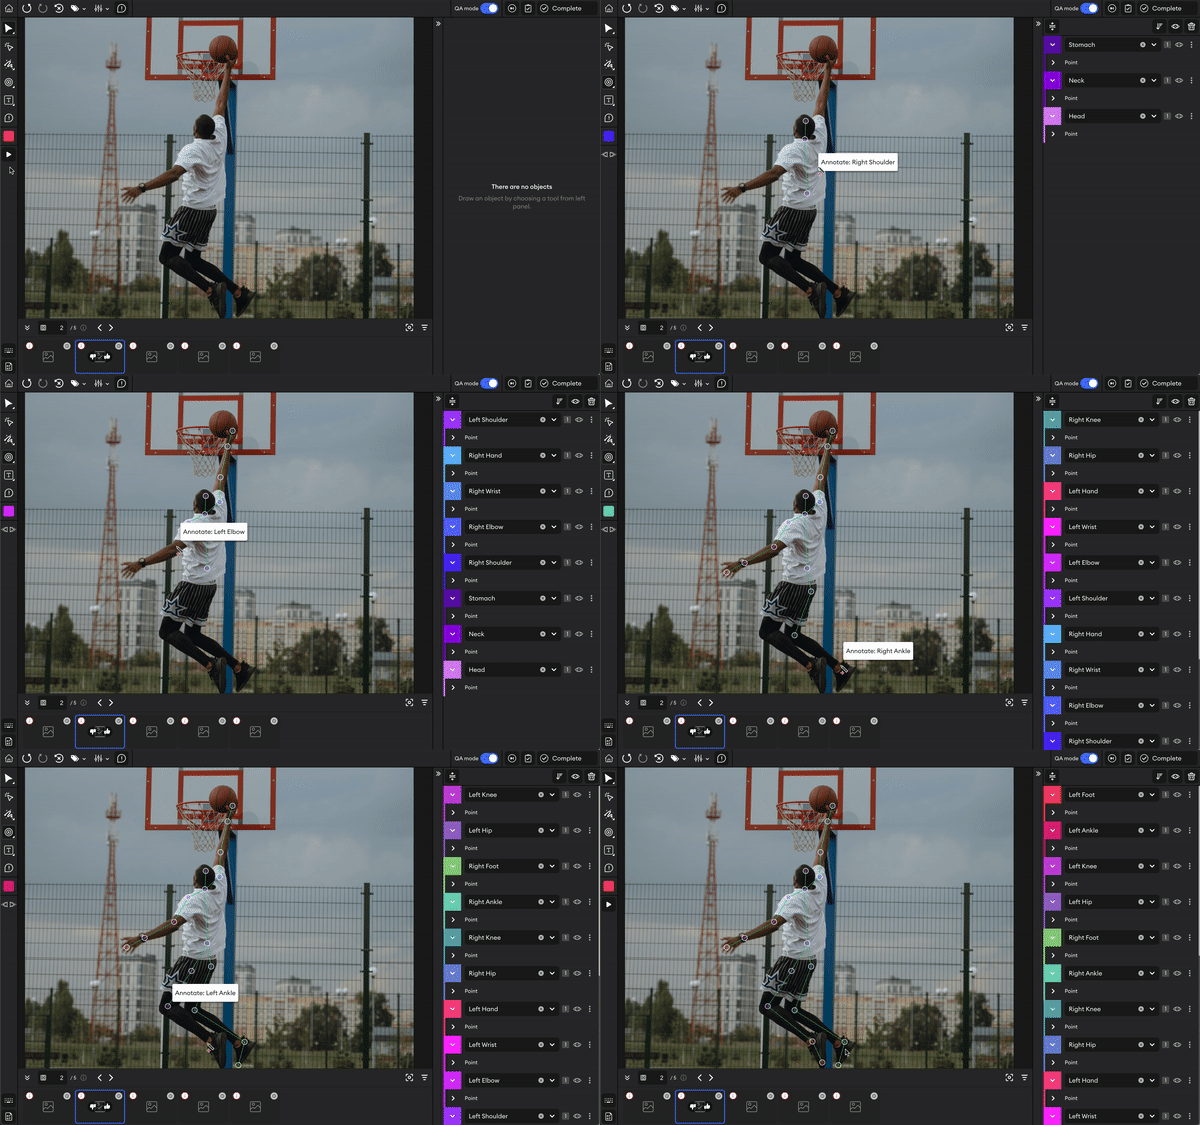
Skeleton annotation
In cases where you need to annotate a skeleton for Pose estimation tasks, you can automate the linking of objects by creating a set of Keypoint annotation steps. This'll allow you to automate and significantly speed up the process of annotating skeletons (Head, Neck, Shoulders, etc.). You can create one manually to best suit the needs of your project and your team, or you can upload a pre-existing JSON with your annotation steps. Learn more.
Once you’ve made your first annotation, you can then autotrack the skeleton across a number of images in your project. Learn more.
Using the steps
In the editor, click Start steps from the left panel, or press . on the keyboard.
After starting the process, you'll see the name of the first step above your cursor. If you had selected an attribute for the step, you'll see the attribute’s name under the step name.
Begin your annotation. After each annotation is made, the set will automatically move on to the next step, and that step’s annotation tool will be selected and ready to use.

Example:
- Step 1: Head
- Step 2: Neck
- Step 3: Right shoulder
- Step 4: Right elbow
- Step 5: Right wrist
- Step 6: Right hand
- (And so on…)
Once you’ve made the final annotation step, the set will end and all annotated points will be grouped together automatically. That way, you'll be able to separate or select each skeleton’s annotation grouping easily.
Navigating the steps
During the process, you can go back and forth between steps as many times as you like, and you can reuse steps you have already done. It won't replace the existing annotations.
To skip a step, click Next step, or press . on the keyboard.
To go back to the previous step, click Previous step, or press , on the keyboard.
If you go back to a previous step in the set, the order will continue from that step onward. For example, let’s say you have 5 steps in your set. If you have annotated steps 1, 2, and 3, but you want to go back to step 1, after annotating it again, the set will move onto step 2 instead of step 4.
- Keep in mind that if you repeat steps, it won't overwrite or delete the existing step. In the case of Skeleton annotation, if you annotate the neck twice, then the head will link to both neck annotation points.
- If you delete a point from the set, the link will be broken. You can fix this by annotating the corresponding step again and assigning it to the same group as the other points. For example, if you've got an annotated skeleton belonging to group 1 and you've deleted step 3 from this group, you can annotate a new point, assign the step 3 class to it, and add it to group 1. This way, it'll be linked with the set again.
Updated 11 months ago