
💡 Setup Automation
To set up an automation, you begin by creating a pipeline. This takes you to a canvas where you can lay out your automation flow. You can select from various event triggers, link them to different actions, and even create a chain of actions that are carried out in progression. You can have multiple chains of event triggers and actions in one pipeline.
To get started, go to the Orchestrate page from the left panel.
Create a pipeline
- In Orchestrate, click + New Pipeline.
- In the pop-up, type a name for your pipeline and click Create.
- From the left panel, click and drag a trigger node (Event) onto the canvas.
- From the left panel, click and drag an Action or Agent that should be triggered by the first node: Send webhook, Send email, Custom actions, or Models. You must have at least one connected model.
- You can configure each node’s properties in the right panel.
- Connect two nodes by dragging a line from the border of one node to another.
- Configure the connections between consecutive actions to only trigger the next node when the current one has either succeeded or failed. By default all connections will work on Success. If you want to create a connection that will trigger only if the action or agent fails, you need to click on the connection, then select Failed from the right panel dropdown.
- Once you've configured the pipeline, click Save. The pipeline will then be enabled and will wait for the event trigger specified.
Here, you can view the payload that actions receive when they’re triggered by the previous node’s failure.
Pipeline editor
The Pipeline Editor is where you create trigger-based automations. At its core is the canvas, a central space where you design your automation by dragging events and actions from the left panel and connecting them. Each event and action comes with its own configurations, which can be set up in the right panel by clicking on each card individually.
Version history
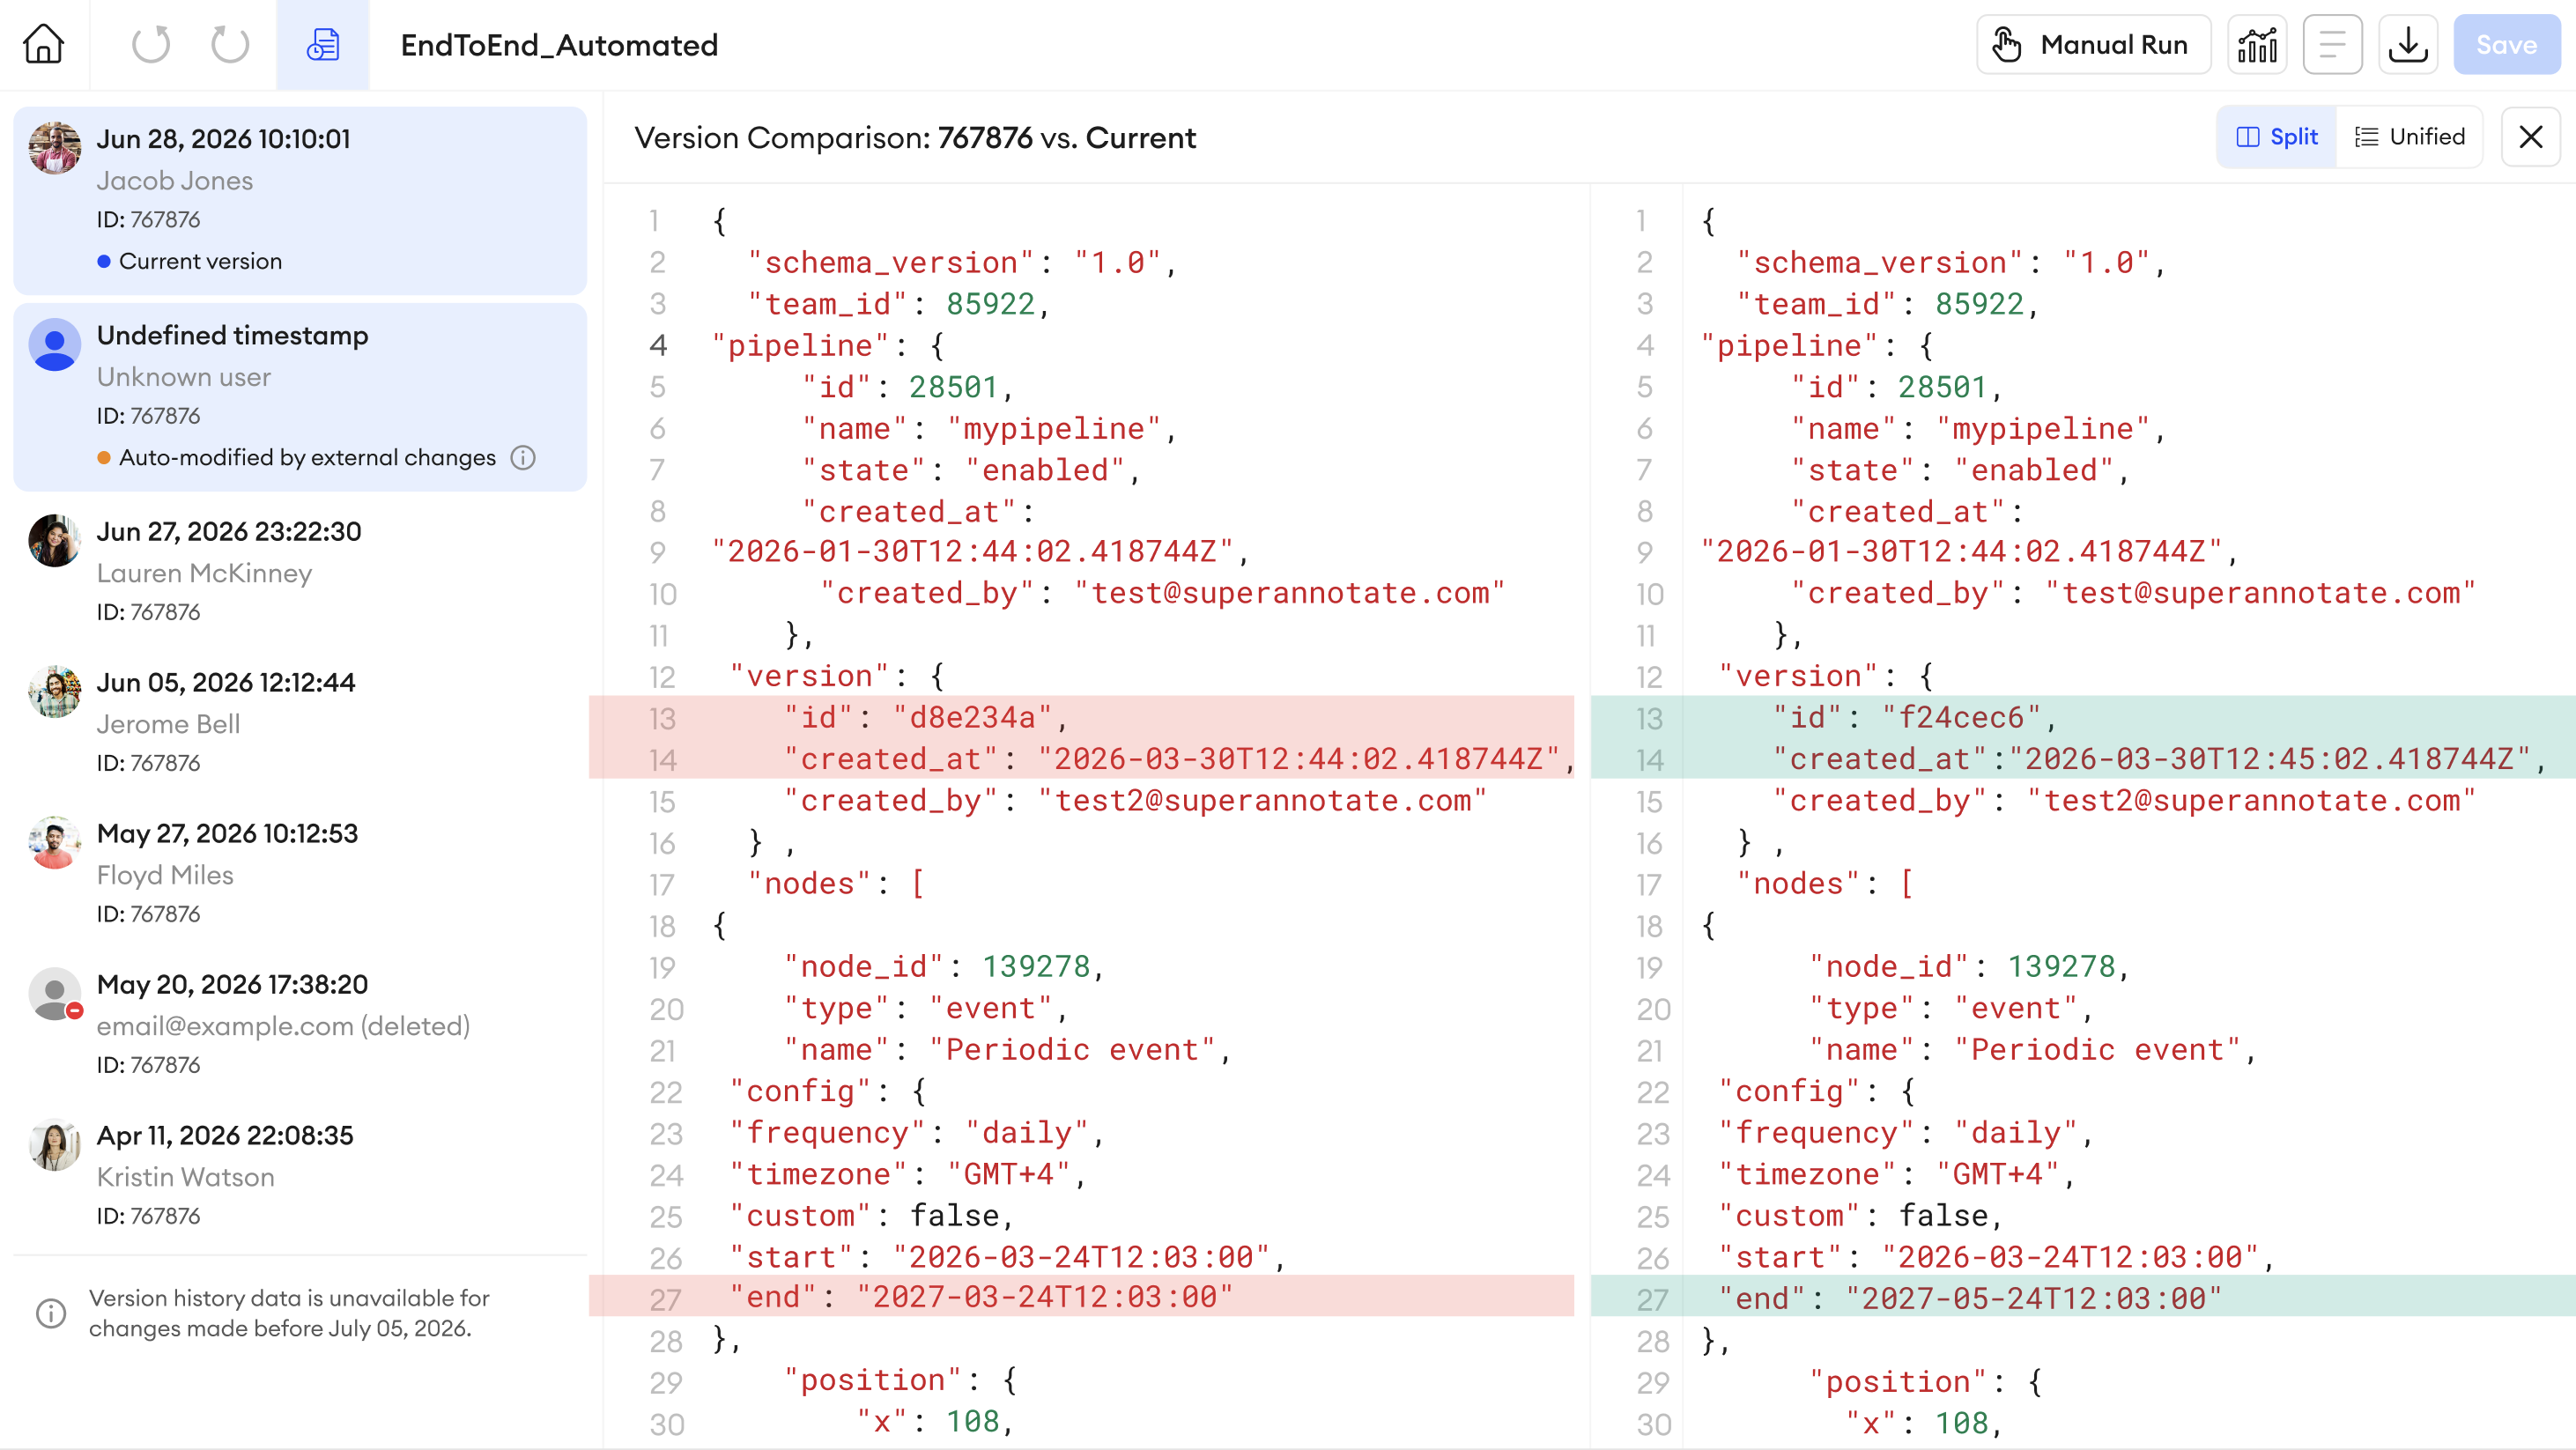
You may access a pipeline’s Version History, which allows you to see all the changes made to a pipeline, the users who made those changes, and when. Each version stores a complete snapshot of the pipeline configuration in JSON format. Previous versions are read-only and cannot be restored. The pipeline version JSON contains all general pipeline information, all event and action nodes present on the canvas, the connections between them, and any scopes defined in them.
By default, Version History opens the current version, which represents the last saved state of the pipeline canvas. You can compare it with an older version by selecting one from the left panel. Comparisons can be viewed in Split or Unified views.
Versions are created when a user:
- Creates a pipeline
- Saves any changes in the pipeline
- Duplicates a pipeline
- Renames a pipeline
- Enables or disables the pipeline
Version History may also show a state called Auto-modified by external changes. This indicates that the pipeline was updated automatically as a result of changes made outside the pipeline editor, rather than by a user directly editing the pipeline in the editor. For example, if a custom action is deleted from the team, any corresponding node and its connections will be removed from the pipeline canvas, creating an ‘Auto-modified by external changes’ version.
Updated 2 days ago