Import items
There are a few ways you can import items into your project, whether they include annotations or not. If you specifically want to upload annotations to your items, you can do so with SDK.
Attached filesPlease note that if the form you’re uploading contains a File Upload component, its value will always be considered empty and none of the attached files will be included.
Requirements
You can import annotated items from an integrated external cloud storage if:
- You have prepared the project's form according to the data you're importing, with all the corresponding components included.
- You have provided SuperAnnotate permission to access your external storage files through CORS authentication.
- If you have any private URLs from an external cloud storage, you must make sure to provide SuperAnnotate a permission to sign them.
Item naming restrictionsWhen naming your items, please avoid using the following special characters as they may lead to unexpected behavior or compatibility issues: < > : ” ' / \ ? * & $ ! +
Access to external URLS
Method 1: Configuring your form for your JSON file
The JSON file you'll need to import from an Integration will contain all of the annotations in a key-value format, like so:
{
    "<annotation_key_name>": "<annotation_value>",
    "<annotation_key_name>": "<annotation_value>"
}
In this case, the <annotation_key_name> should be replaced with a name for your annotation. The <annotation_value> should be replaced with the actual annotation data. For example:
{
    "name": "LLM Completion Review",
    "review": "The completion was satisfactory."
}
Once you do this, you must save your JSON file and upload it to an external cloud storage that's integrated and available to your team.
When that's done, you should format the values of your form's components like so:
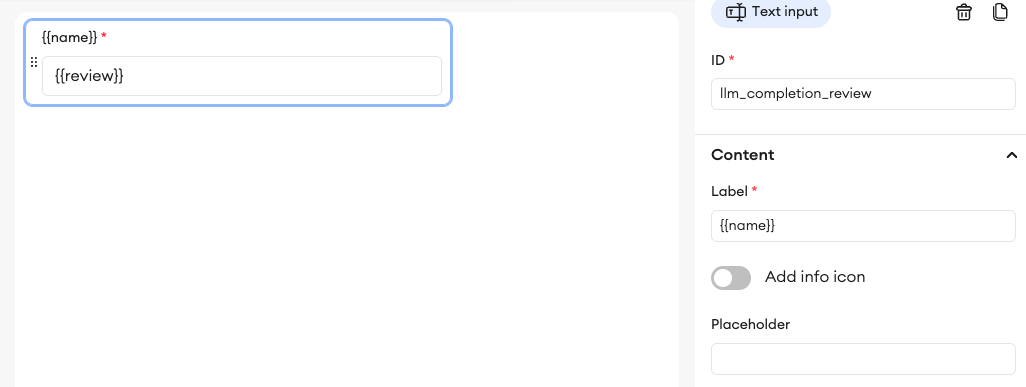
By using {{name}} as the Text Input component's Label value, it'll be replaced by the value of the name key in your JSON; LLM Completion Review.
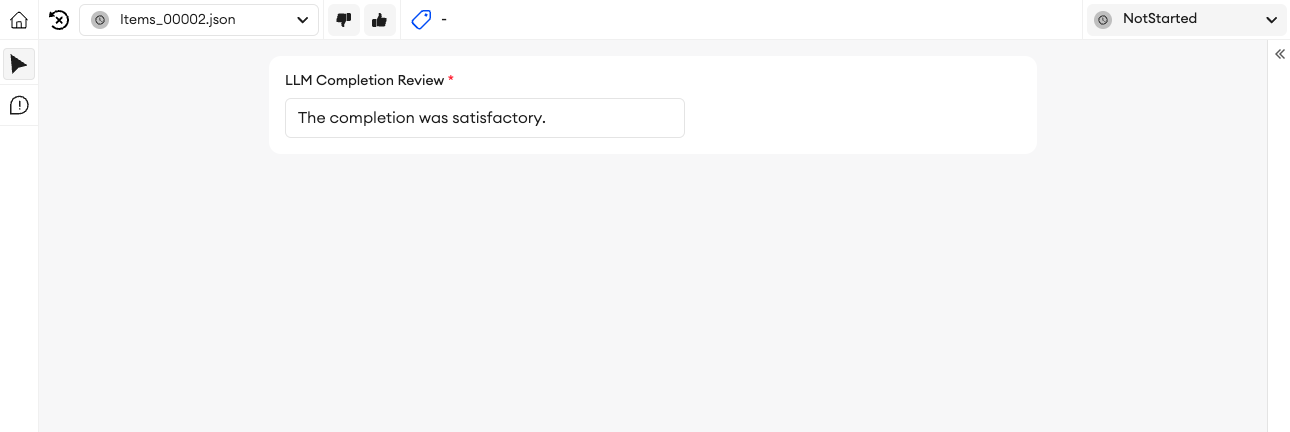
By using {{review}} in the Text Input component's input field, it'll be replaced by the value of the review key in your JSON; The completion was satisfactory.
As a result, it should look like this in the editor:
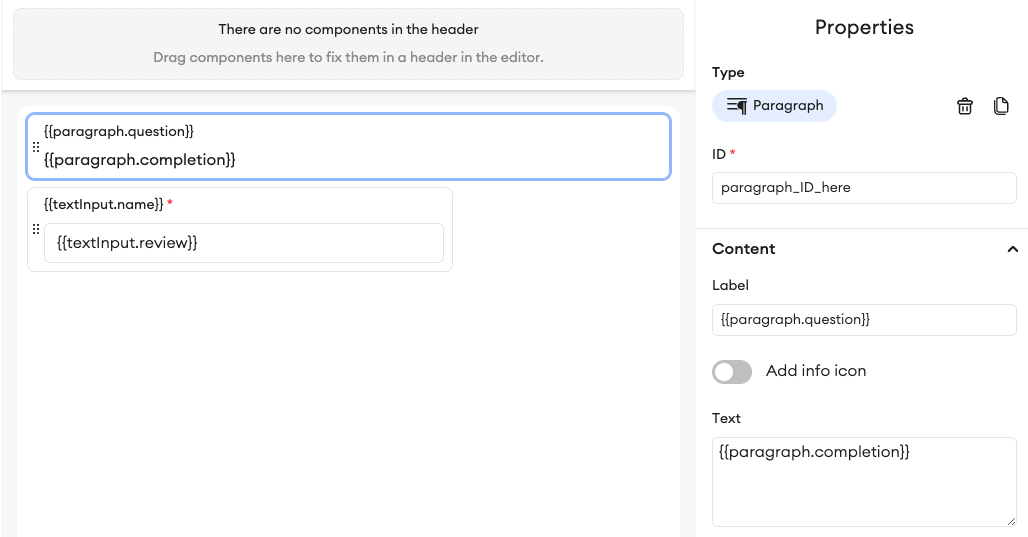
You can create as many of these key-value pairs in your JSON as you need for your annotations, and you may even nest the objects as such for better organization. In the following example, the key-value pairs are separated by what component they belong to so that it's easier to import them correctly:
{
    "textInput": {
        "name": "LLM Completion Review",
        "review": "The completion was satisfactory."
    },
    "paragraph": {
        "question": "How would you describe a dog in one sentence?",
        "completion": "A dog is a loyal, playful companion with expressive eyes, boundless energy, and an unwavering devotion that brings joy and comfort to those around it."
    }
}
To make use of nested objects like this, you'll have to format the component values as follows:
You may also use these keys to import external files (images, videos, texts, etc.) as the data for a specific component. For example, if you have an Image component and a Video component, and you want to import one of each from an external cloud storage space, you can do it like this:
{
    "media": {
        "imageUrl": "<link_here>",
        "videoUrl": "<link_here>"
    }
}
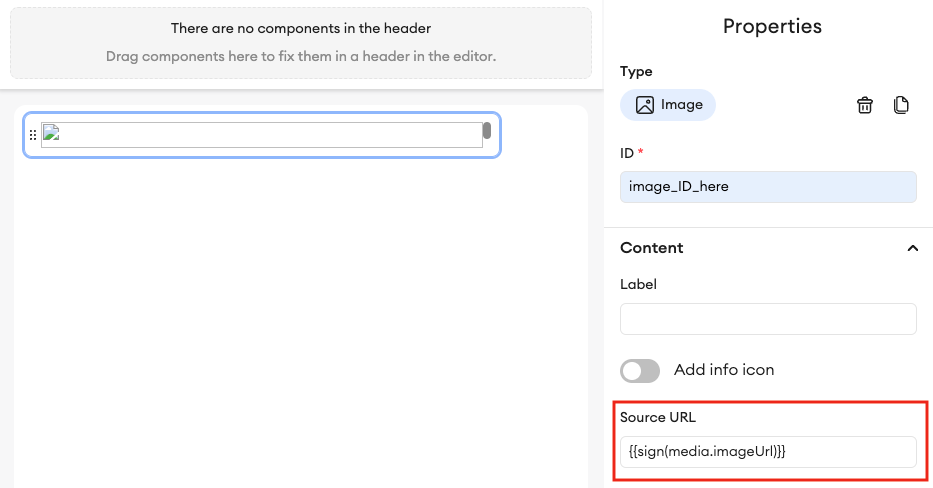
In this case, <link_here> should be replaced by the link to the file in your external cloud storage.
To authorize the use of external files in your form's components, you'll have to format the component values as follows:
Important to note
- Signing items is required when the value of a key is an external item (in this case, an image you're trying to load from an external source).
- You'll only have to use this format to sign the image as an integrated item if your integrated items are set to private.
- Be mindful of any modifications of certain characters in the item name when it's converted into a link (i.e. the way AWS changes the spaces in a name into
+, makingItem Nameappear as/Item+Name/in the link). Modifications like this may cause the item to become unreadable when importing this way.
Method 2: Configuring the Code Editor (for CSV and JSONL)
When using private URLs as data sources in your CSV or JSONL file, you must incorporate the following function in your Multimodal project's Code Editor. This will ensure that these URLs are signed when the corresponding item is opened.
import sdk

<component_type>_<storedURL_component_ID> = ['storedURL_component_ID']

<component_type>_<component_ID> = ['<component_ID>']

async def assetPathSign():
    print(">>> SIGN >>>")
    try:
        currentImg = await sdk.currentAsset(False)
        img_id = currentImg['data']['id']
        data = await sdk.assetPathSign(img_id,[sa.getValue(<component_type>_<storedURL_component_ID>)])
        print("signed")
        sa.setValue(<component_type>_<component_ID>, data[str(img_id)]['paths'][0])
    except Exception as error:
        print(">>> NO CURRENT ASSET >>>")

await assetPathSign()
Configuring this function
import sdk- This is required for the code to use its corresponding SuperAnnotate SDK functions.<component_type>_<storedURL_component_ID>- This refers to the component ID where the original, unsigned URL is stored. It could reference a Text Area or Text Input, from whichsa.getValue()can retrieve a string. In your CSV and JSONL files, the URL must be listed under this component IDstoredURL_component_ID.<component_type>_<component_ID- This indicates the component type and ID of the target component (e.g.image_imageCompID) where the signed URL is set as its value.async def assetPathSign()- This is the asynchronous function which handles the URL signing process when an item is opened.- The async
assetPathSign()function uses thegetValuefunction to retrieve the URL from source component (<component_type>_<storedURL_component_ID>). Thesdk.assetPathSign()function then signs that URL for secure access. Then, thesetValuefunction provides the specified target component (<component_type>_<component_ID>) with that signed URL.
Supported URL formats for GCP integrationsThe GCP integration only supports authenticated Google Cloud Storage URLs (storage.cloud.google.com). Public URLs (storage.googleapis.com) are not supported and cannot be used for uploading items.
Upload CSV
You can import items into your project by uploading a CSV.
To upload a CSV:
- In the project, click + Add.
- Click Upload CSV.
- In the pop-up, drag and drop your CSV file or choose a file from your computer.
- If your CSV file contains private URLs from an external cloud storage, you must check the Access to external URLs box. This allows them to be signed when an item is opened in the editor. Make sure your Code Editor is configured accordingly.
- If you’ve checked the box, select the integration that corresponds to the URLs in your file.
- Once you’re done, click Upload.
Limitations
- There are any invalid or non-existent component IDs in your CSV.
- Your upload exceeds the folder’s 50,000 item limit.
- Your upload exceeds your organization’s subscription plan limit.
CSV Format
Once your project’s form is created, you can download the CSV in order to use it for the data upload. You can download your CSV file in one of the following ways.
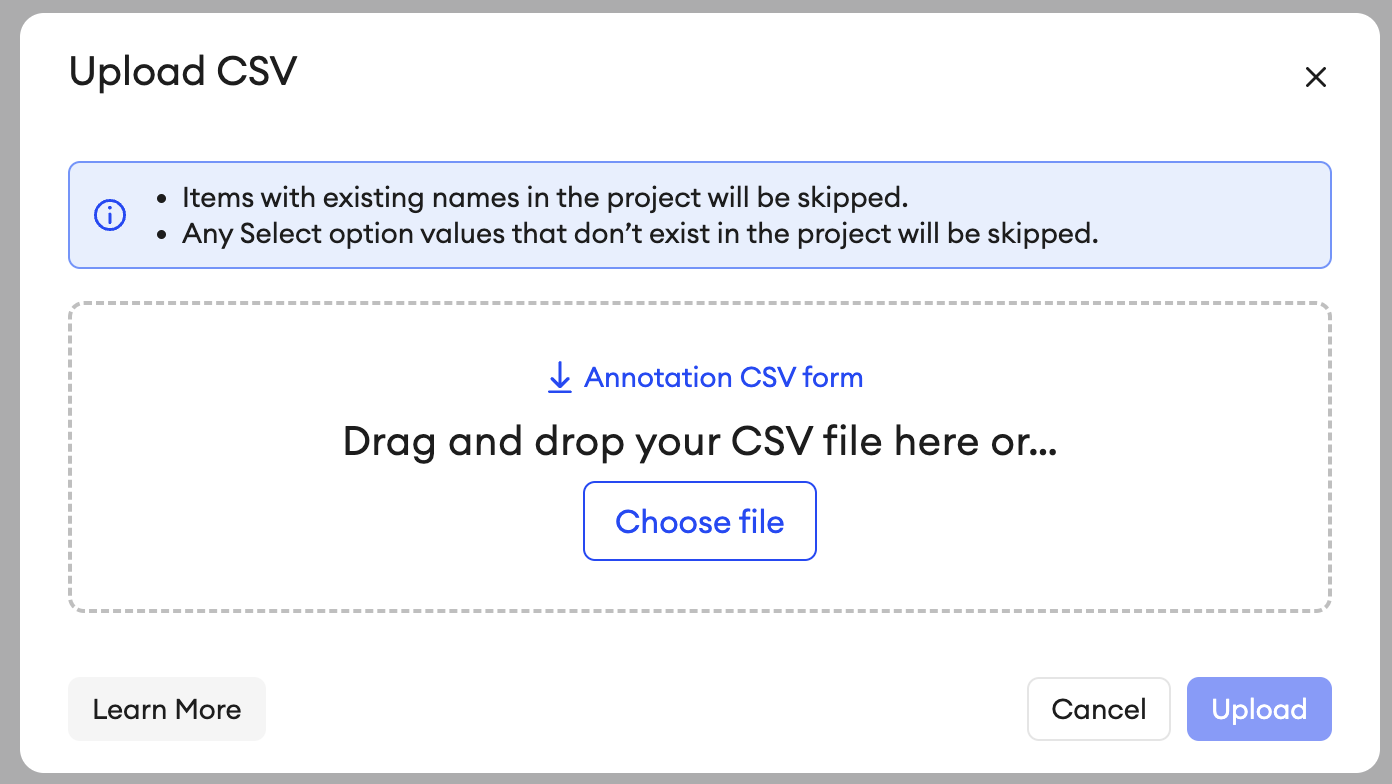
From the upload menu:
- In the project, click + Add.
- Click Upload CSV.
- Select Annotation CSV form.
From the project’s form builder:
- In the project’s form builder, click Export.
- Select CSV for annotations.
When creating the CSV file for an Multimodal project, there are a number of factors to consider.
Your CSV file should only contain the following mandatory columns:
- _item_name - This is what the item's name will be in the Data tab. Items with missing values in this column will be provided with a randomly generated UUID name.
- [Component ID] - This header’s value must be a component ID mentioned in your project’s form builder, e.g.
Input_component_1. The ID must belong to an Input, Select, or Media component type that hasn’t been excluded from export. - _item_category - This column is where you can provide a category to the items you upload. This can only work if you’ve enabled the Item Category setting for your project.
- _folder - You can upload your items into multiple folders from one CSV file. If the folder doesn’t exist, it will be created during the upload. You must add this column and specify the folder name for each item. Any item with an unspecified folder name will be uploaded to the project’s root.
- To upload your items into multiple folders, you must do so from outside of those folders, or from within the project’s root. You can also do this in a project’s empty state.
- You may also create new folders during the upload process by typing in a unique folder name in the
_foldercolumn. Keep in mind that folder names are case insensitive.- If you want to upload to a specific folder, you can use the
_foldercolumn while uploading items from outside of the folder. Alternatively, you can upload your items from within the destination folder, but you must exclude the_foldercolumn from the CSV in that case.- Keep in mind that if you include any upload or creation timestamps in the CSV, they won’t be uploaded. They are only produced when downloading the CSV file by ticking the corresponding checkbox to include them.
Category Limitations
- Each item can only have one category at a time.
- A project can only have 2000 categories maximum.
- The character limit for a category name is 200.
- When choosing a name for your category, make sure it is unique and keep in mind that category names are case-insensitive. This means that ‘name’ and ‘Name’ will be considered the same.
Formatting
The CSV files required for an Multimodal project have to be created with the following in mind:
- Values in the CSV file must be separated by comma (,).
- If the value itself contains a comma, then you must write the value in quotation marks.
- Empty rows that contain no values or delimiters will be skipped.
- Each row of the CSV file will be uploaded into the platform as an individual item.
- For the Checkbox component, the options in the CSV file should be provided as a list of strings, as shown below:
["Partially complete, needs review", "Incomplete"]
- When uploading Markdown, Text area, Code, Paragraph, and Text input components, you can also use JSON formatting for their values.
Important conditions
- Any Single- or Multi-select values that don’t exist in the project will be skipped during the upload.
- If a component ID is included without any values under it, then all of the component’s values will be blank when uploaded.
- In case of any duplicate item names in the CSV file, only the first item with that name will be uploaded.
- Item names must be unique. If you try to upload items whose names already exist in the project, then these items won’t be uploaded.
- If there are any values in your CSV that belong to Select component options that don’t exist in the project, then those values won’t be uploaded.
Upload JSONL
You can import items into your project by uploading a JSONL.
To upload a JSONL:
- In the project, click + Add.
- Click Upload JSONL.
- In the pop-up, drag and drop your JSONL file or choose a file from your computer.
- If your JSONL file contains private URLs from an external cloud storage, you must check the Access to external URLs box. This allows them to be signed when an item is opened in the editor. Make sure your Code Editor is configured accordingly.
- If you’ve checked the box, select the integration that corresponds to the URLs in your file.
- Once you’re done, click Upload.
Here are the fields you can include in your JSONL file:
- “metadata”
- “name” - optional key - Items with names that exist in the project will be skipped. If this is left empty, the corresponding item will be provided with a randomly generated UUID name.
- “item_category” - optional key.
- “folder_name” - optional key.
- “data”
- “<Component_ID>” - Required - The ID of an Input, Select, or Media component that exists in the project. Components excluded from export can’t be uploaded in this way.
- “value” - This should be listed as a key in an object in the value of the Component ID key. Depending on the component type, their value type should be as follows:
- Input
- “Markdown” : string
- “Text area” : string
- “Number” : number
- “Code” : string
- “Text input” : string
- Select
- “select_multi”: array of strings
- “select_single”: string
- “slider”: number
- “checkbox”: array of string
- “radio”: string
- “voting”: number
- “rating”: number
- “date”: string
- “time”: string
- Media
- “image”: string
- “web”: object
- “pdf”: string
- “url”: string
- “video”: string
- “audio”: string
- “avatar”: string
- “csv”: string
- Input
- “value” - This should be listed as a key in an object in the value of the Component ID key. Depending on the component type, their value type should be as follows:
- “createdAt” - The time at which the component’s value was created. This field won’t be considered during upload.
- “updatedAt” - The time at which the component was last updated. This field won’t be considered during upload.
- “<Component_ID>” - Required - The ID of an Input, Select, or Media component that exists in the project. Components excluded from export can’t be uploaded in this way.
- The “createdAt” and “updatedAt” keys will only be visible in an exported file if anything in the item was changed in the editor.
JSONL example
Take a look at the example provided here to get an idea of what your JSONL file should look like.
{"metadata":{"name":"<item_name>","item_category": "<category_name>","folder_name": "<folder_name>"},"data":{"<component_ID>":{"value": "<component_value>"},"<component_2_ID>":{"value": "<string_component_value>"},"<component_3_ID>":{"value": <numeric_component_value>}}}
{"metadata":{"name":"<item_name>","item_category": "<category_name>","folder_name": "<folder_name>"},"data":{"<component_ID>":{"value": "<component_value>"},"<component_2_ID>":{"value": "<string_component_value>"},"<component_3_ID>":{"value": <numeric_component_value>}}}
{"metadata":{"name":"<item_name>","item_category": "<category_name>","folder_name": "<folder_name>"},"data":{"<component_ID>":{"value": "<component_value>"},"<component_2_ID>":{"value": "<string_component_value>"},"<component_3_ID>":{"value": <numeric_component_value>}}}
In this case:
<item_name>should be replaced by the name you want the item to have, if any.<category_name>should be replaced by the name of the category that the item belongs to, if any.<folder_name>should be replaced by the name of the folder you want to upload the item into.<component_ID>should be replaced by the corresponding component's ID, and<component_value>should be that same component's given value. Refer to the list above for each component's relevant data type.
Upload conditions
- If the file you’re uploading specifies a
folder_namekey, then you can’t upload from within a folder on the platform.- You can’t upload more than one JSONL file at a time.
- The data entered in the file must not be invalid and must follow the necessary format as listed above.
- The JSONL file must contain at least one data row.
Using Python SDK
By using the upload_annotations() function, you can specify a folder path to import the annotation JSONL files from, and a destination project. To use this function, make sure you have set up the proper authentication.
Items with a File Upload componentWhen using Python SDK to import items that have a File Upload component, keep in mind that:
- If you've exported the items and data from a project, they can only be used in the projects they were originally exported from.
- The value of the File Upload components won't be cleared when imported, they'll be incorporated as-is: If these items are uploaded to a different project than the original they will be invalid. Any files attached to these components will be inaccessible.
Item generation
If you don't have any annotations to import and you'd rather fill your form's details out manually through the editor, then you can create items from your form using item generation.
Updated 2 days ago