
Logic & Behavior
Overview
The Code Editor in the multimodal platform empowers you to transform a static UI into a dynamic experience. Your Python code runs in the browser (via Pyodide), allowing you to respond to user actions, manipulate component values, and integrate with external APIs—without needing a separate backend for lightweight logic.
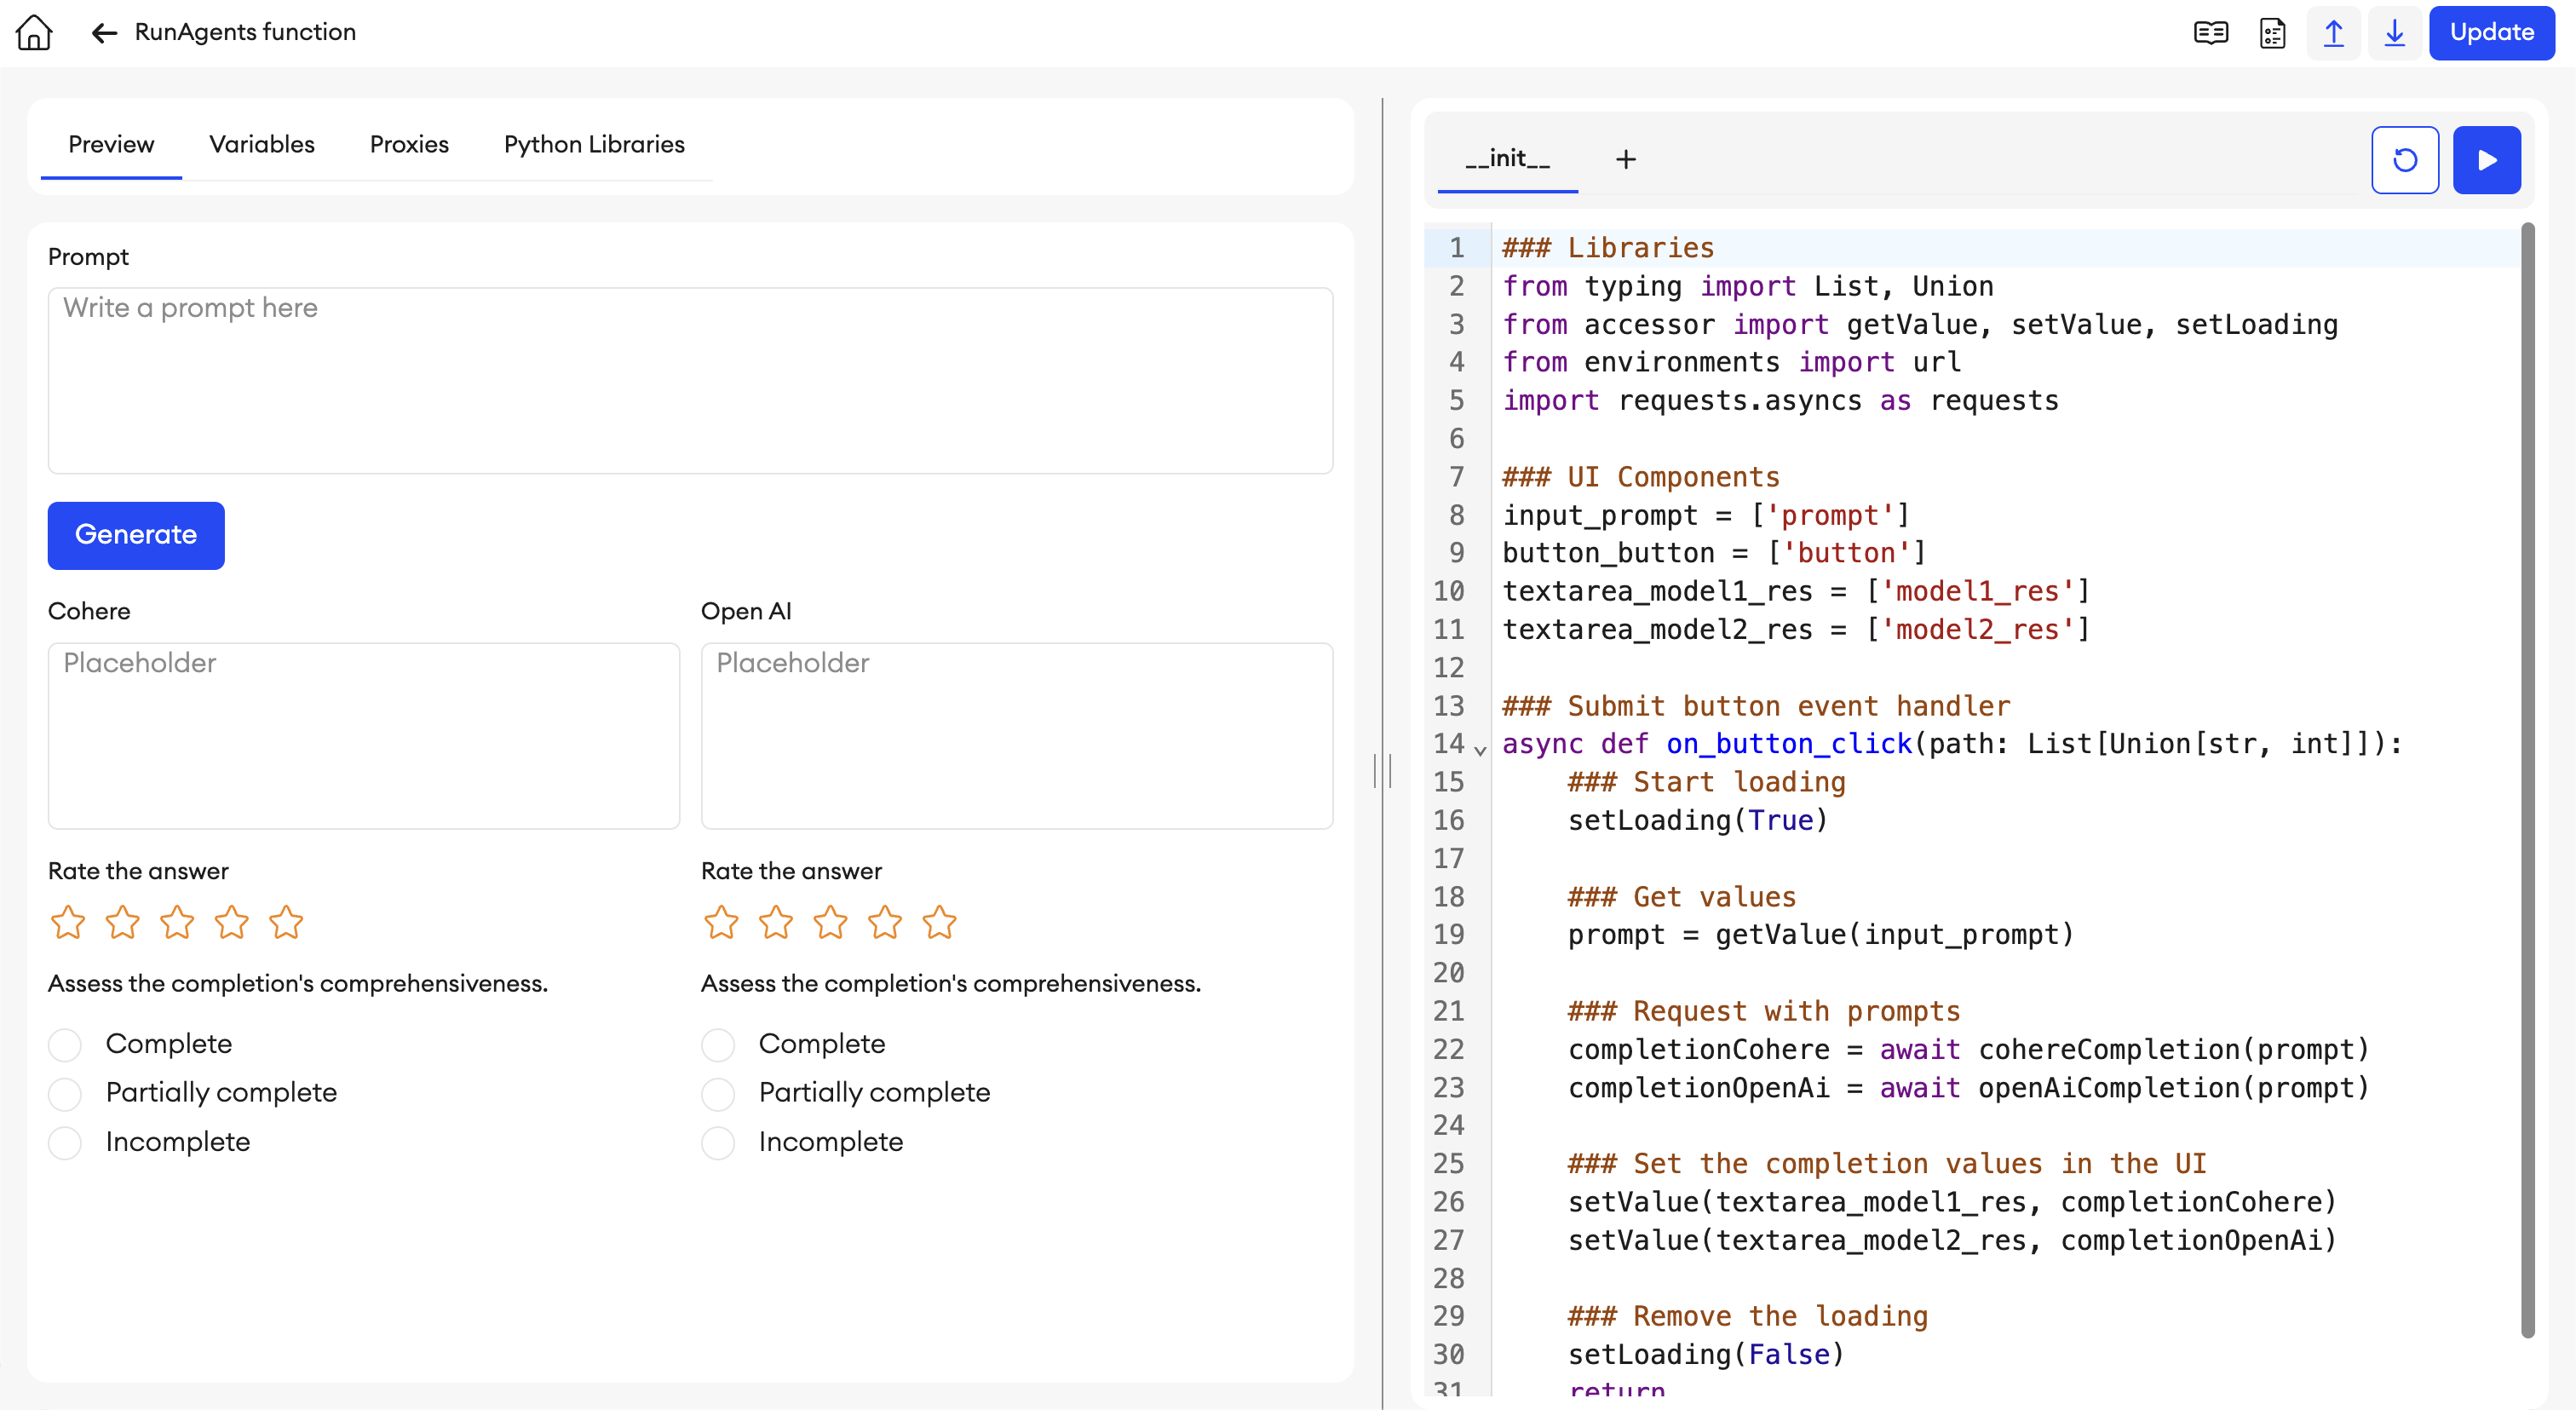
On the left-hand side of the editor, you’ll find:
- A live preview of your form, where you can see how your interface behaves in real time.
- A variables panel, allowing you to define reusable values accessible within your code.
- A component inspector: Right-click any component in the preview to reveal its type and ID. You can copy the component’s ID directly from this menu for use in your code.
If your form uses visibility permissions, you can preview it from different perspectives by selecting a specific role and item status. The form will adjust dynamically to reflect the user experience for that configuration.
On the right-hand side, you’ll see the code editor. This is where you write custom Python logic, interact with components, use predefined variables, and build functionality specific to your annotation workflows.
Using Pyodide
The Code Editor leverages Pyodide, a Python runtime compiled to WebAssembly (Wasm). This enables Python scripts to run client-side, in the user’s browser. While it’s incredibly flexible, keep in mind:
- Limited Library Support You can’t install every Python package by default, though many popular libraries are available or can be installed dynamically with
pyodide_js. - Performance Constraints Pyodide handles small to medium tasks well but may struggle with heavy data processing or other compute intensive tasks. For larger workflows, see the Orchestrate Documentation.
Installing packages
To load external Python packages in the code editor, use the pyodide_js module:
import pyodide_js

async def load_libraries():
await pyodide_js.loadPackage('some_package')
import some_package
# Now you can use some_packageNote: Packages are installed during the first run of each session. If you switch between items within the editor during the same session, the packages remain in place and are not redownloaded. However, closing and reopening the editor starts a new session, which will trigger a fresh installation.
Supported packages
- The form editor only supports packages from Pyodide
0.23.2.- Packages outside of Pyodide aren't supported in the editor.
Base Code Structure
When you create or update a form in the UI Builder, the platform automatically generates a base Python file named __init__.py. This file includes:
- Component Path Definitions
- Mappings for each component’s unique ID or group path.
- Event Handler Stubs
- Predefined functions (
on_<component_id>_<event_type>) for standard component events.
- Predefined functions (
You can freely extend __init__.py with custom logic, variables, or imports. If you need a more modular approach, you can add additional Python files and import them into __init__.py.
File Management
Files are a way for you to manage and sort your form’s code without maintaining it all in one compacted place. You can categorize different areas of your code into separate files, then simply import the desired data within to the file that requires it.
To create a new file:
- Click the “+” icon at the top of the Code Editor.
- Enter a filename in the dialog (e.g.,
helpers.py). - Click Create.
To import a specific variable, function, or class from one file to another, include this import sequence in the destination file:
from helpers import calculate_sumTest items
From the Preview tab, you can create test items to try out and review your form and its code before publishing the form or generating live items.
To do this, type in a name in the Test items dropdown and click + Create item.
You can also delete the test items you don’t need by finding the item from the dropdown list and clicking the delete button on it.
Limitations
- You can make up to 10 test items at a time in each project.
- The character limit for test items is 120 characters.
- Test item data won’t be saved to the form’s JSON.
Proxies
This tab shows you any configured and available proxies in your team that you may make use of in your project.
If there are no proxies in the list, then one may be created by a user with the role of Team Admin (with access to Orchestrate) or higher. If you have an applicable role, you can click + Create to be redirected to Proxy creation.
To use your proxies, you must first import the proxy library in your code editor using this line:
import requests.proxied as proxyProxy function calls
You can copy a proxy’s function call snippet for use in your code by clicking the Copy Function Call button on the respective proxy.
The snippet will look like the following, where PROXY_ID will be the respective proxy’s ID, and the TARGET_DOMAIN is the URL defined during proxy creation:
proxy.request([PROXY_ID], "get", "[TARGET_DOMAIN]")Additional headers can be added from within the code editor as needed.
All configured proxy headers will be included when the function call is made.
External annotation storage
You may enable this feature to store sensitive annotation data in an external storage endpoint of your choice. The values of the form components that you select will be stored in and read from this endpoint, and they’ll be excluded from SuperAnnotate’s servers and annotation JSONs.
This makes it so that only the selected data is kept private, while the rest is still saved on our servers and can be queried in Explore.
URL
In the URL field, enter the link to the external storage endpoint you want to store your annotation data in. You must configure your backend using our GitHub repository.
External components
From the dropdown field, you can select the IDs of the components whose data you want stored in the specified endpoint.
The components eligible for selection are: Link, Markdown, Text area, Number, Code, Paragraph, Text input, Select, Slider, Checkbox, Radio, Voting, Rating, Date, Time, Image, Web, Video, Audio, URL, PDF, Avatar, and CSV.
Important to know
If a component has the Exclude from annotation JSON box checked, and is then added to the External components list, the box will become unchecked and disabled.
- Upon removing the component from this list, however, the Exclude checkbox will become available again, unchecked.
If a component is added to the External components list, and that component has a value saved in the annotation JSON, the system will send that value to the specified endpoint and remove it from the annotation JSON.
- If the component is then removed from the list, it’ll be included again in the annotation JSON, but values stored in the external annotation storage won’t migrate over with it.
Disabling the External annotation storage feature will prevent reading from and writing to the specified endpoint, but it won’t migrate stored values back to the form’s annotation JSON.
Changing the ID of a component included in the External components list won’t affect this selection. The component will remain selected.
When saving changes, the system will first save the selected components’ values to the specified external storage. Once that’s successful, the rest of the components’ values will be saved in the annotation JSON.
If you place a comment on a component whose values are stored in an external storage, the comment’s values will still be stored in the form’s annotation JSON, and not that storage.
Insights and Analytics won’t reflect any data for components excluded from the annotation JSON with this feature. In addition, components excluded this way can’t be queried in Explore, but they’ll still appear on the form in Zoom View.
Custom Headers
If you need an authorization token to access your configured endpoint, you can use the following Python function which returns a dictionary of custom headers. These headers will be included in every request to the external URL specified.
You can use these to pass authentication tokens from a configured proxy or your own backend server.
import requests.proxied as proxy

res = await proxy.request([PROXY_ID], "get", "[TARGET_DOMAIN]")

return { "Authorization": res.json()["token"] }
In this example, PROXY_ID should be the numeric ID copied from the corresponding proxy. TARGET_DOMAIN is the target domain specified in the same proxy.
Run
To test your code after editing, you must click Run to update the form preview.
Regenerate
After your form's base code is generated, when you make changes to your form in the UI builder, the code editor will be modified accordingly. Clicking Regenerate will replace the code with an initial state based on the updated form UI. If there are any lines of custom code that you want to keep, make sure to have a copy of them with you before regenerating the code editor.
Event Handlers
Event handlers are special functions that allow you to attach custom behavior to user interactions and system events within the Code Editor. These functions follow a strict naming convention:
def on_<component_id>_<event_type>(path, ...):
	# Your code here
Where:
component_idis the unique ID of the UI element.event_typeis one of the supported interaction or lifecycle events listed below.
Supported Component Events
Value Change (change)
change)Triggered when the value of a component changes (e.g., typing in a text field).
Signature:
def on_<component_id>_change(path, value):
    # Your custom code
    return
path: The component’s path (['component_id']or['group_id', row_index, 'component_id']).value: The new value of the component.
Button Click (click):
Triggered when a button is clicked.
Signature:
def on_<component_id>_click(path):
    # Custom logic
returnpath: Path to the clicked button
Web Component Message (message):
Triggered when a WebComponent sends a message using postMessage.
Signature:
def on_<component_id>_message(path, value):
    # Your custom code
returnpath: Path to the WebComponentvalue: Message sent from the component
Group Row Deleted (deleted):
Triggered when a row is removed from a Group component (e.g., clicking the ❌ icon).
Signature:
def on_<group_id>_deleted(path):
    # Your custom code
returnpath: Path to the deleted row
Group Selected
Triggered when a row is selected.
def on_<group_id>selected(path):
    # Your custom code
returnpath: Path to the selected row
Lifecycle Hooks
In addition to direct component event handlers, the editor provides lifecycle hooks for major item actions:
post_hook()- Called when an item is closed in the editor.before_save_hook()- Called immediately before saving. Useful for final validations or data transformations.on_saved_hook()- Called right after an item is saved.before_status_change_hook()- Called before an item’s status changes (e.g., from “InProgress” to “QualityCheck”).on_status_changed_hook()- Called after the item’s status has changed.
Use these hooks to enforce consistency checks, log events, or trigger custom actions when items are saved or statuses change.
Interacting with Components
Component Paths
Every component is identified by a path, which depends on whether it’s standalone or nested in Groups:
- Standalone:
['component_id'] - Grouped:
['group_id', <row_index>, 'component_id'] - Nested Groups:
['group_1', <row_index_1>, 'group_2', <row_index_2>, 'component_id']
Built-in Functions
In the code editor, you can access a set of built-in helper functions for interacting with components, sending messages, and manipulating UI state. These are available via the sa module:
import saAll functions are accessed through the sa. namespace:
Component Interaction
-
sa.changeTab(path: list[tuple[str, int]], index: int)Switches the selected tab in aTabcomponent based on the provided path and tab index. -
sa.deleteRow(path: list[tuple[str, int]])Deletes a row in aGroupcomponent at the specified path. The path must include the row index. -
sa.enable(path: list[tuple[str, int]])Enables a component (e.g., input, button) located at the given path. -
sa.disable(path: list[tuple[str, int]])Disables a component at the given path. -
sa.getGroupLength(path: list[tuple[str, int]]) -> intReturns the number of repeated rows in aGroupcomponent. -
sa.repeatRow(path: list[tuple[str, int]], index: int) -> list[tuple[str, int]]Appends a new row to a group at the specified path and returns the path of the newly created row.
Value & State Access
-
sa.getValue(path: list[tuple[str, int]]) -> AnyReturns the current value of a component at the given path. -
sa.setValue(path: list[tuple[str, int]], value: Any)Sets the value of the component, and can set the dictionary type as well. The value type must match the component's expected format:str,int,float,list[str],tuple[int, float], dict[str, Any], etc. -
sa.setLoading(state: bool, path: list[tuple[str, int]])Sets the loading state of aButtoncomponent. -
sa.setOptions()Sets the value of dynamicSelectcomponent options. -
sa.getOptions()Retrieves the values of dynamicSelectcomponent options.
Payloads & Web Communication
-
sa.getPayload(name: str) -> AnyRetrieves the contents of a JSON file attached to the current item by name. -
sa.postMessageToWebComponent(path: list[tuple[str, int]], data: Any)Sends data to a customWebComponent.
User Messaging
Displays a message on the bottom-left of the interface. Useful for user feedback or error handling.
sa.showError(message: str)– Displays an error message.sa.showInfo(message: str)– Displays an informational message.sa.showSuccess(message: str)– Displays a success message.sa.showWarning(message: str)– Displays a warning message.
Best practices
- Backup Custom Code
- Always save or copy your code elsewhere before regenerating the base code. The regeneration process can overwrite changes in init.py.
- Organize Files
- Keep business logic, helper functions, and main event handlers in separate files for clarity and maintainability.
- Test Frequently
- Use the Run button in the Code Editor to verify changes in real-time. Log or print outputs to the console to debug.
- Avoid Long-Running Tasks
- Pyodide runs in the main UI thread. Heavy operations can freeze the interface. For large computations, consider using Orchestrate.
- Leverage Lifecycle Hooks
- Validate data, run housekeeping tasks, or log user actions at key points in the annotation process (before/after save, on status change, etc.).
Next steps
- Learn About Custom Components: Explore how to build or embed custom HTML/JS interfaces.
- Discover Orchestrate: For tasks that exceed Pyodide’s constraints, see our orchestration system for containerized Python scripts.
- Review Advanced Examples: Check out the Code Editor Examples for a guided walkthrough on event handlers, group manipulation, and more.
Updated 15 days ago