
Azure integration
Create integration
Create an Azure integration with SuperAnnotate to upload items from your Azure storage into your projects. SuperAnnotate will have read-only access to your data; your items are stored in your Azure storage and are only displayed in SuperAnnotate.
Step 1: Begin integration setup

- Click on your Organization.
- Go to the Integrations tab.
- Click New Integration.
- Select Azure.
- In the Create Azure Integration pop-up, type the name of your integration under Integration name.
- Under Team, you can add the integration to one or multiple teams (optional). The integration will be available in the selected team(s) only.
It is also possible for Team Owners and Team Admins to set up an integration through the Team Setup tab.
- Only Organization Owners can set up an integration from the Organization tab.
Step 2: Create storage account

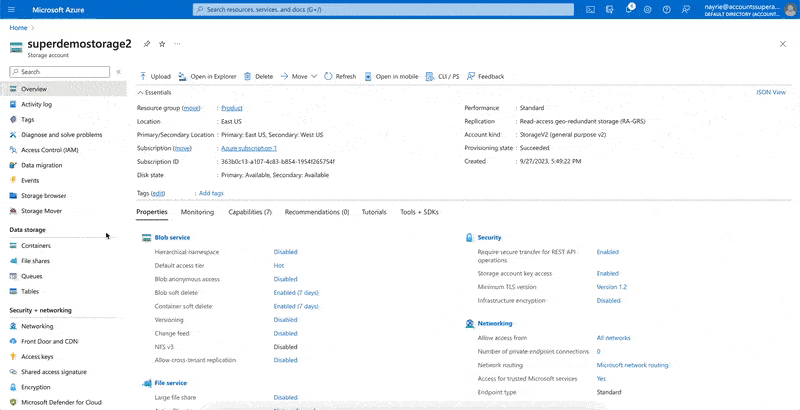
- Go to the Azure portal and click on Storage Accounts.
- Click + Create.
- Type in a name for your storage account in the Storage account name field.
- Click Review.
- When the account is ready, click Create.
- Go back to SuperAnnotate’s integration setup page.
- Enter your storage account name in the corresponding field.
Step 3: Create Azure container

The Azure Container is where your items will be uploaded to and imported from.
To create a container:
- In the Azure portal, click on the storage account created in Step 2.
- In the left panel, under Data storage, click on Containers.
- Click + Container.
- Type in a name for your container (max 120 characters).
- Click Create.
- Go back to SuperAnnotate’s integration setup page.
- Enter your container name in the corresponding field.
Step 4: Annotation location

Choose an Annotation location. This will decide where your annotation data will be stored:
- SuperAnnotate - your annotation data will be stored on our servers.
- Azure container - type in the location path where the annotations will be stored. SuperAnnotate requires read, write and delete access to the provided location.
- Choosing an annotation location allows you to maintain an extra level of project privacy and security by ensuring that all annotation data will be stored in a location of your choice.
- If you want only some of your Multimodal components’ data excluded from the SuperAnnotate servers, you can enable the External annotation storage instead.
- If the provided location doesn’t exist, it will be created when you annotate an item from that bucket. The path to the annotated JSON file will be as follows:
BUCKET_NAME / ANNOTATION_LOCATION / data / TEAM_ID / ANNOTATION_JSON.json- Please note that if your annotation JSON file exceeds 15MB, it’ll have to be temporarily downloaded and processed to make it available, then deleted after 24 hours.
Future upload methods will be defined based on the annotation location type of the chosen integration. Learn more.
The Explore, Insights and Analytics features will be unavailable for any project that uses integrations whose annotations aren’t stored on SuperAnnotate’s servers.
Step 5: Register single-tenant application
 A registered application will allow you to provide SuperAnnotate the necessary roles to access your container.
- In the Azure portal, go to App registrations.
- Click + New registration.
- Type in a name for your registration.
- Make sure that under Support account types, you have selected: Accounts in this organizational directory only (Default Directory only - Single tenant)
- Click Register.
- Copy the Application (client) ID and the Directory (tenant) ID from your registered application’s page and paste them into their respective fields in the integration setup page.
Step 6: Create client secret

- When in the registered application page, go to Certificates & secrets in the left panel.
- Click + New client secret.
- Type in a name for the secret.
- Select an expiry date.
- Click Add.
- You’ll need to copy the Value key. Make sure to save it somewhere safe, because when you return to this page later, the key will no longer be visible.
- Go back to SuperAnnotate’s integration setup page.
- Paste the copied key under the Client secret field.
Step 7: Grant access to registered application
Providing access to your Storage account
- In the Azure portal, go to the storage account created in Step 2.
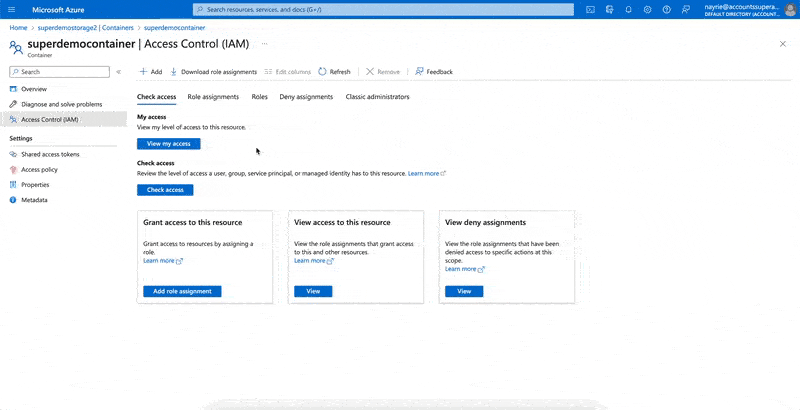
- In the left panel, click on Access Control (IAM).
- Click + Add.
- Select Add role assignment.
- Search for Storage Blob Delegator.
- Click Next.
- Under Members, click + Select members.
- Select the registered application created in Step 5.
- Click Select.
Providing access to your Container
- Go to the container created in Step 3.
- In the left panel, click on Access Control (IAM).
- Click + Add.
- Select Add role assignment.
- Search for Storage Blob Data Reader.
- Click Next.
- Under Members, click + Select members.
- Select the registered application created in Step 5.
- Click Select.
Providing access to the annotation location
If you've selected your Azure container as your annotation location, then you must provide the Storage Blob Data Contributor role to the specified path:
- Go to the container created in Step 3.
- In the left panel, click on Access Control (IAM).
- Click + Add.
- Select Add role assignment.
- Search for Storage Blob Data Contributor.
- Click Next.
- Under Members, click + Select members.
- Select the registered application created in Step 5.
- Go to the Conditions tab.
- Click + Add condition.
- Under Condition #1, click + Add action and provide the following:
- Write to a blob
- Create a blob or snapshot, or append data
- Delete a blob
- Next, in Build expression, click + Add expression. For the following fields, select these options:
- Attribute source: Resource
- Attribute: Container name
- Operator: StringEquals
- Value:
[Your container name]
- Next, click + Add expression again and select these options:
- Attribute source: Resource
- Attribute: Blob path
- Operator: StringLike
- Value:
[Annotation Folder Name]/*
- Between both expressions above, select And.
- Click Save.
- Click Review + assign twice.
Step 8: Finalize and create

Once you’ve completed the steps above, go back to SuperAnnotate’s integration setup page and click Create.
Validate Integration
To validate your Azure integration:
- In Integrations, find your integration.
- Click the three dots
⋮. - Select Check connection.
Edit team
If you need to make your integration available for more teams, or you want to revoke a team's access to it, you may edit the permissions accordingly.
To add or remove an integration to one or multiple teams:
- In Integrations, find your integration.
- Click the three dots
⋮. - Select Edit team.
- Add one or multiple teams from the dropdown, or remove a team by clicking the X on their name. To add all teams, choose Select all. To remove all teams, click the X on the right side of the field.
- Click Save.
Delete integration
To delete an integration:
- In Integrations, find your integration.
- Click the three dots
⋮. - Select Delete Integration.
- In the popup, click Delete.
Please note that by deleting the integration, any items uploaded to your projects from this integration will no longer be accessible.
Add items with Azure integration
You can add items from your Azure container to your projects.
- In Data, click Add.
- Select Upload Items.
- In Integrations, choose an integration (mandatory) and type a folder path (optional).
- Click Upload.
Folder paths
- Note that when you type in a folder path, all items within that folder will be uploaded. You won't be able to select and choose specific files from the folder.
- SuperAnnotate supports a two-level folder structure. This means that you can have items and folders in a project, but you can’t create or upload subfolders. For example, let’s say you want to upload a folder from your cloud storage to the root folder of your project. If that folder has several items and a subfolder, the subfolder will be excluded. If you want to upload items from that subfolder, you’ll have to specify its location path:
FOLDER 1 / SUBFOLDER
Updated about 1 month ago